Showing posts with label medium format. Show all posts

Wednesday, July 22, 2009

45mm f/4

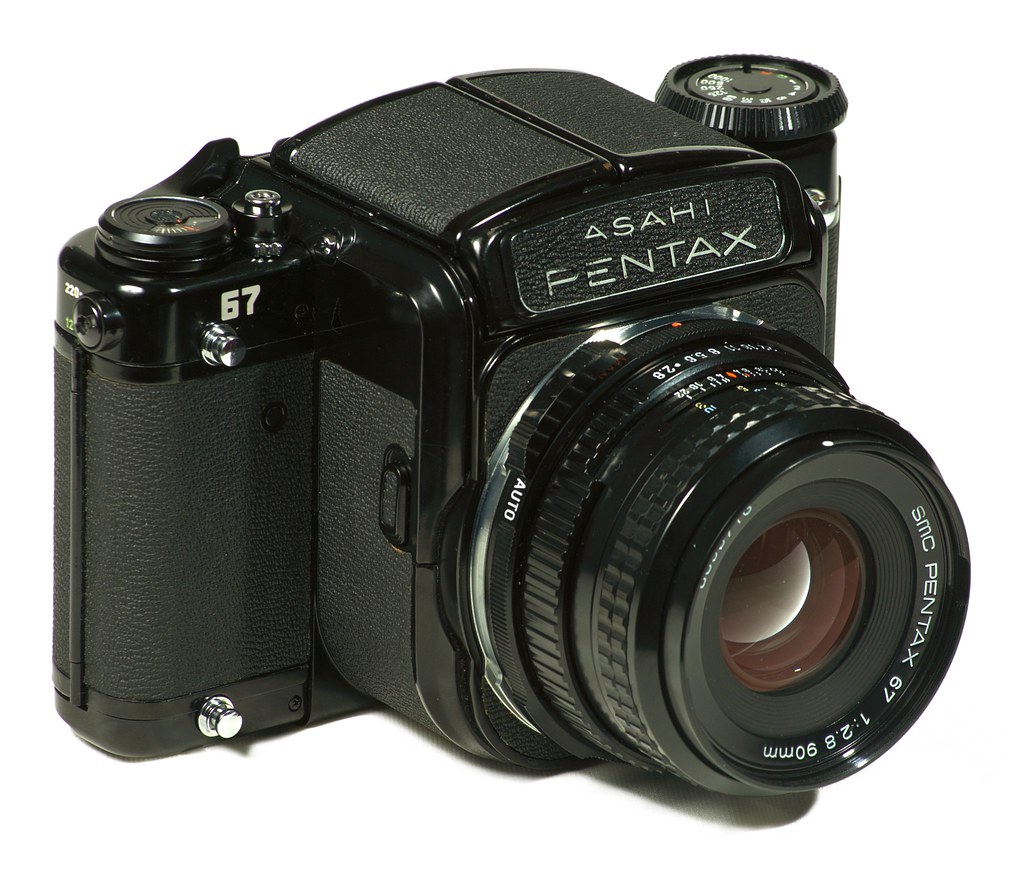
I got a second lens for my Pentax 67 a while back, the wide-angle 45mm f/4. 45mm on this camera has an angle of view of 89°, which is really wide, bordering on extreme wide angle. It's about as wide as a 21mm lens on a 35mm camera, or a 15mm lens on most digital SLR cameras.

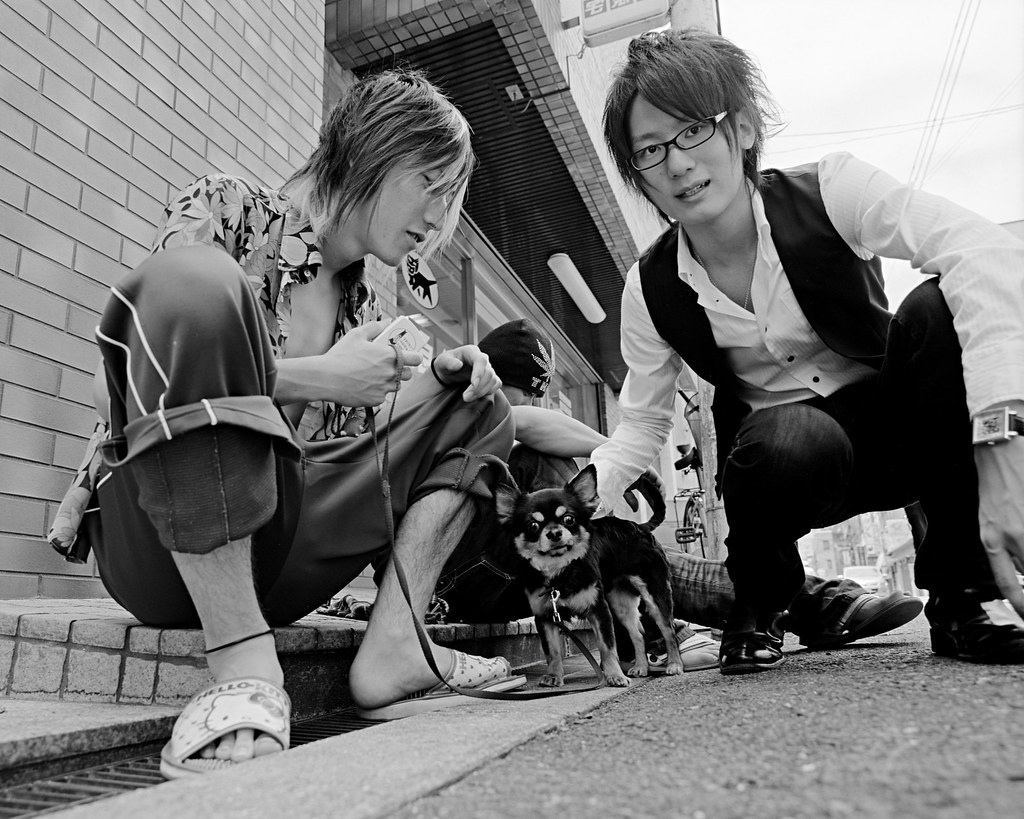
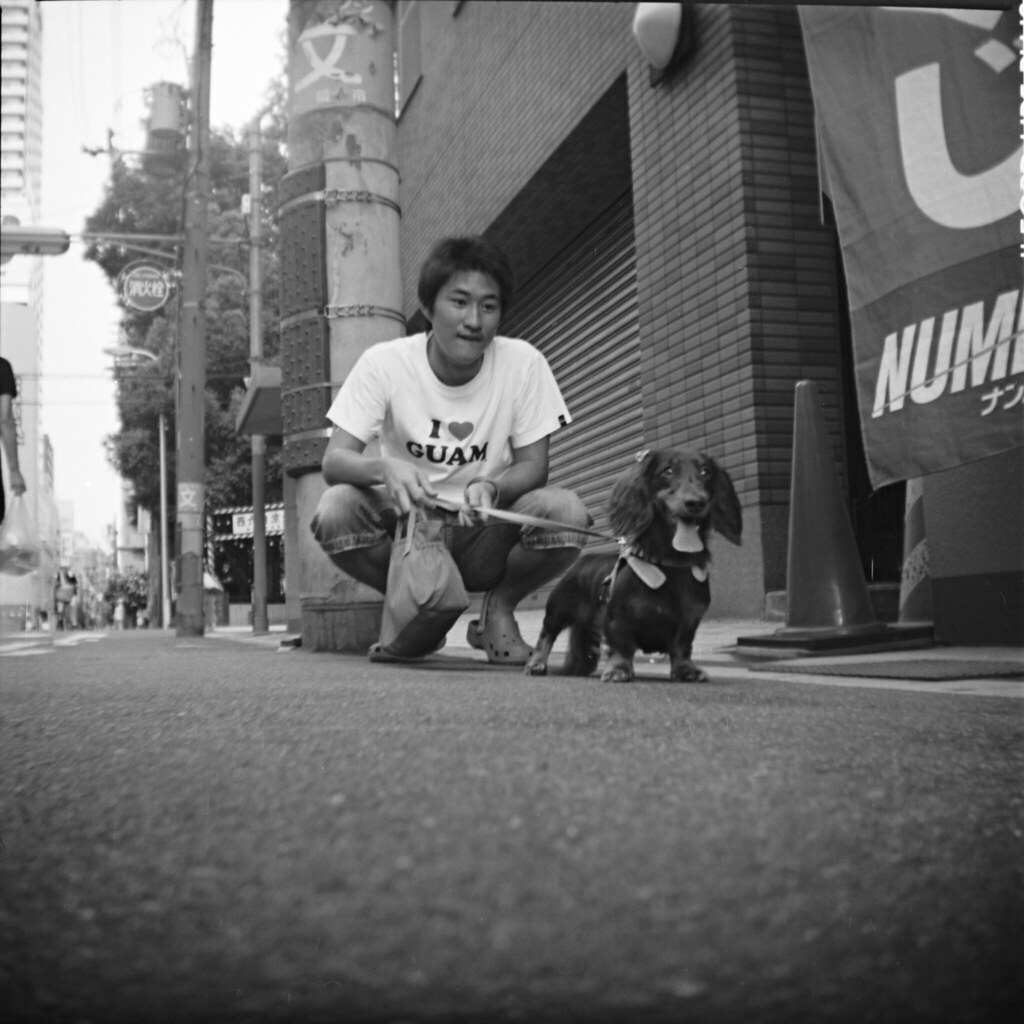
Day Off

A couple of hosts and their dog killing time outside their apartment building in Shimanouchi, Osaka. The wide perspective works well here but would have been even better had the dog come forward another couple of steps.


While small-format cameras have even wider rectilinear1 lenses (up to 115°), medium-format cameras all stop at 90° or so. Wider lenses for medium format are all fisheye lenses, not rectilinear. The reason for this is, I think, that even wider lenses are extremely hard to make with high image quality, and really wide lenses inevitably give you some quite ugly perspective distortion near the edges. Not many medium-format customers - who often use MF precisely to get the best possible quality - would be willing to pay the high cost of such a lens if they have to cut away the edges anyway. Hobbyists don't care as much about distortion or image quality so small-format makers can make relatively inexpensive ultra-wide lenses for them. I don't like that perspective distortion so 90° is about as wide a rectilinear lens as I'd be want to use.

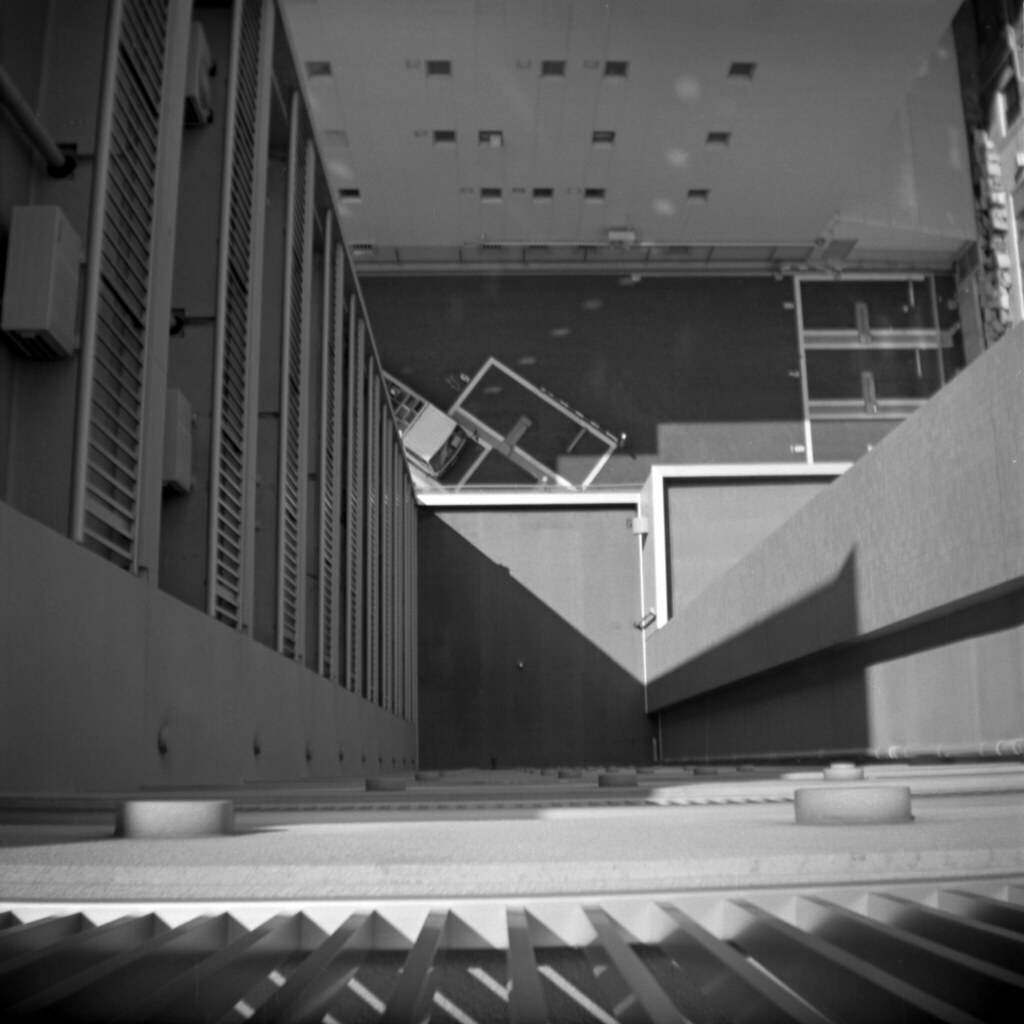
Open Yard

Sometimes you may need wide angle simply to really get everything in frame. Here I was unable to back up further. I avoid the corner distortion when I can, but you can just see a hint of it here, with the box-like hatch in the bottom left and the pillar in the upper right both kind of "stretching" a little towards the corner. At this angle of view it's noticeable but not bad. It quickly gets worse if you increase the angle even further.


Nothing is small when it comes to the Pentax 67, of course, but the 45mm is a surprisingly compact lens. It's 90mm by 60mm, and it weighs just shy of 500g. It's only slightly larger than the 90mm that I also have, and about the same size as the standard 105mm. The camera, both lenses and accessories all fit nicely in my usual compact camera bag, and I can hang the tripod on the outside for that extra-nerdy look.

The maximum aperture is f/4, which sounds slow by small-format standards. But with medium format you generally want to use smaller apertures when you can since your depth of field is narrower for the same angle of view. And with MF cameras you often use a tripod anyway, so large apertures (to get faster shutter speeds) are not nearly as important as for small cameras.

It's also easy to forget that a large maximum aperture doesn't come for free. High quality, large aperture, wide angle lenses are difficult to design, and the result is big, heavy and expensive. You don't really want to pay the cost - in price, size and weight - of a fast lens if you don't need it. Handheld low-light photography is where digital SLRs really shine so I'm happy to use digital for those times and have slower MF lenses if it means they're lighter, cheaper and better.

The 45mm is light, it is cheap (well, at least used), and it really is very good. Plenty sharp enough in the center. The corners - always an issue with wide lenses - are a bit mushy near wide open, but get better as you stop down. That's easy to live with; the corners never really look good anyhow due to the wide-angle perspective distortion. More importantly, there is very little light falloff towards the edges and there's no barrel distortion (where lines get a little "wavy" or bent near edges) to worry about.

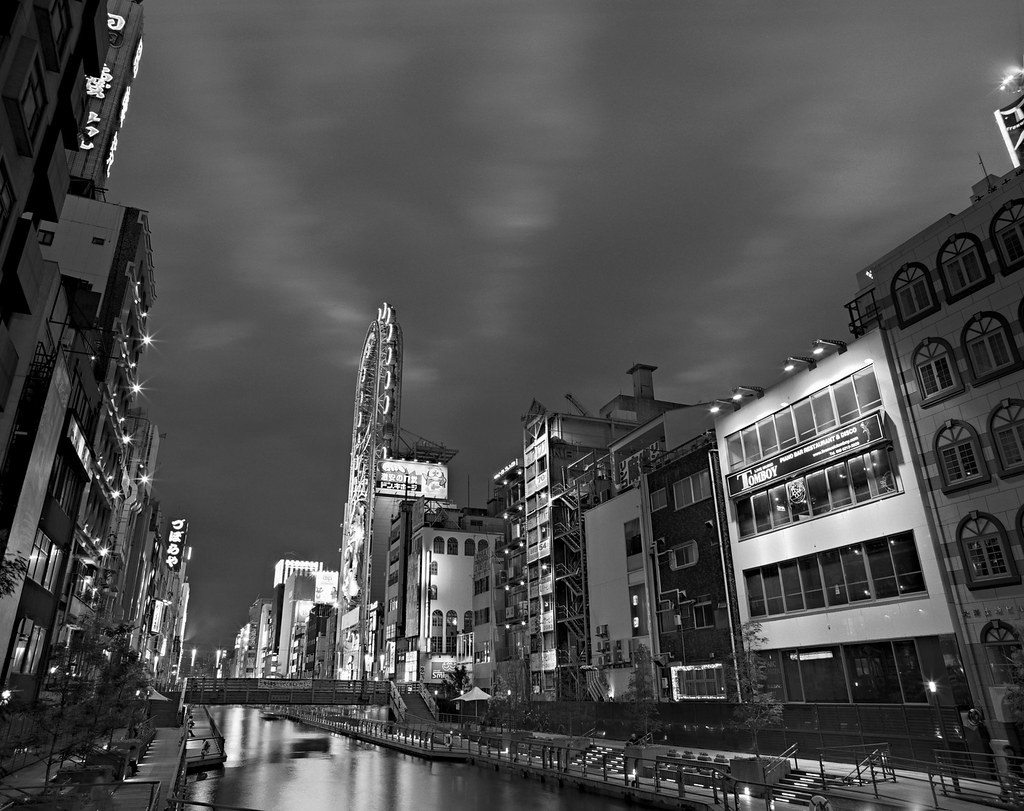
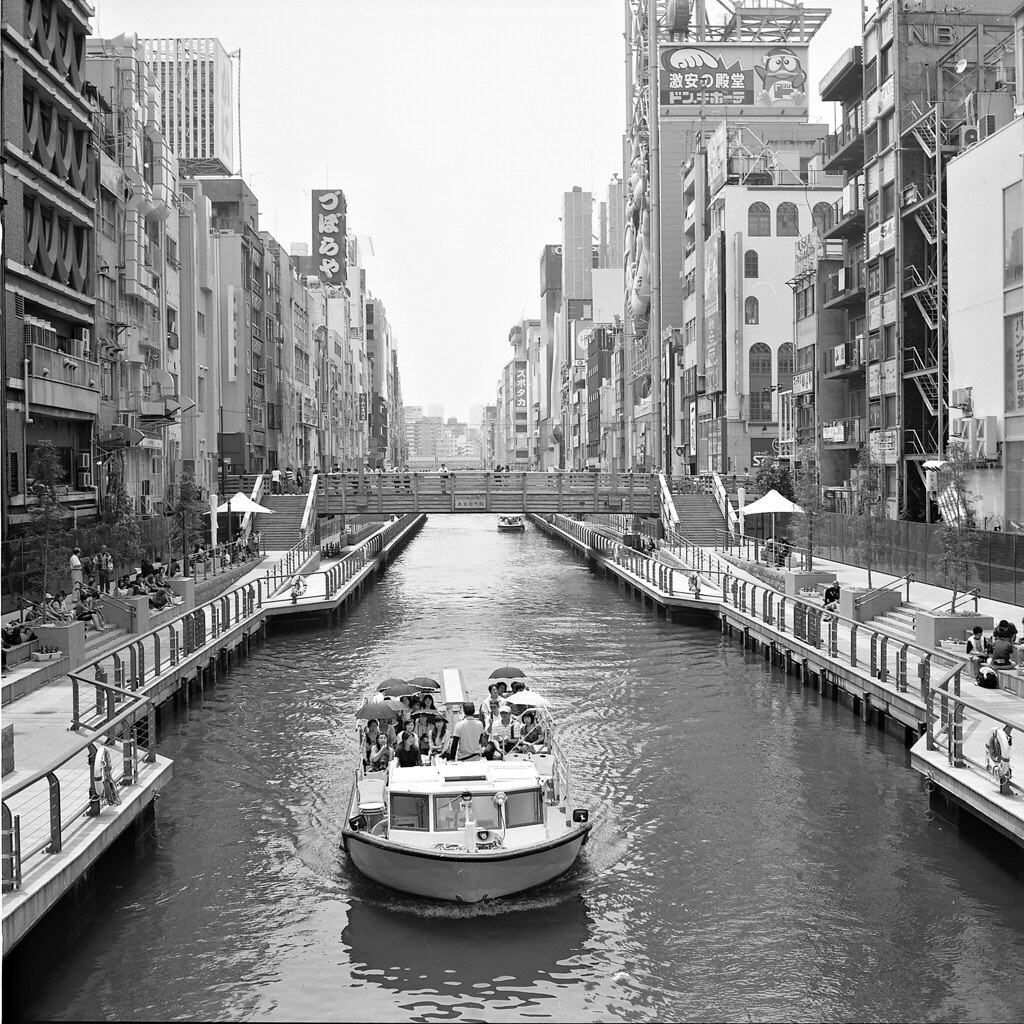
Doutonbori

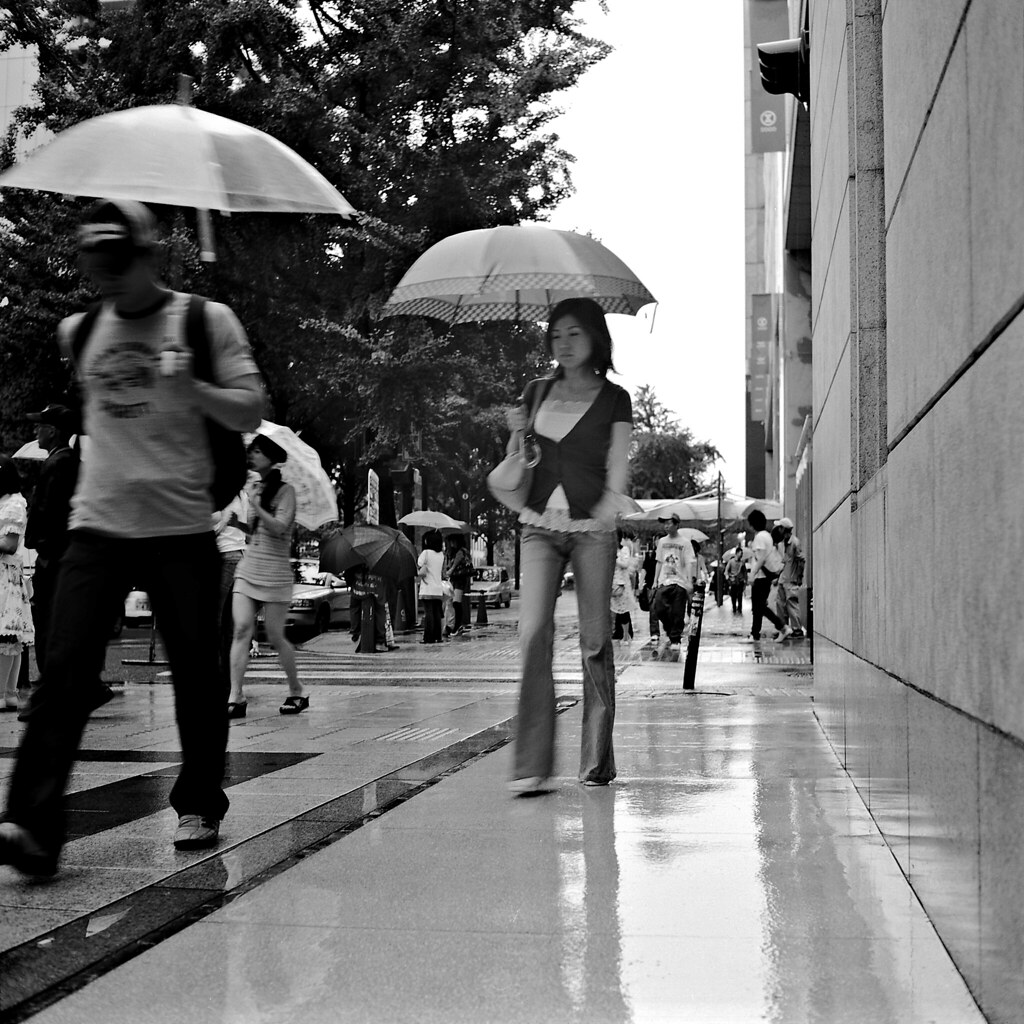
Doutonbori canal. About 12-15 second exposure. This shows the benefit and drawback of wide lenses: You can capture the impression of a wide vista, but everything will look tiny and unengaging unless you make an effort to place something close into the frame. Which I failed to do here.


Using this lens is fun, but using it well is difficult. Unless you're really close, things become tiny. On the other hand, once you do get close small things become really big. Wide angle lenses exaggerate distances, while telephoto lenses compress them. This is why wide angle lenses aren't used for portraits much; closer features like noses, chins and lips get bigger relative to features farther away like ears, neck or the head itself.

I'm no good at using really wide lenses and most of the images here show it. It's so tempting to use it to simply get "everything" into the frame. The result is inevitably disappointing - the interesting bits become tiny and surrounded by lots and lots of nothing much. The reason we do this is, I think, because we don't really see the world this way. We really only focus on a fairly narrow area at one time. We don't notice all the space out in the margins, so we simply forget to compose with that space in mind. A near normal-angle lens is much easier to compose with precisely because it matches our own perception much better.

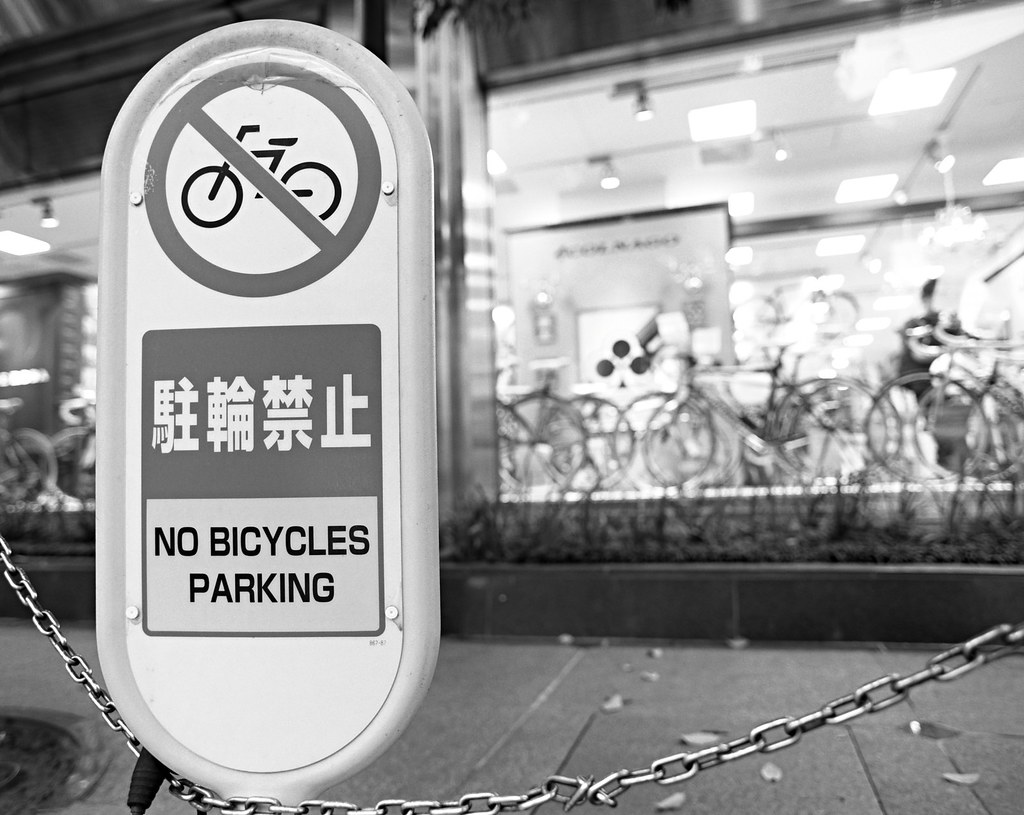
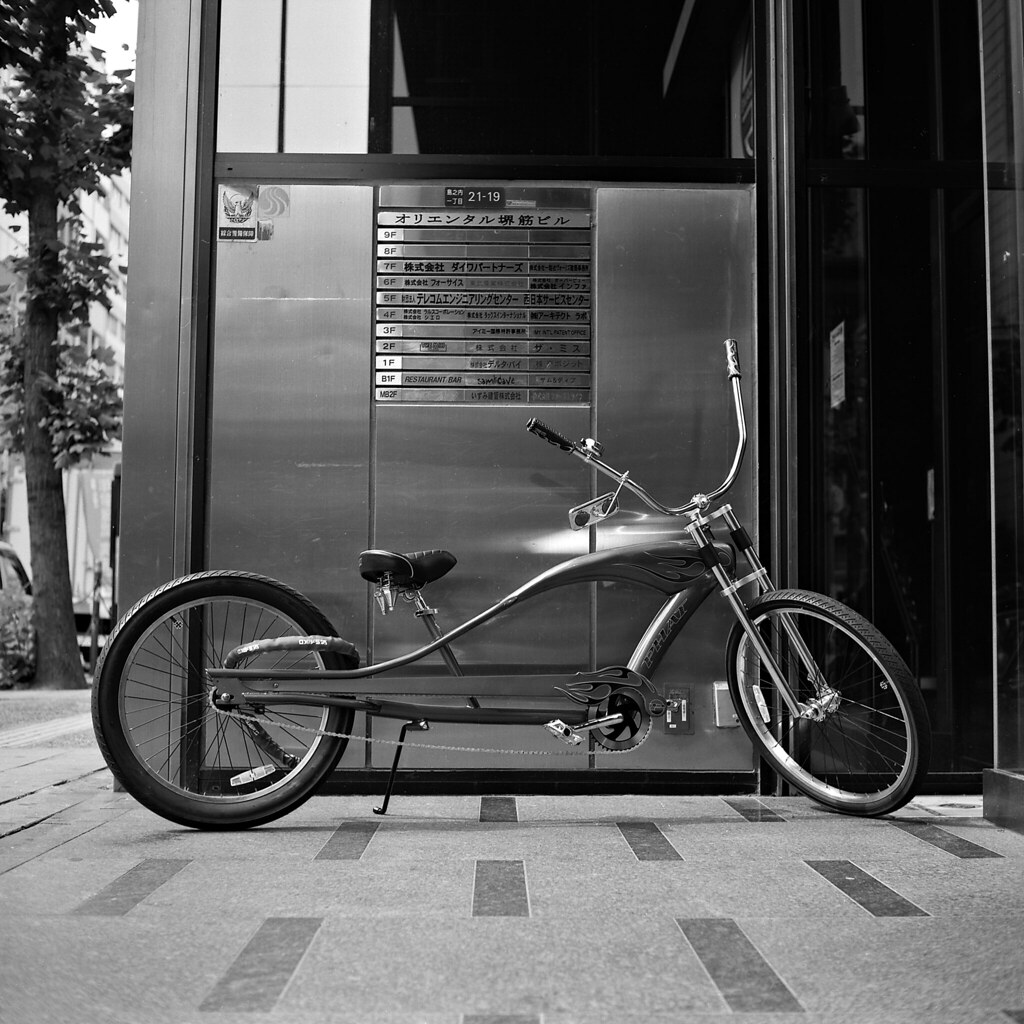
No Bicycles Parking

Street sign outside a bicycle speciality shop along Sakaisuji street. Here we have two layers with the sign right up close and the bicycle shop in the background which lets us contrast two things of very different size. It might have have worked even better had I stopped down a bit more to get the shop a little more in focus.

--

#1 "Rectilinear" means that straight lines stay straight in the picture. The penalty is that proportions get distorted near the edges. Fisheye lenses, on the other hand, keep proportions right but bend straight lines instead instead. Which is right? Both. Neither.

You're trying to take a half-spherical map of reality and flatten into an image. Something has to give. It's the exact same problem as making a flat map of a round earth.

Tuesday, April 7, 2009

Pentax 67

Pentax 67
Pentax 67

I got a Yashica Mat a year ago, just to try out medium format film photography. I got bitten hard, and I now use film as much as digital. The Yashica is compact, lightweight and fun to use; it's a perfect second camera, but as a main camera it has some shortcomings. I'd like a rugged camera with high quality interchangeable lenses and preferably a waist-level finder like the one on the Yashica. Oh, and I prefer a large 6x6 or 6x7 format over 6x4.5; if I use film I may as well use the largest format I find practical. I did consider the Mamiya 7, but it's a rangefinder and known to be somewhat delicate. The Hasselblad 500 system is fairly light and high quality but it's very expensive even used. The Mamiya RB and Bronica systems are large and bulky, and really intended for studio use.

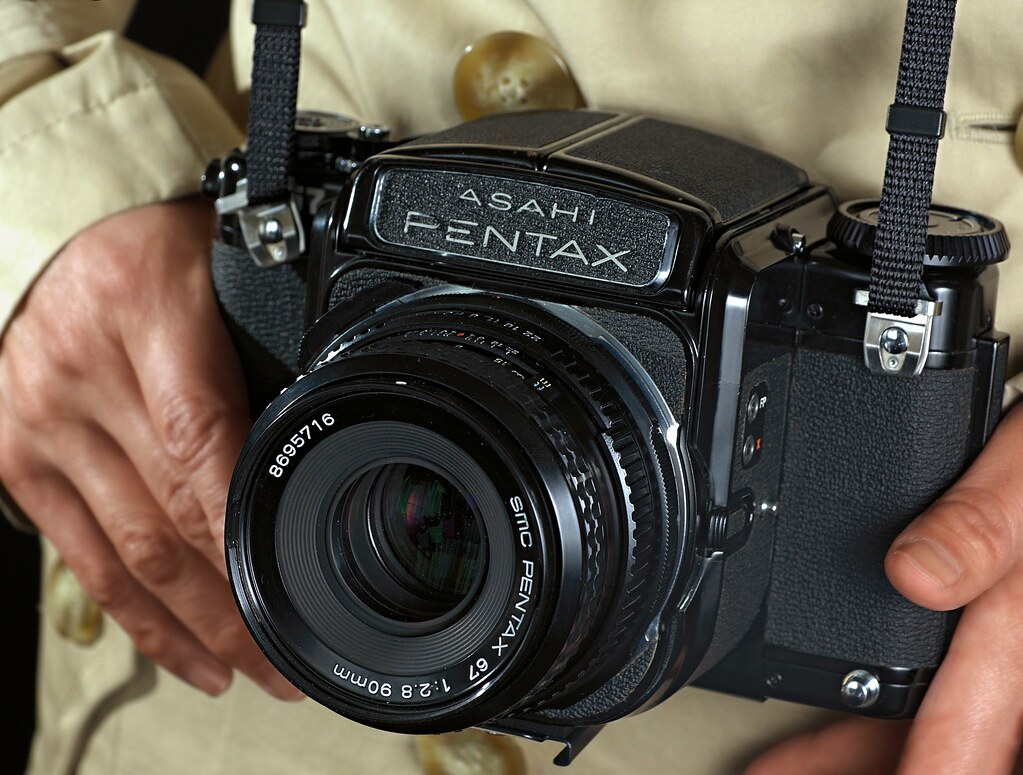
Instead I got a used Pentax 67 with a 90/2.8 lens. It's a manual-focus 6x7 format SLR camera with a body style similar to that of a 35mm camera. This camera system has been around for a long time; it was introduced in 1969 (the same year I was born) and has been in production right up until 2009. Production of the third and last generation will stop in September; parts, lenses and second-hand gear will no doubt be plentiful for decades to come. My camera is a second generation one, introduced in 1989.
 
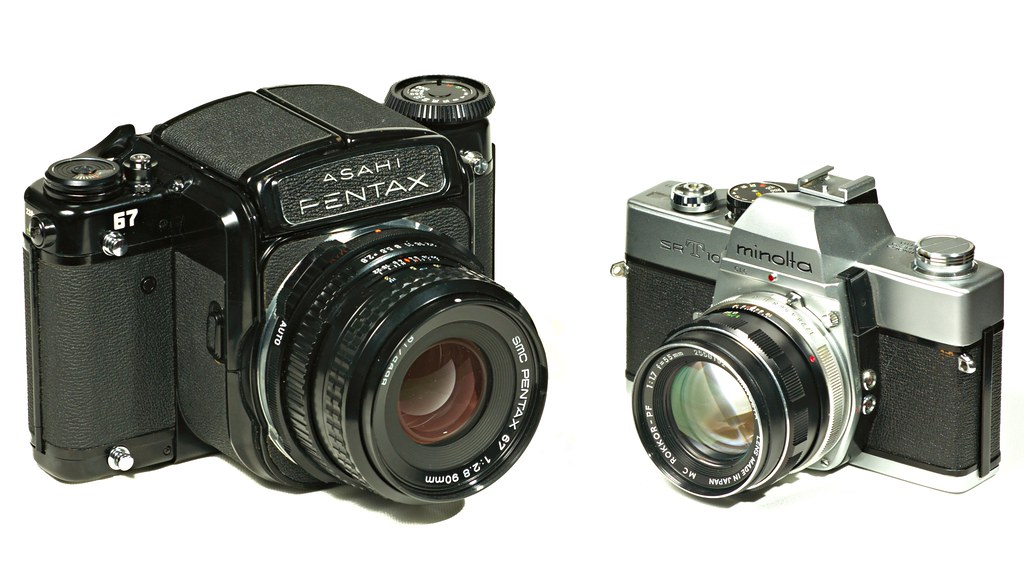
Pentax 67 and Minolta SRT101

A size comparison between the Pentax and a typical film-era SLR. The Pentax is to the left.


Some people will say the Pentax 67 is huge and heavy; others will say it's compact and lightweight (and all will agree that it's rugged and solid, and has a noisy shutter with lots of vibration). This mixed reputation is due in large part because of its looks. It invites comparison to 35mm SLR cameras, and compared to them it's absolutely huge, like a giant-sized or novelty version of a normal camera. It's heavy too - about 1.7kg with the prism viewfinder, two or three times as much as most 35mm film cameras. Small-format users find it enormous.

To most medium and large-format camera users, on the other hand, it's fairly compact and portable. There is no other 6x6 or larger medium format SLR camera that is as light and compact, and probably none other as rugged. The camera is designed to be a field camera as much as studio equipment, and it's been a long-time favourite of landscape photographers and astro-photographers, hikers and travelers especially. With a waist-level finder the camera is closer to 1.2kg (the glass prism in the prism finder weighs half a kilo by itself), and the 90mm normal lens is again fast and small.

Pentax 67

It may look big sitting right next to a small 35mm SLR, but it's really not bulky or cumbersome to bring along; certainly no more so than any other 6x7 format camera.


Besides, when you compare it to current digital SLR cameras it's no longer all that big. The current digital Canon and Nikon flagships - the 1Ds and the D3X - are about the same size and weight as this camera, but a lot more expensive and fragile, and needing multiple batteries or a charger and frequent access to electricity.

The design is clean and basic, and largely unchanged since 1969. Manual focus, aperture and shutter speed, manual film advance (thumb crank) and manual film loading - no motor drives or automation here. There is a prism finder with a light meter meter available for the 67 model I have, but it only meters passively: you set speed and aperture manually and get feedback from the meter. The newest model - the 67 II - does have a modern matrix meter with aperture-priority mode, but only as a prism finder. I prefer a waist-level finder and like to use an external meter anyway so I didn't want to spend a premium for the latest model. Film loading is easy, and it loads and unloads exactly the same way the Yashica Mat does. I mean exactly; you could write one set of detailed instructions covering both cameras.

Back street

Back street in Kobe. The residential areas up towards the mountain side often look like this, with a mix of new buildings, traditional Japanese houses and old European architecture. As a major port, Kobe has long had a large influx of foreign residents, and affluent traders built their mansions and residences up on the mountainside rather than near the dingy, smelly harbor. The remaining old European-style buildings are now protected and the ones along the main streets are mostly converted to restaurants and wedding chapels, but the ones along the back streets are still used as family residences.

To me, this camera - the 6x7 format, the near-normal angle of view, the waist-level finder - is perfect for shots like this. You can relax with the camera hanging in front and just wait until you see the picture you want on the large, clear ground glass.


This is an SLR (single lens-reflex) camera with a focal plane shutter (a curtain just in front of the film, covering it), just like your normal SLR or DSLR camera. It has a mirror in front of the shutter that reflects the light from the lens onto the viewfinder screen. When you press the shutter, the mirror first swings up, then the shutter curtains move across the film plane to expose the film. As anyone who's used a 35mm SLR or DSLR camera knows, this design can be a little noisy as the mirror swings up, then the shutter snaps across the film or sensor. The film format here is bigger - almost 6x7 cm in size - so it means the mirror and shutter is also much bigger, heavier and noisier.

To put a not too fine a point on it: the camera is loud. Not the high-pitched metallic click of a small-format camera, but a distinct, heavy "Flubbupp" from the mirror and a solid "Ka-lock" from the shutter. Nobody nearby is in any doubt that A Picture Was Taken. And you're in no doubt yourself either; all that fast-moving mass really shakes the camera in your hands as the shutter fires. Like most SLR cameras the Pentax 67 has a mirror lock-up function; it is a really good idea on this camera.

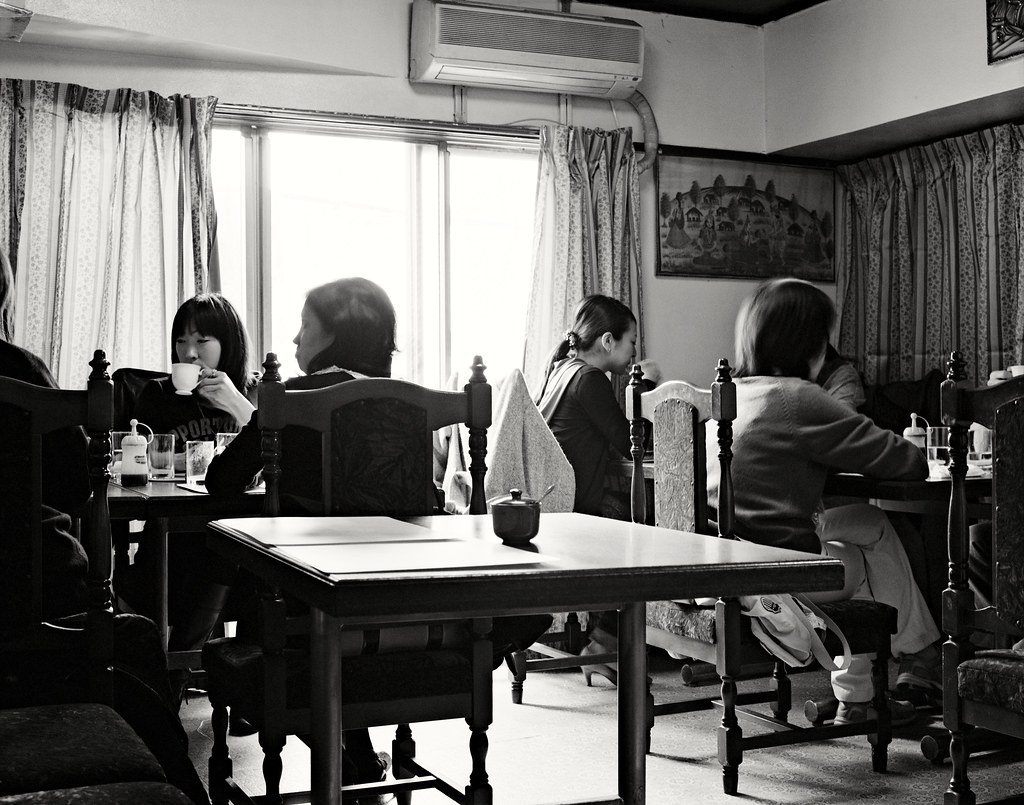
Kusumu

This is Kusumu, an Indian restaurant housed in a dingy, unmaintained 3rd floor apartment in an old concrete building in Kobe. The wallpaper is flagging, the floor buckles, the furniture, cutlery and decorations are mismatched and second hand, and at least part of the place is clearly used as living space for the family that runs it. Next door they have another apartment where they're selling Indian imported ingredients such as spices, rice and lentils in bulk.

The food, however, is cheap, home-cooked (literally) and delicious. There is no menu, just the meal of the day. You get samosa as a starter, then a plate with rice, three kinds of curry and chapati, which you get as much of as you want (in fact it's hard to stop the steady flow of food). In a sign of just how good it is, normally fastidious young Japanese women seem to come here in droves despite the messy, unkempt environment.

This image - taken on a tripod - pushes my scanner to the limit. It's about 35mp as scanned, and there's more detail on the film than the scanner is able to pick up. No matter; it's more resolution than I know what to do with anyway.


With that said, people exaggerate the problem of shutter and mirror shake. Yes, it does give you a bit of added vibration, but it only really start to matter at slower shutter speeds (1/30 and slower) where you really should be using a tripod and mirror lock-up anyhow. At 1/125 and faster there seem to be no such problems at all. Other large medium-format SLR cameras have the same design issue but don't have the same reputation; I suspect the noise makes people believe the problem is worse than is really the case. There is apparently a specific, real issue with long lenses (200 mm and beyond) and shutter speeds from 1/15 where the shutter can make the setup oscillate unless you have the body and lens anchored to the tripod at two points rather than just one. As I normally only use normal and wide lenses it's a non-issue for me.

Artsy

Ritsuko is making a point of me spending too much time taking pictures, I think. Or she just wanted a shot titled "Oddball Foreign Guy With Oversize Camera".

Anyway, this shows one reason to shoot negative film: The white wall is sunlit while the inside of the parking garage is in deep shadow. And yet, the wall is not blown out but has lots of detail and the dark garage is not blocked. This is, take note, after I've actually increased the total contrast to make the sunlit feeling stronger. A digital camera would have given you pure white walls or solid black shadows.


In practice it's really comfortable to use. The weight is no more than my usual K10D and a set of lenses, and it fits into my usual camera bag. It's not a fast camera by any standards however (no MF camera is), so it's not well suited for quick snapshooting. You just can't focus and frame a picture fast enough to follow a rapidly unfolding event. A better way is to decide beforehand where to take an image, set the camera, then wait until the light, the people and other elements come together. You get to decide exactly what background and elements you get in your image, and you give yourself time to prepare. Of course more often than not I never get the combination of elements I was looking for - or the idea turns out not to work at all once I see the result.

Neat & Grog

Neat & Grog, a tequila bar in Shinsaibashi, and an occasional waterhole for me and Ritsuko. Haru, the owner, is an entertaining guy, and the variety of tequilas he's got is amazing.

In this case I really wanted a more interesting-looking passersby in the image, but I was losing the light (see how long the shadows are on the front) and in another minute or two the front would have been in shadow. Can't get what you want, always.


This sit-and-wait approach is very suited for a waist-level finder. You focus once, then let the camera hang from the neck strap when you frame and take the picture. When you use a tripod (and you really should), the waist-level finder is much easier and faster to use than a prism finder. An added benefit is that you're not hiding your face behind the camera so people don't react negatively to you. The camera is big, of course, but despite the size of it and the racket it makes it still looks like a plain old film camera, so people don't feel threatened by it.

A tripod, just to repeat it once again, is a really good idea. You can certainly use the camera hand-held and the results will be fine as long as you stay at 1/125 or faster. Those speeds will still benefit from a tripod, adding just that extra bit of crispness (resolution) to the image, and at slower speeds - 1/30 or slower - some kind of steady support is really no longer an option. Besides, when you're doing sit-and-wait photography a tripod is a lot more comfortable than holding the camera yourself. This goes for your digital camera too, by the way: use a tripod and you'll immediately see an improvement in the quality of your pictures, but especially when you zoom in or when it's getting dark.

At this point I have only the 90mm f/2.8 lens. It's the smallest lens available and one of the fastest. The coverage is about the same as a 45mm lens on film or 31mm on a DSLR; the Yashica, the Voigtländer and the Handy Box all sport lenses with similar coverage. It's the focal length I use most often by far so I'm in no hurry to get another one. At some point I would like a really wide lens, like the 45mm f/4, but that is for later. The 90mm will do me fine until I've learned to use this camera fully.

Surprise!

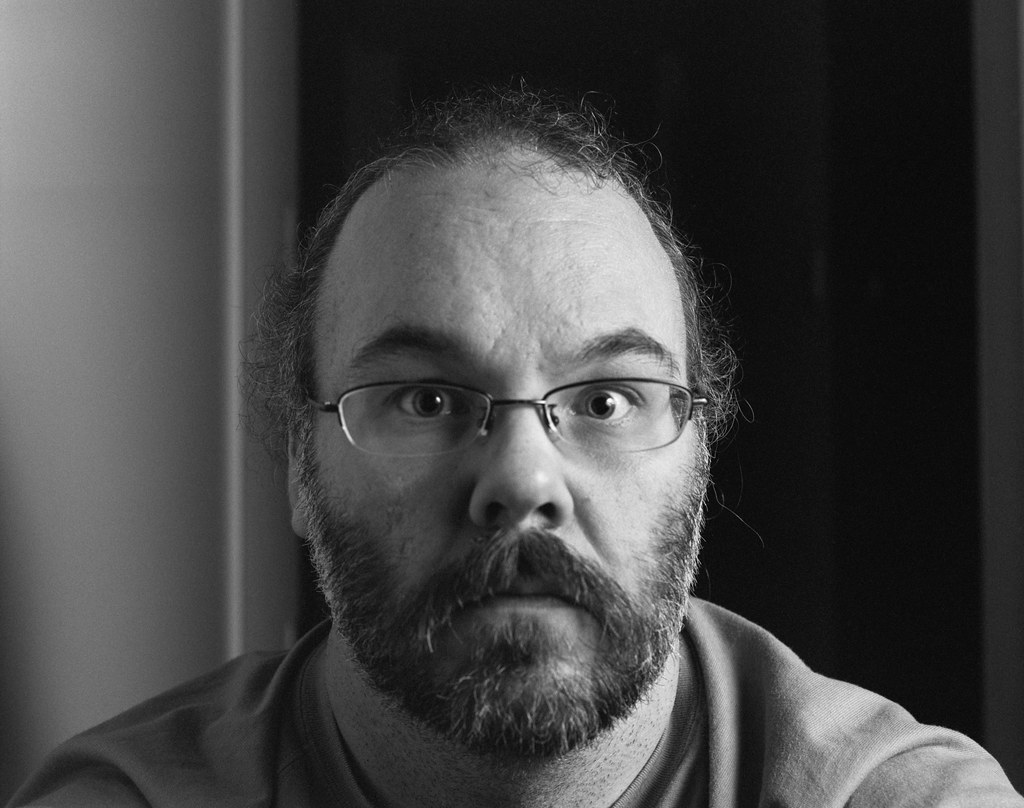
You perhaps saw this shot in an earlier post. Just wanted to test flash photography with the Pentax 67, and it's easier to just do a self-portrait than ask Ritsuko. Out of focus (I'm sitting too close) but otherwise OK.

The Pentax has a flash sync speed of 1/30, which means you have to use 1/30 shutter speed or slower. This is one of the few real drawbacks on this camera. By way of comparison, my Pentax DSLR will sync at up to 1/180, and the Yashica, with its leaf-shutter, will sync all the way to 1/500. A slow sync speed means you can't use a flash in combination with daylight to fill in shadows for instance. For real indoor ("studio") use like here the only light is from the strobes so the sync speed doesn't really matter.

Monday, August 25, 2008

The Handy Box

In my neverending efforts to complicate my life - also, I wanted to join the $50 film camera project - I have been making use of another old camera. The Handy Box is a box camera, one of the earliest, most common, easiest to use and cheapest camera types ever produced. It is sometimes said that a camera really just is a box with a hole in one end and a film strip in the other; the box camera comes close. Of course, any camera could be said to be a "box camera" but a rough definition is a rigid, non-foldable camera with simple, straightforward design, no automation and very limited settings. If it needs a battery, or if you can change lenses, it is most definitely not a box camera.

Handy Box
It's handy. It's a box. It's Handy Box!


This kind of camera first showed up in the 1880's, and has been in continuous production in some form ever since. While the traditional squarish box shape is no longer used, Instamatic-type cameras are really box cameras with a slightly different shape, and today's disposable cameras are really just small box cameras without a way to change the film.

You can find box cameras just about anywhere. They were made in huge numbers over many years so they keep showing up in garage sales, antiques fairs and second-hand stores, often for tiny sums, or even for free. Since they are so simple it's easy to check if it still works. Open it and trip the shutter a few times to see that it works. Look through the lens to see if it is in reasonable condition. Look for any holes or cracks (it should be pretty obvious if there are any). Make sure the film winder isn't stuck.

The Handy Box is somewhat rare, as it is Swedish-made; while Hasselblad is the only well-known Swedish maker today there were quite a few other camera makers over the last century. "Göteborgs Kamerafabrik" in Gothenburg had been producing a box camera called the "Mefag"; when the company folded around the second world war, the design and tooling was bought by "Svensk Kameraindustri" who produced the Handy Box around 1947 and 19481. There's lots more on the Swedish camera history on Per-Anders Westman's informative site, so far only in Swedish, unfortunately.

This is a solid all-metal 6x6 medium-format box camera, with a leather case and carrying handle. And despite being over 60 years old, it's still in quite good condition. There's a small chip or scratch on the lens, some paint scratches in the corners and a bit of surface rust on the inside but that's about it. The shutter mechanism is smooth and reliable and the viewfinder finds views just like it's supposed to.

Handy Box
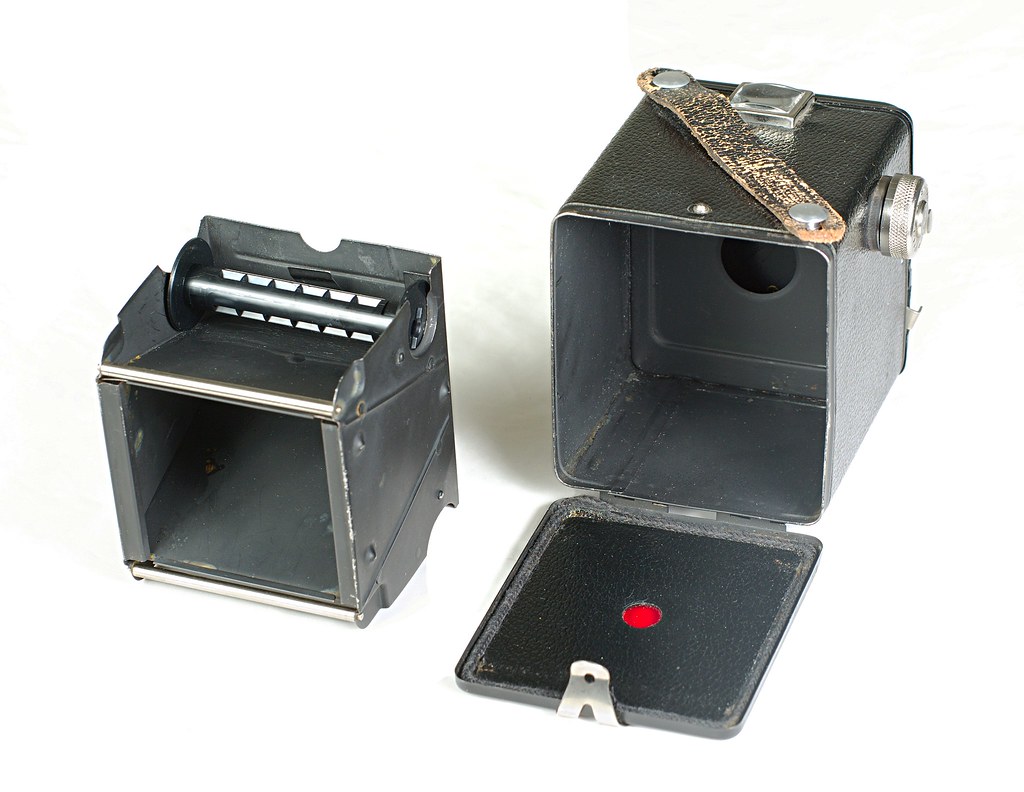
The camera insert to the left, and the shell to the right. At the top of the insert is an empty film spool; the full spool goes into the opposite side, on the bottom. The red round window is where you see the markings on the film back so you know which frame you're at and how far to wind the film.


It's simple to load the camera. Open the back, pull out the winding knob and pull out the insert. The lens is actually mounted in the insert, not the outer box. Take out the empty roll in the camera - if it's a wooden roll, save it and get a cheap plastic one from your camera store. Put the film roll in the bottom, pull out the film a bit and insert the end tab of the film into the slit in the empty roll (it's easiest to do this before you put the empty roll in place). Wind the roll a couple of turns then put the empty roll into place at the top of the insert. Slide the insert back into the body. Push the winding knob back; you need to wiggle and twist it a bit to make it catch the slot on the film roll. Wind the film until you get to a wide arrow across the film. Close the back, then wind the film until you get to the first frame.

Once you've shot the film, unloading is even easier. It's best to be in the shadow or indoors. Keep on winding until you see the film end pass in the red window. Wind another couple of turns, open the camera as above and take out the roll. A medium-format roll has a strip of gluey paper at the end that you wet just like a stamp, then wrap around the roll (often in the opposite direction). The roll is actually well-protected from light despite appearances so you don't need to keep it in the dark. It is a good idea to have it developed fairly soon, though.


Operation

The Handy Box aims for simplicity, just like a modern digital point and shoot camera. Unlike the point and shoot, however, it achieves it superbly. A modern camera tries - and fails - to be simple by automating all settings. The Handy Box achieves Zen-like simplicity by having no settings to change.

Handy Box manual Handy Box manual
The Handy Box manual. All two pages of it. When the Handy Box aims for simplicity it's not kidding around. How many pages does your typical digital camera manual have? Left of page one describes "instant" photography, and the right side describes "time". The table reads: "Indoors near windows, 1-3 seconds; in gray weather or in shadow, 1-5 seconds; Indoors with window light, 5-30 seconds". Page two describes how to load and unload film.

A big thank you to Per-Anders Westman who kindly scanned his manual for me and sent me the images. It's people like him that make this hobby so rewarding.


A modern camera will try to autofocus for you, but it will take time and it will sometimes focus on the wrong thing or fail to focus at all. Older cameras like the Yashica TLR or Voigtländer Bessa that I've written about need to be focused manually. The Handy Box has a far simpler, more reliable solution: you don't focus the camera at all. The lens is permanently set to a medium distance. It is the ultimate autofocus. If the picture got blurry it's not the camera's fault, you were just not standing in the right place. Selecting the aperture is solved in the same, radically simple way: It is fixed - I measured it to f/16 - and unchangeable. You no longer need to worry about depth of focus issues.

With shutter speed and exposure, too, the Handy Box lives up to its name. Measuring the exposure and setting the right shutter speed is a major worry in modern photography, with whole books devoted to the subject. The Handy Box cuts through this web of complexity: we need no exposure metering since we can't set the shutter speed. The shutter has only two settings: "time" (what we call "bulb" today) and "instant". With the "time" setting, you push the shutter lever one way to open the shutter, and the other way to close it again. At the "instant" setting the shutter will open briefly when you pull the lever, whether up or down. I measured the shutter speed to 1/50 going one way and 1/60 going the other; similar enough to be the same in practice.

Handy Box Viewfinder
The Handy Box viewfinder. It's fairly dim - only useful in daylight, really - and you need to be very precisely positioned to see through it. It's often easier to simply guess your composition.


Fixed focus, fixed aperture, fixed shutter speed - truly, worries about camera settings are a thing of the past with the oh so very handy Handy Box!


What? No settings?

When I first loaded the film and picked up the camera I felt utterly lost. There was no way for me to adjust anything. Our modern cameras give us very precise control; we can adjust every possible setting, and we get instant feedback on everything we do. But while this control is wonderful it is also deceptive; once we can control our settings precisely we soon start to believe that we must do so. We start thinking that a picture that isn't perfectly controlled - perfect focus, perfect exposure, perfect color - is not a good image.

We amateurs and enthusiasts tend to forget that the picture is not the image (professional photographers know this, which is why they spend their time arguing royalty rates and licensing, not pixel-level sharpness). The World Press Photo exhibition passed by Osaka two weeks ago. It honours the best press photography of the year. When you look closely, you realize that a lot of those images are not well controlled; focus, exposure and color may all be off. But a soft or dark image may convey its subject as strongly as a technically perfect one. Many things go into making a good image and technical quality is only one of them.

The most important advice for using an old camera like this is to work with the camera, not fight against it. Use its strengths and embrace its weaknesses. When you have no control over focus or exposure, you don't want to try shooting a wedding album. If your camera is slow to set up and use, don't use it for sports photography. If it's unreliable and erratic, it's no good for scientific imaging ("the camera didn't fire. We have to redo the experiment. All twelve hours of it.").

The Handy Box is not a sharp camera. It has a good amount of distortion, both barrel distortion and vignetting. The images are pretty low contrast and really benefit from a healthy contrast bump in postprocessing. But it is small and light, it's fast (no need to set anything, remember), it's quiet and it is very discreet - people often don't realize it's a camera at all. In other words, it's a really good street camera. Street photography is often in daylight, and the low-fi quality of the images will often complement and enhance the urban motives.

I have another couple of tips for users of older cameras. First, establish a routine. Whenever you have taken a shot, always set the camera back to its standard settings. In my case (as I learned the hard way - see the second picture below) I always wind the film to the next frame and set the shutter to "instant" as soon as I had taken a shot. If you don't make this a habit you will inevitably make a mistake, with interesting consequences. Interesting is good from time to time, of course (I really like that second picture myself), but it's still better to avoid them when you can.

Second, keep a notebook. Your digital camera records all the technical details of your images, but with an older film camera the responsibility is your own. Just make note of the settings you used for each frame so you can go back and compare with the results. And when you're taking notes anyhow it's a good idea to note what you're trying to shoot, and what you're trying to do with the image. It's not easy to remember what you were thinking perhaps weeks after taking it; just a few words jotted down can really help. That helps you improve your composition, not only the technical aspects.


Examples

I shot and developed a roll of Ilford HP5 with this camera last week. The camera is set for sunlit days with the ISO 100 speed films of the time so I figured an ISO 400 film like HP5 should enable me to get decent shots in shadow or when overcast. Sunny days would be too bright so I'd want to avoid that.

The camera really is as easy to use as I say above. When outside, use the "instant" shutter. When inside and it's bright, use something like 1 second (just guesstimate it). In dim light, go to about 3 seconds. If you don't get it exactly, don't worry - black and white film is pretty forgiving, so you'll have a recognizable image even if you're way off on your shutter speed.

Digital photo technology helps us here: since we can easily scan the images and post-process on our computers, exposure problems - and dust, and scratches, and vignetting, and a host of other issues - are much easier to fix today than they were when people printed directly from the negatives. In many ways, these old, manual medium-format cameras are far easier to use than ever before, with the support we can get from digital technology. All the images below have been postprocessed: I removed some dust - not all, just the most obvious specks - adjusted brightness and added some contrast. These are standard tools at our disposal today, we use them for all our other images, and it would be strange not to take advantage of them here as well.

The image quality I get from the Handy Box is pretty even and dependable. Even the images with the most technical issues don't actually look much worse than the technically best ones. When you take a picture with this camera you know what you're going to get. This dependability is part of why it's so amazingly easy to handle: I never measured the light level for any of the images above, and I didn't time the shutter; still, the images turned out good. And with no worries about any technical aspects I had a blast taking them.

I've collected all images related to this camera in its own Flickr set.
Below are the twelve frames from this roll of film, in order.

Handy Box #1
"Ok, so I'll wind the film to frame 1. And I'm winding and winding, and here's an arrow in the small red window, and another arrow, and some other symbols, and a small horizontal line, and I'm winding and winding, and here's number '2'. '2'?! Agh, was that a '1' before, not a horizontal line? Oh cr*p."

I scanned this without the film holder so I'd get the film markings on the side. Chalk it up as a learning experience.


Handy Box #2
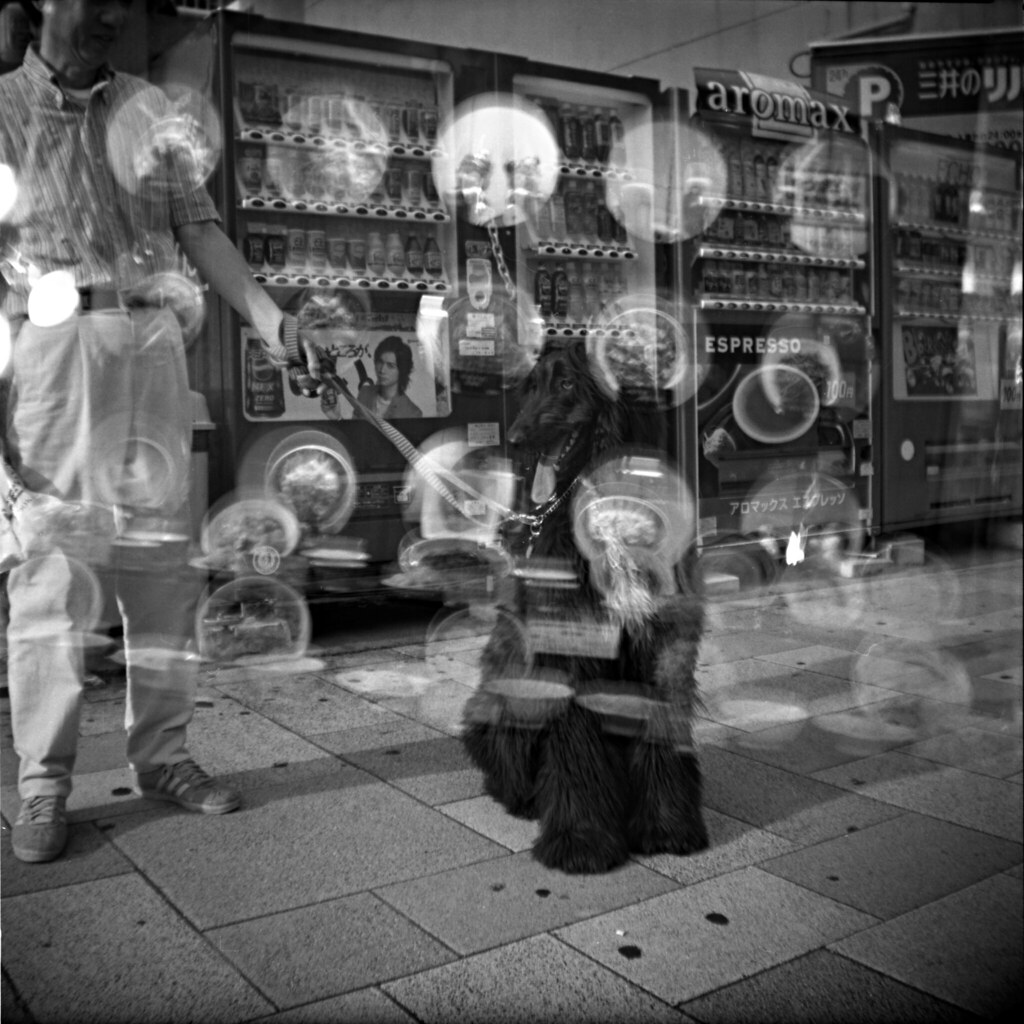
"Ahh, look at that dog! Cute, friendly and thin enough to be almost two-dimensional. The owner looks affable enough. 'Excuse me, could I take a picture?'" The dog owner sees an obviously foreign person brandishing an ancient camera and improbably decides this is a good thing. "'Great! Hold it riiight there. Thank you very much.'"

"It's really hot up on street level; the underground arcade is nice and cool right now. Gotta take a picture of that Ramen restaurant display too. That'll give me an excuse to try longer exposures. Hmm, viewfinder is really hard to see here. Ah, got it. There. Now, wind the film... wind.. the.. film...... Aggh, I forgot to wind it after the dog picture! Poor doggie, and shame about the Ramen."


Easy mistake to avoid, this - make sure you establish a routine as I wrote above. That said, this picture is rather more interesting than either the dog or Ramen display would have been on their own. Almost like a frame from some old Hammer Film horror feature; all it needs is a Vincent Price voice-over.

Composite shot; one taken with "instant" shutter, one at about 1 second.


Handy Box #3
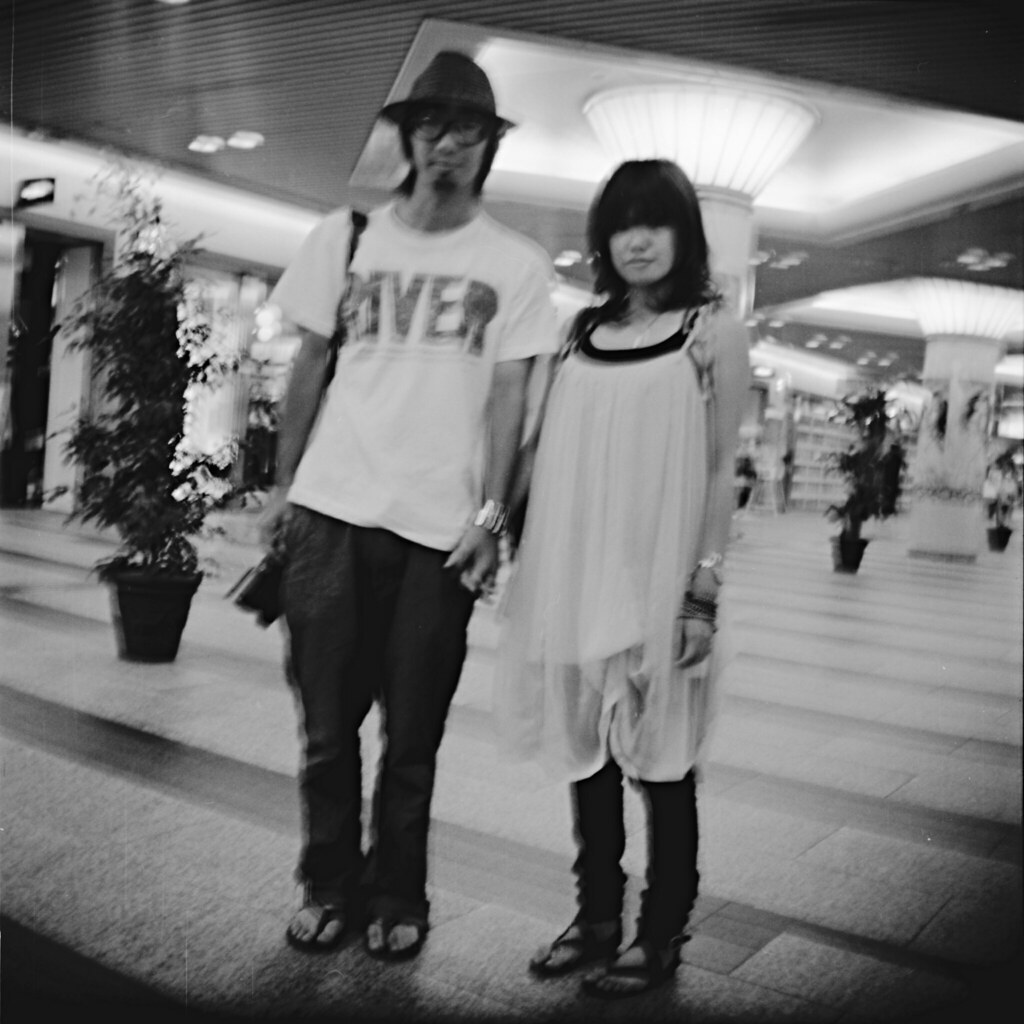
"Oh look, a hip couple, and with camera and all. Low light portrait time! 'Excuse me, could I take your picture?' 'Yes, both of you; you look cool together. There, just stand there so I get the pillar in the back. It'll be a second or so - stand very, very still.' ... 'Got it, thanks!'"

1 second shutter, underexposed. 2-3 seconds would have been better. Of course, that would have gotten me even more motion blur.


Handy Box #4
"The high ceiling and those pillars here look cool. Could I get the pillar with that escalator? Worth a try. Get motion blur on the people riding it too."

1 second. The whole image is too blurry for the motion blur idea to work.


Handy Box #5
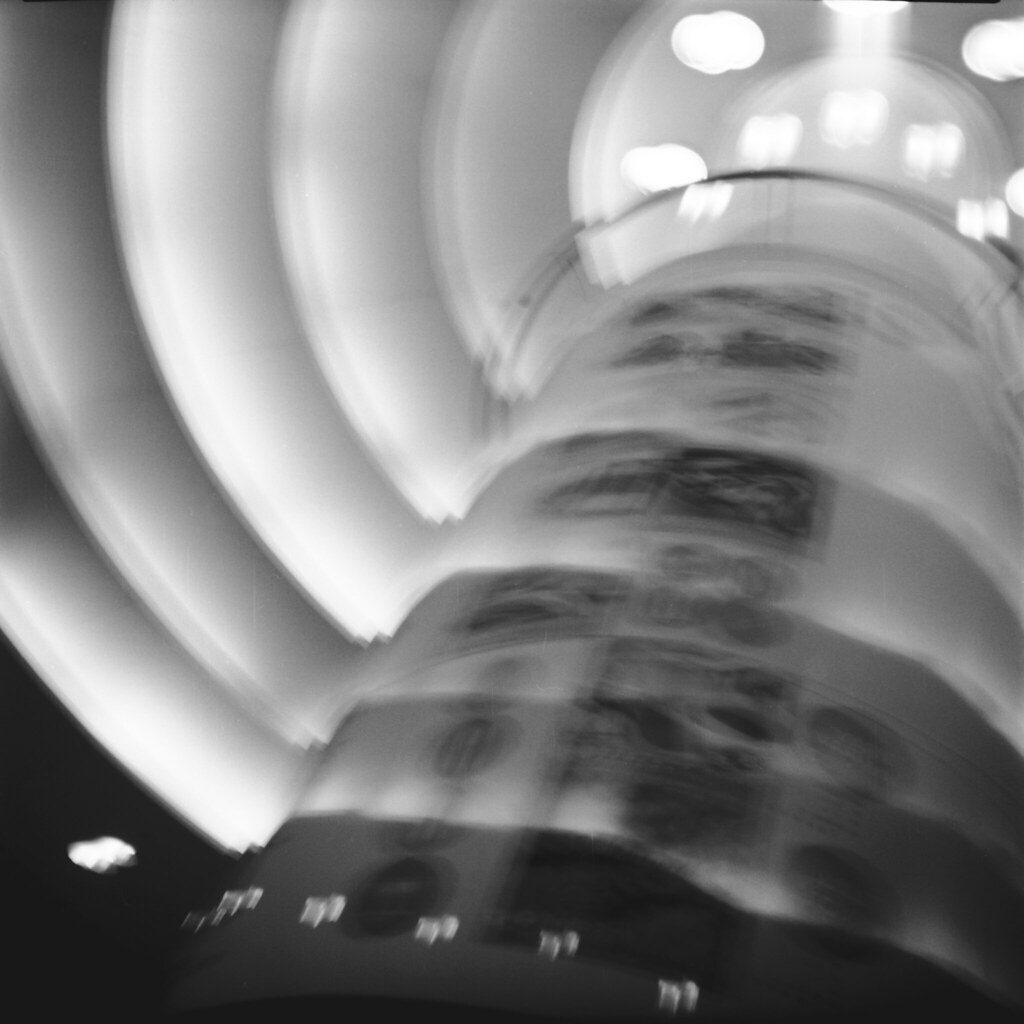
"What if I try to get just the pillar, from below, make it abstract? Try to hold it steady somehow; lean the corner of the camera on the floor I think. Aaand guesstimate the time - umm, the light is pretty bright so a bit less than the other shots should be OK."

About 0.5-0.8 seconds or so. My favourite image.


Handy Box #6
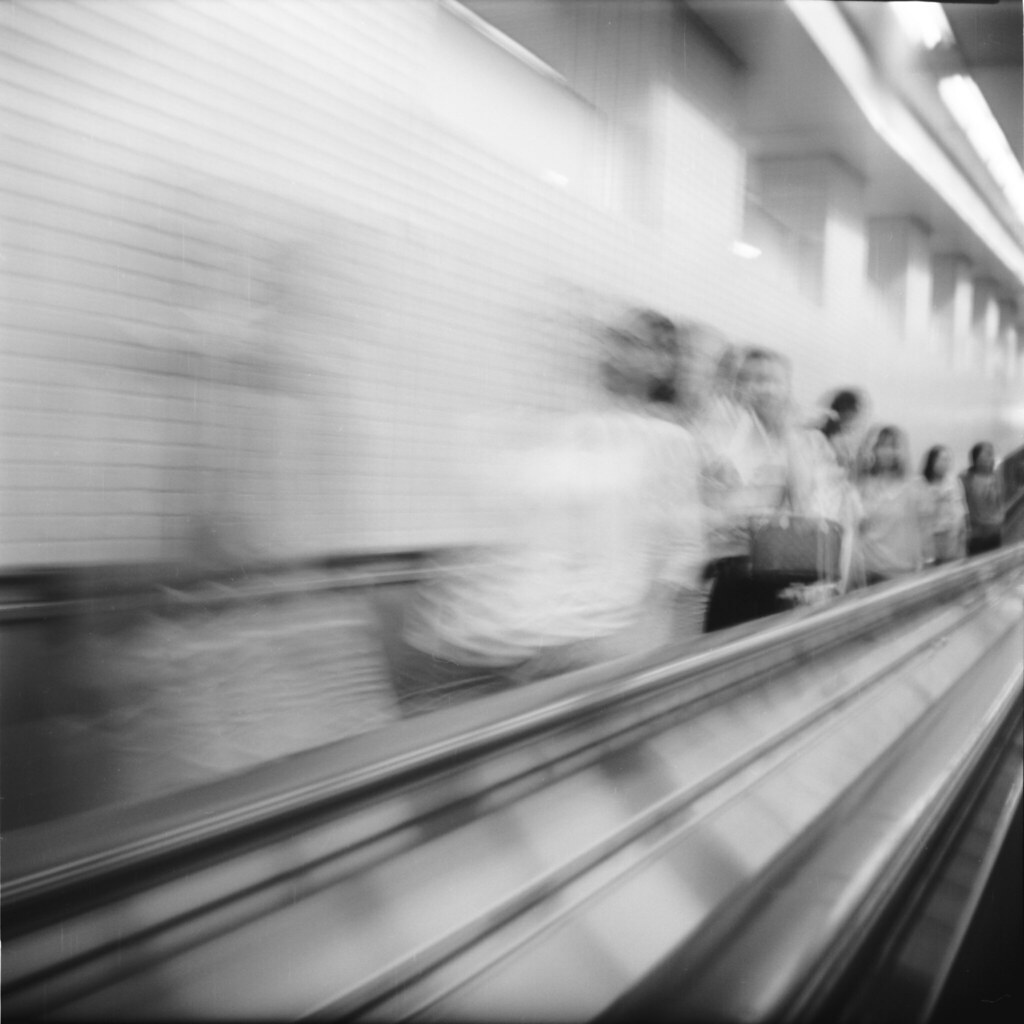
"I don't get the point of this horizontal escalator. I mean, the whole arcade is about a kilometer, and this power walkway runs for all of fifty meters. Sure is fun though. Hey, what if I put the camera on the railing and shoot the people gliding by? Worth a shot."

Around 0.5 seconds.


Handy Box #7
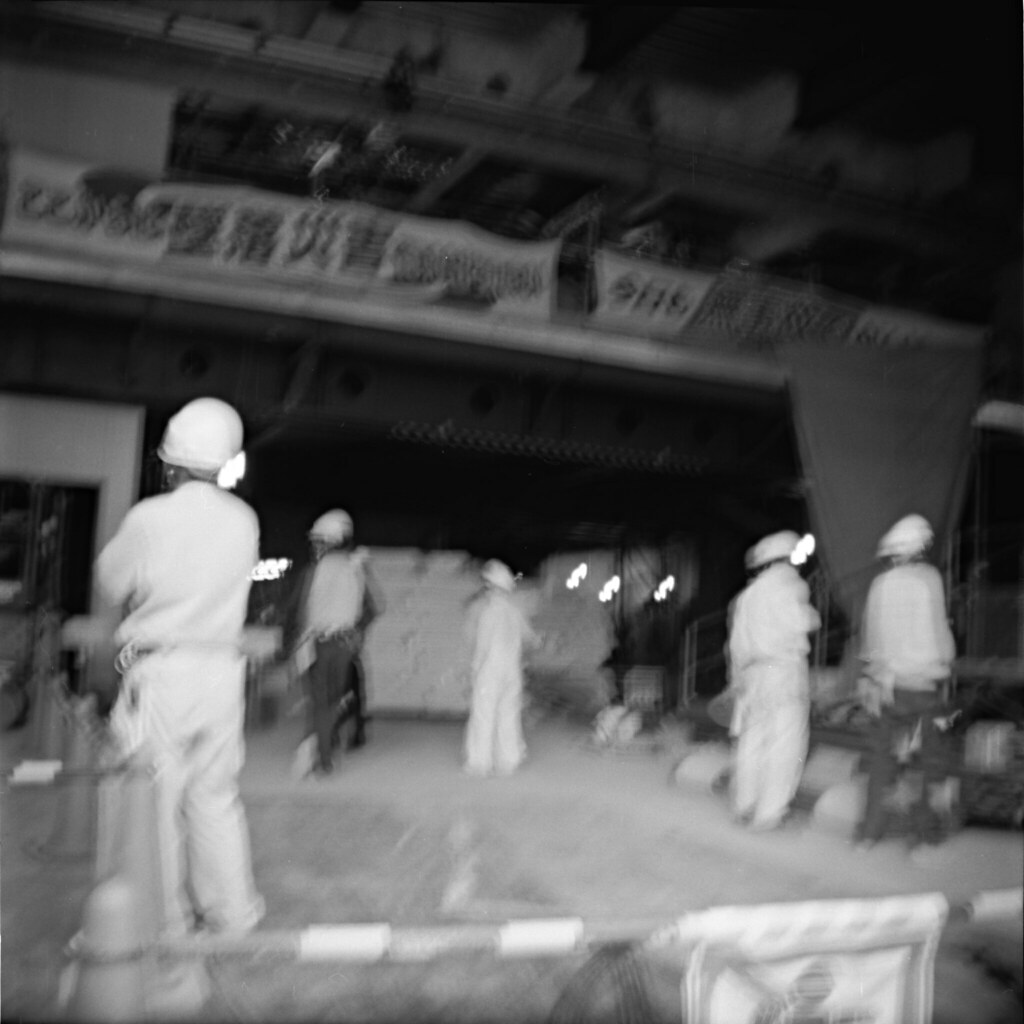
"Construction work. Never fails. Big machinery, exposed frameworks, people in helmets. Pretty dark in there though. Take some extra time perhaps."

2-3 seconds; that overexposed the brightest areas however. And I think the blur is enough to be distracting here.


Handy Box #8
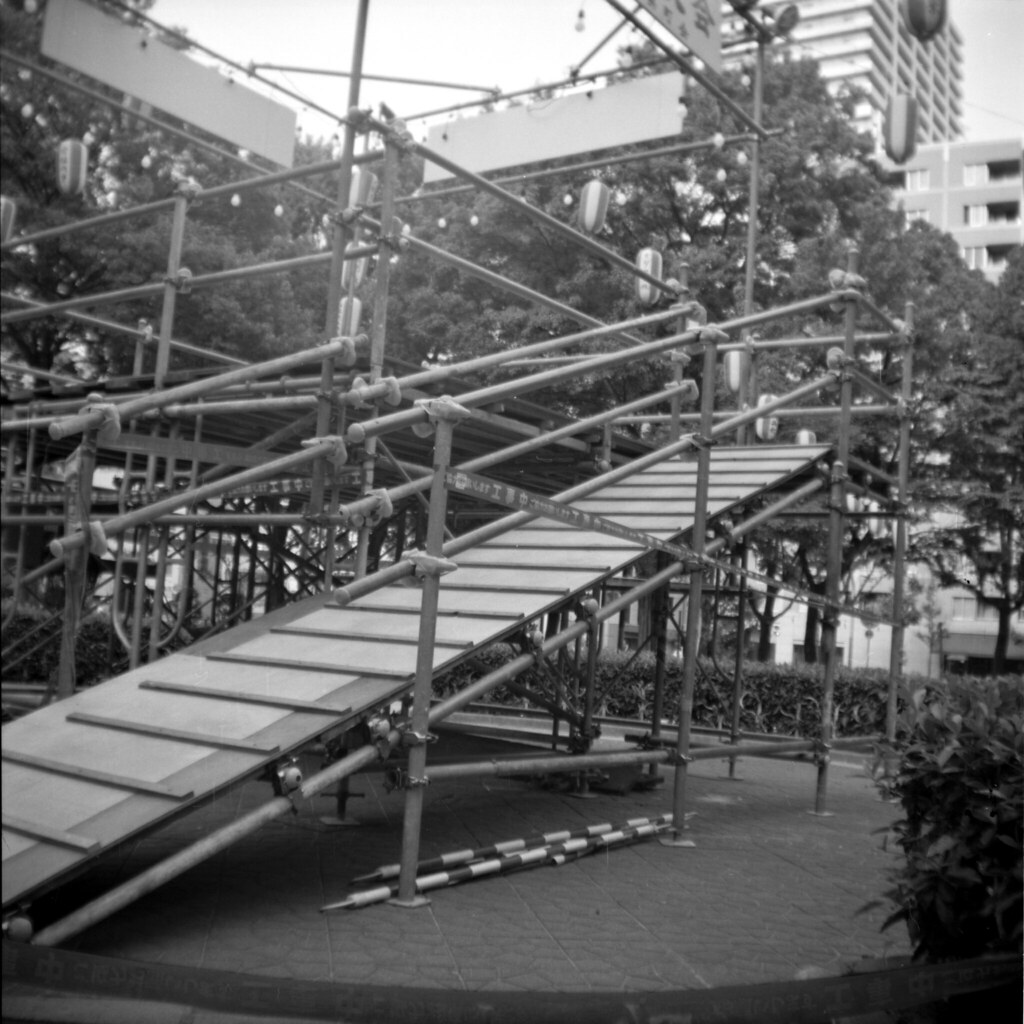
"There's an Obon festival in this park tonight I guess, that's why they've put up the scaffolding and lanterns. Let's see how the camera likes backlight."

"instant" shutter. Backlight is OK; fair bit of veiling glare but nothing distracting.


Handy Box #9
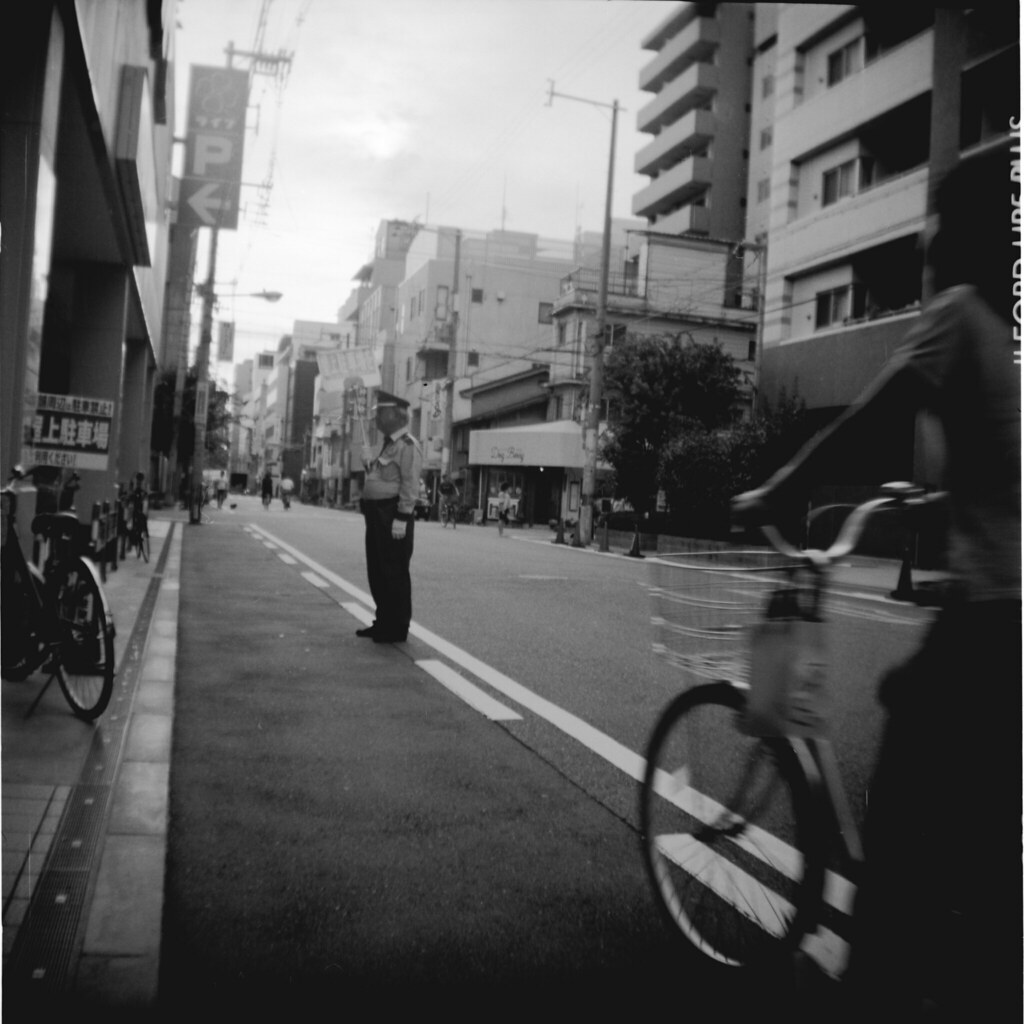
"Nice, deep light - the late afternoon sun is kind of shading the street. If I could just get the guard to look this way... Oh, bicycle coming, got to take it right now."

"instant" shutter. Shadow in late afternoon makes it a bit underexposed.


Handy Box #10
"Another dog! And crouching owner. 'Crouching Owner, Hidden Dachshund' could be a good movie title. Got to get low here. Rule of thumb: Low dog, low picture."

"instant" shutter. Close areas, like the street at the bottom, are very unfocused; the focal plane seems to be at around 4-5 meters.


Handy Box #11
"Evening, and we have a good sunset down Nagahori street. I must have half a dozen images of this already, so I want one for comparison."

"instant" shutter. You can see here that the lens has rather a lot of barrel distortion, with buildings at the edge curving inwards.


Handy Box #12
"That's some simple, clean geometric light and shadow going on there in the morning light. No way to use the viewfinder so I'll just shoot blind."

"instant" shutter.


EDIT August 2011: Changed links to Per-Anders Westmans current homepage.

---

#1 The name "Göteborgs Kamerafabrik", by the way, means "Gothenburgs Camera Factory" and "Svensk Kameraindustri" means "Swedish Camera Industry", harking back to an era when company names still had a connection to what they were actually doing; do you have any clue what kind of business, say Accentor or Ingenico are in, without clicking through to check?

Wednesday, August 6, 2008

Voigtländer Bessa

While at my parents, it turned out they had some old, unused cameras lying around. One of them was somewhat special: a Voigtländer Bessa I folding 6x9 format camera from 1950. It had been owned by my mother's brother - my uncle - who died young. When he discarded it in favour of a newer camera it apparently became a toy for my mother to play with. As so often, it ended up stuffed into a drawer, into storage and brought along whenever the household moved.

Voigtländer Bessa I
The Voigtländer Bessa I. The front scale on the lens is the distance; the black scale on the side is the shutter speed.


But amazingly, despite its use as a toy and subsequently stuffed into a drawer for many years, it is still complete and still works beautifully. It is a folding camera; as you can see in the picture the lens is set on a collapsible frame and a soft bellows connects it to the housing. When folded up it's quite compact; smaller than my DSLR, and not much bigger than a serious small-format camera. The film format is 6x9; this is about the largest medium format in common use today. You only get 8 images on one roll of film, so there's a metal screen available that blocks half the frame and lets you use it as a portrait 6x4.5 format camera. This almost doubles the number of frames per roll to 15.

This camera still has both the metal screen and the leather case. The bellows look good and have no light leaks at all. The shutter seems to work just fine, and the other mechanics - the folding mechanism, the film advance, the viewfinder - are all fine as well. Even the camera finish is just about flawless, which really is amazing considering its age and the years as a children's toy. To try it out I got a couple of rolls of tri-x 400 (the only B&W 120-format film available in Borlänge). As an aside, the camera store in Borlänge illustrates nicely why the net is killing some camera stores: they carry one single kind of B&W 120-format film, at a cost almost three times the on-line price, and they kept mentioning that they were the only store in town selling it. Needless to say, if I lived in Borlänge I'd avoid that place and order on-line.

Fountain
Fountain and pond.


Overall, this camera works just like any other, with just a few more manual steps that later cameras do automatically. You advance the film (using the small red window at the back to know when to stop) and open the front. There is no light meter so you use an external meter or make a guess. Once you've decided on the light level you set the aperture and the shutter speed on the lens at the front and cock the shutter with a small lever. You set the focus distance, compose the image using the viewfinder, and take the picture. The viewfinder is a bit hard to use; the eye relief is quite close so with glasses I can't see the whole image at once, and it's a bit dim and blurry. That might simply be a matter of cleaning it of course.

Midsummer Girl
Celebrating midsummer at Torsång. to the far left, way out of focus, is my not-so wayward brother clutching a beer.


How do you focus? You guess. That's right - this camera has no focusing aids whatsoever. There is a focus distance scale on the lens front so you find out the distance to your subject, then set the distance accordingly. You can measure the distance in several ways: a tape measure, for instance, if you are doing a portrait, or mount an external optical rangefinder on the accessory shoe - I'm hunting for one right now by the way; if anyone happens to have one for sale I'd be interested. Or, just take your best guess, then stop down the lens to f/11 or f/16 or so; that way your subject will hopefully still be in focus even if your guess is off.
Haganäs
Haganäs, near Borlänge.


The results from the camera are perfectly fine. With no way to measure distance I did as I describe above: I guessed the distance and stopped down the lens to compensate. The result is fairly low contrast, with a slightly dreamy look. Not hugely sharp, but then I'd not expect it either from a sixty year old camera made for older lower-resolution films (and our scanner isn't helping matters either). With no reliable way to focus and with a fairly low-resolution lens, this camera is probably best used with a fast film that allows you to stop down. The resulting graininess will only help the perceived sharpness of the images. There's a few more images available in the Flickr set.

Borlänge
Leaving Borlänge for home.

Tuesday, July 8, 2008

Yashica Camera

As I've mentioned, I got a 6x6 format (meaning the negative is a square 6x6cm) Yashica Twin-Lens Reflex film camera about a month ago.

Digital cameras are killing off the 35mm film format (and it already killed Polaroid film), but it has been a boon for medium-format film photography. Digital cameras, cheap scanners and the proliferation of information on the net means it is easier than ever to work with medium-format film. The continuing popularity of Holga, Diana and other toy medium-format film cameras is of course helping as well. According to photography store people in both Osaka and Stockholm (yes, two of them, total), both new and used medium format equipment has seen increasing sales for the past few years while 35mm is tanking. If you stay away from the big Brand names (Rolleiflex, Hasselblad), you can still find inexpensive and very capable used equipment.

My experience with the Yashica so far - after one roll of film - has been very positive. The camera is entirely manual of course, but easy to use; loading and unloading film, for instance, was no problem (just search the net for lots of instructions and tips). There's a light meter built in, but I've ignored it in favour of my digital camera. I use it as a light meter and "polaroid camera" for test shots. Once I'm happy with what the digital camera is showing me I can switch to the Yashica for the real shot. With only 12 pictures per roll you tend to take your time and really think things through before taking a picture. I'm certainly getting more images I'm happy with than I do with a digital camera.

Lowrider
They look a little silly, but lowrider bicycles are apparently fairly popular among a segment of young people here. This one is outside Sam and Dave's on sakaisuji street. Click on the image for a larger size, and you can find the full size on my Flickr photo stream.


Two things stand out with this camera: the viewfinder and the shutter. It has a glass focusing screen at the top - a big, beautiful focusing screen - that is just like having a digital camera live view, but without all its drawbacks (this really is live, after all, not recorded and shown on small screen). The viewfinder has a pop-up hood; in it is a small magnifying loupe you can flip up to check the focus precisely. The shutter is a leaf shutter (it's in the lens, not in front of the film), so it's almost silent, very fast, and produces no vibrations at all. And if you want to use flash (there's a flash socket on the camera) it will sync up to the maximum shutter speed.

There are drawbacks of course, but no serious ones. First, the viewfinder is flipped "left-to-right". As you look into the screen, it's the right side up, but your left side is on the right and vice versa. So when you want to see more of the left side of the image you need to turn right. Rather disorienting at first and takes a little while to get used to, but no big deal.

Doutonbori
Doutonbori river. I'll manage a good picture of it yet.


Using a separate camera to meter means you can't really react when the light changes quickly (the rain image below suffers from this); but then, this isn't a camera made for quick snapshots. The lens on the Yashica is quite good but has a few flaws. It's somewhat soft until you stop it down a fair amount, it has a tendency to flare (I need to get a hood, I think), and corners are quite fuzzy and smeared out (check the bottom corners in the bicycle image).

Tsuyu
The rainy season - Tsuyu - is still going strong, creating fast-changing light as the weather whips back and forth between sort-of sunny and pouring rain. Film is better than digital at adapting to it, but there are limits of course.


With a camera bag over your shoulder and peering down a TLR hanging off your neck, you're not exactly Mr. Invisible. People know you're there and they know you have a big, old camera pointed at them. Nevertheless, it seems to be really good for street photography. While people easily notice you, they don't seem to be bothered by the camera the way they are with a DSLR and big lens, and the way you hold the camera means you naturally get a lower, more pleasant perspective on your subject.

Take a break.
Fellow walker taking a quick break in Shinsaibashi.


Using film is not a problem either. It took me a month or so to use up my first roll, and that was with half the frames taken to test the camera. One roll is 250 yen and 500 yen to develop for a total cost of around 750 yen. Which, per month, is nothing I'd worry too much about. I could develop myself and save a bit, but really, why bother? I scan on an old flatbed scanner with a film holder (CanoScan D2400); we have a newer scanner at home but it has film holders only for 35mm, not medium format. And yes, you do want a scanner with a holder and overhead light; scanning film using the flatbed directly doesn't work.

The original scans are at 2400dpi; at that resolution the image is somewhat blurry - due to the scanner or the lens - so I downscaled them to half linear size. I could scale them larger than that, but I really don't need images that big anyway.

Sennichimae
The pedestrian crossing between Sennichimae road and Sennichimae street. Something tells me the original plans for that temple didn't include this kind of neighbourhood.

Saturday, June 7, 2008

Sweden

It's busy at work, in part because I'm taking a week off from the end of next week; we're going to Sweden to celebrate Midsummer with my parents and my sister and her family (who all live in the USA, and who have never met Ritsuko, nor have I met them). This weekend is the last opportunity for me to do any real preparations for the trip, so blogging has had to take the back-seat for a while.

One thing I did today was to pick up a lens for my brother (camera equipment is still quite a lot cheaper in Japan than in Sweden even if prices have evened out somewhat). And as I was buying the lens I did the mistake of looking over a few of the used equipment shelves. And there it was: a Yashica Twin-Lens reflex camera in near-perfect condition.

Yashica Mat 124G
Yashica medium-format twin-lens reflex camera.


Digital SLR cameras are great: quick and easy to use; easy to bring along and readily adaptible to most any situation from portraits to sports. And it's digital, so you can take hundreds of images without worrying about space or cost. The problem is, those are all drawbacks as well. When it is so very quick and easy, it's so easy to just snap away without thinking through your composition, without thinking about what it is you want to show the viewer; without, in fact, thinking at all.

So using film, and medium-format film like this, is a good antidote. A TLR (twin-lens reflex) camera is by its nature fairly slow to use. You see the world back to front on a ground-glass screen at the top, not directly through a viewfinder. It's a fixed-lens camera so you have no zoom and no way to switch lenses. And a roll of medium-format film will give you 12 exposures in total, so you had better make each one count.

At the same time, pictures from cameras like this really are easier to get right than ever. Just bring your digital camera along, and use it as your combined light meter and polaroid back for test shots to see that your exposure is right. I'm looking forward to this. But no, I'm not taking it along on the trip, tempting as it is to do a "one picture per day" kind of thing with it.