

Showing posts with label photography. Show all posts
Showing posts with label photography. Show all posts
Monday, March 26, 2012
ASSO
Went on a brief photo walk around Namba and Shinsaibashi yesterday. It's still chilly but the sunshine is warm and spring is in the air. I brought a film camera (my grandfathers SRT 101) so most pictures will wait for later, but I did snap one shot with my phone:
"ASSO virtual golf club", Shinsaibashi, Osaka. Now, it may be only me, but perhaps they should use the same colour for all the letters in the name.

Thursday, March 8, 2012
Velvia
Velvia by Fuji Film is perhaps the single most famous family of modern slide films in existence1. It's actually a number of different films, but what they have in common is vivid (some would say garish) colour rendering that can really highlight nature scenes. That rendering does make it a less good choice for shooting people, though, as the bold colours that tend towards green can easily make your subjects resemble that of a seasick drunk. Which is not the impression you want to convey if you shoot, say, a wedding or a fashion show.
 Velvia in its native habitat. Bold, vivid nature colours.
Slide films are a very small market even within the shrinking market for film in general. Some estimate that slide films are perhaps 5-6% of the entire film market and I have no trouble believing it. It's easy to see why: They're the most expensive films you can buy, and they tend to have short shelf-life. They have low latitude so you need to meter the light carefully or end up over- or underexposing them. They tend to have lower resolution than other film types. The large contrast means they're difficult to scan or print.
Modern negative films are really as good or better in every way, except that a properly treated slide film will give you an exact, repeatable colour rendering every time, and you can see the image right there on the negative. That is the reason magazines and other print have preferred slide film over other media.
 Nara Institute of Science and Engineering, Nara.
But now, of course, digital cameras do it just as well — they have many of the same characteristics, with repeatable colour and high contrast — so the market for slide film, never big, has dropped off a cliff. The movie industry — the part that still haven't switched to digital — uses negative colour film, as do most hobbyists. It is cheaper, has much better latitude and tends to have better resolution. If you are going to scan the film, it's easy to adjust the final colour to your liking today, removing most of the advantage of slides. Kodak recently discontinued its last slide films, leaving Fuji as the sole manufacturer.
With that said, a slide image on a light table (or projected) is a beautiful sight to behold. There is something viscerally satisfying about the almost glowing colors that render even a mundane scene otherworldly beautiful. That glow does not quite translate into the scan or print, unfortunately, but it does give you something to aim for. And shooting slide film is fun if nothing else.
 Nankinmachi, Kobe, at dusk.
Velvia is really made for nature photography. It pushes muted colours, greens especially, to make them clearer and more vivid. Drab leaves brighten up. Flat, rainy scenes glitter and sparkle. Autumn reds and yellows will pop. Of course, human skin will also "pop" and become ruddy and saturated, and any green tones will get exaggerated. It may give you a healthy outdoorsy look in some people, but make others look like they are drunk or suffer from high blood pressure. Man-made, colourful structures will tend to become overly garish.
 Sunlit winter leaves.
For these reasons, Velvia has been considered a bad choice for portraits and street photography. I agree that you want something subtler for portraits, but I think it makes a fine film for street and urban photography. With digital photography, and with "HDR photography" especially, the goal posts have moved. With it-hurts-so-bad-I-must-claw-my-eyes-out hypersaturated images everywhere today, Velvia doesn't seem all that bold or saturated by comparison.
 Shinsaibashi, Osaka. Note how the high contrast is a draback in this case; the film could barely capture both the sunlit and shaded areas at once.
 Sakaisuji Honmachi station, Osaka. This is home.
--
Slide films are a very small market even within the shrinking market for film in general. Some estimate that slide films are perhaps 5-6% of the entire film market and I have no trouble believing it. It's easy to see why: They're the most expensive films you can buy, and they tend to have short shelf-life. They have low latitude so you need to meter the light carefully or end up over- or underexposing them. They tend to have lower resolution than other film types. The large contrast means they're difficult to scan or print.
Modern negative films are really as good or better in every way, except that a properly treated slide film will give you an exact, repeatable colour rendering every time, and you can see the image right there on the negative. That is the reason magazines and other print have preferred slide film over other media.
But now, of course, digital cameras do it just as well — they have many of the same characteristics, with repeatable colour and high contrast — so the market for slide film, never big, has dropped off a cliff. The movie industry — the part that still haven't switched to digital — uses negative colour film, as do most hobbyists. It is cheaper, has much better latitude and tends to have better resolution. If you are going to scan the film, it's easy to adjust the final colour to your liking today, removing most of the advantage of slides. Kodak recently discontinued its last slide films, leaving Fuji as the sole manufacturer.
With that said, a slide image on a light table (or projected) is a beautiful sight to behold. There is something viscerally satisfying about the almost glowing colors that render even a mundane scene otherworldly beautiful. That glow does not quite translate into the scan or print, unfortunately, but it does give you something to aim for. And shooting slide film is fun if nothing else.
Velvia is really made for nature photography. It pushes muted colours, greens especially, to make them clearer and more vivid. Drab leaves brighten up. Flat, rainy scenes glitter and sparkle. Autumn reds and yellows will pop. Of course, human skin will also "pop" and become ruddy and saturated, and any green tones will get exaggerated. It may give you a healthy outdoorsy look in some people, but make others look like they are drunk or suffer from high blood pressure. Man-made, colourful structures will tend to become overly garish.
For these reasons, Velvia has been considered a bad choice for portraits and street photography. I agree that you want something subtler for portraits, but I think it makes a fine film for street and urban photography. With digital photography, and with "HDR photography" especially, the goal posts have moved. With it-hurts-so-bad-I-must-claw-my-eyes-out hypersaturated images everywhere today, Velvia doesn't seem all that bold or saturated by comparison.

--
#1 Kodachrome, discounted a couple of years ago, is far more iconic but it was not a modern film by any means, and did not use the same chemistry as today's slide films.
Monday, November 14, 2011
ColorHug
OK, so you're into photography. Like most of us, you download your pictures from your camera, or you scan your negatives, then process them on your computer. Nice. Fun. Convenient.
But frustrating. Why? Because of color. As in, the color you saw in the scene is not what you see on your computer screen, which is not what you see on your other computer screen or what people will see online or what you end up with from your printer.
 This is one solution to color problems, of course. I love black and white; and with no color there is no problem with color casts.
Maiko at Shochikuza theatre in Osaka.
There's lots of reasons. Your camera doesn't really capture the "true" color (if you shoot negative film you know just how malleable "true" really is). A printer can't really reproduce all colors your camera can capture or your screen can show; it fudges things outrageously just to give you a vague impression of similarity.
But one frustrating reason is that your screen isn't neutral. Pretty much all screens have a color cast — they're bluish or reddish, or a green tint, or have some odd color shift between lighter and darker colors. And monitors change as they get older. The backlight changes color with age, and the screen pixel colors themselves can change with years of exposure.
So you carefully edit your pictures to look great on your computer. But if your screen is, say, a bit blue, then you will have added extra red to your pictures to compensate for that. They'll look reddish on other peoples screens, and come out red-tinted on your printer. Of course, their screens and your printer have color casts of their own, making things even worse.
You can't do much about other peoples screens. But at least you can do something about your own. Most image-related software today can handle "color profiles". That is, a file that describes how your monitor (or camera, or printer) handles color, and lets the software compensate for it. If you have a good color profile for your particular screen then your software can take it into account. Everything will look "right", that is neutral, as you work with it. It won't fix other peoples screens of course, but at least they get a nice, neutral, well-balanced image without color casts to begin with. It should look better, at least, if not great.
 Why can't we just eyeball the color cast ourselves? Because we are really, really bad at evaluating color accurately. Any hint of the right color and we "fill in" the rest ourselves. The picture above is black and white. I added a few areas of solid color tint to it — red, green and blue areas for the signs in the background, muted orange for skin areas, a few splashes on clothes and bags. All colors are solid tints, and just vaguely similar to the real colors. Most of the image is still in black and white, with no trace of color.
Still, at first glance it looks like a natural color image to most people, and some refuse to believe it's largely black and white until you explicitly cover up the colorized parts. Our brains see the hints of color and fills in the rest by itself.
How do you create a color profile? You use a "colorimeter" — a device that measures the color on a screen, or paper — together with software that takes the measurement and generates a color profile from it. There's a few such devices for sale out there like the Pantone Huey or X-Rite ColorMunki. They work well enough. But the software is not open source, so you're dependent on them to support you in the years ahead. If the company goes bust or they decide to discontinue support for newer OS version your expensive device ends up as a paperweight. They also typically work only on recent Macs or Windows machines.
Enter ColorHug. It's a colorimeter, built as open hardware (schematics and the firmware is available for you), and with open source software for Linux. It's a fair bit faster than other systems, and less expensive too. The developer is gearing up for a first production run, and has just announced an advance order program that gets you a unit at a discount in exchange for helping out with reporting bugs and issues.
This is very useful for Mac and Windows users too by the way. The software is for Linux, but the color profile files are the same for every operating system. You get a bootable CD with a Linux system, so you can boot the CD, calibrate your monitor, then use the profile in your own operating system with no problem. And of course, the client software is open source, so somebody is bound to port it to both Windows and Mac if there is enough interest.
I've sent in my preorder already. Interest seems huge, though, so I can only hope I'll actually get one.
But frustrating. Why? Because of color. As in, the color you saw in the scene is not what you see on your computer screen, which is not what you see on your other computer screen or what people will see online or what you end up with from your printer.
Maiko at Shochikuza theatre in Osaka.
There's lots of reasons. Your camera doesn't really capture the "true" color (if you shoot negative film you know just how malleable "true" really is). A printer can't really reproduce all colors your camera can capture or your screen can show; it fudges things outrageously just to give you a vague impression of similarity.
But one frustrating reason is that your screen isn't neutral. Pretty much all screens have a color cast — they're bluish or reddish, or a green tint, or have some odd color shift between lighter and darker colors. And monitors change as they get older. The backlight changes color with age, and the screen pixel colors themselves can change with years of exposure.
So you carefully edit your pictures to look great on your computer. But if your screen is, say, a bit blue, then you will have added extra red to your pictures to compensate for that. They'll look reddish on other peoples screens, and come out red-tinted on your printer. Of course, their screens and your printer have color casts of their own, making things even worse.
You can't do much about other peoples screens. But at least you can do something about your own. Most image-related software today can handle "color profiles". That is, a file that describes how your monitor (or camera, or printer) handles color, and lets the software compensate for it. If you have a good color profile for your particular screen then your software can take it into account. Everything will look "right", that is neutral, as you work with it. It won't fix other peoples screens of course, but at least they get a nice, neutral, well-balanced image without color casts to begin with. It should look better, at least, if not great.
Still, at first glance it looks like a natural color image to most people, and some refuse to believe it's largely black and white until you explicitly cover up the colorized parts. Our brains see the hints of color and fills in the rest by itself.
How do you create a color profile? You use a "colorimeter" — a device that measures the color on a screen, or paper — together with software that takes the measurement and generates a color profile from it. There's a few such devices for sale out there like the Pantone Huey or X-Rite ColorMunki. They work well enough. But the software is not open source, so you're dependent on them to support you in the years ahead. If the company goes bust or they decide to discontinue support for newer OS version your expensive device ends up as a paperweight. They also typically work only on recent Macs or Windows machines.
Enter ColorHug. It's a colorimeter, built as open hardware (schematics and the firmware is available for you), and with open source software for Linux. It's a fair bit faster than other systems, and less expensive too. The developer is gearing up for a first production run, and has just announced an advance order program that gets you a unit at a discount in exchange for helping out with reporting bugs and issues.
This is very useful for Mac and Windows users too by the way. The software is for Linux, but the color profile files are the same for every operating system. You get a bootable CD with a Linux system, so you can boot the CD, calibrate your monitor, then use the profile in your own operating system with no problem. And of course, the client software is open source, so somebody is bound to port it to both Windows and Mac if there is enough interest.
I've sent in my preorder already. Interest seems huge, though, so I can only hope I'll actually get one.
Wednesday, August 10, 2011
World Press Photo 2011 this Weekend
A quick reminder for anyone in Osaka: the World Press Photo 2011 exhibition is this week, at Herbis in Umeda, until next Thursday. We'll be going this weekend. They show pretty much around the world, so check their website for schedule and locations.
This exhibition is a favourite of mine. Not all pictures are good, and some pictures can be disturbing — much like the news it covers — but it never fails to engage me. If you have the chance to catch it, do so.
This exhibition is a favourite of mine. Not all pictures are good, and some pictures can be disturbing — much like the news it covers — but it never fails to engage me. If you have the chance to catch it, do so.
Sunday, October 31, 2010
Vivitar Mariner
The Feeling Negative site has an ongoing traveling camera project: people send a camera to each other in turn, and every recipient takes a roll of film with it before sending it on. It's a fun idea, if somewhat slow as each stop takes a few weeks at least and the participants are spread out over the world.
The camera stopped by here in Osaka last month. I opened the very light cardboard box to find this:

The Vivitar Mariner. Fifty grams of plasticky 35mm goodness.
The Travelling Camera is a film project so I thought it fitting to take this shot with film too. I used the Pentax 67 with 90mm lens; it doesn't focus very closely so I've had to crop this quite a lot. I really should get a set of extension tubes. The film is Ektar 100, a recent negative film from Kodak with strong colors and very fine grain; the results are akin to slide film, but with much better dynamic range.
Last year I tried a Fuji single-use camera on a day-trip to Kobe. It was simple and dingy but a lot of fun to use. I thought about having a camera just like it but reusable, so you wouldn't have to send it off for development just to change film. The Vivitar Mariner is exactly that camera. I'm not the only one who thinks it's a good idea, apparently, as prices for a used one - a used low-quality 35mm film camera, note - can reach 100 US dollars or more, though more normal prices seem to be around 15-30 Euro.

When I step out on my way to work the morning rush is already underway, and a fair a of office workers are bustling to reach the office early.
The resolution and contrast isn't exactly jumping off the page here. Compare to the medium-format shot above; cameras and lenses, and formats, really do matter a lot.
The complete Mariner has a water-proof enclosure - our one doesn't have it any more - but apart from that this is remarkably similar to the Fuji camera. There's no settable aperture or shutter speeds, and the cheap plastic lens is set at a fixed focus distance of a couple of meters. The body is a very lightweight plastic construction that doesn't exactly inspire confidence but is up to the task of keeping the film in and the light out.

Delivery trucks are still parked at the depot, waiting for the morning shift to get going.
The aperture and speed of the camera is about perfect for open shade like this when used with 400-speed film.
With a 400-speed film you get plenty of light for daylight shots. I would say it's even a little too bright, and if you want to use this on bright summer days you would probably want to try a 100-speed film instead. Of course, it's made for underwater use where the extra light makes sense. There's a flash built-in that takes a 1.5v pen battery, but I didn't try it so I have no idea what the results are like; my guess is that it's not much use beyond a meter or two.

Tosabori canal, Minami Senba, Osaka. On my way to work with just a tiny detour.
The lens is really wide, much wider than the viewfinder. On the positive side it's fun with a real wide-angle. Less positive is the distortion; the leftmost pillar here should really be straight, not bulging. Of course, the pillar wasn't even visible in the viewfinder. If you insist on decent image quality (and if you are, why are you using this camera?) you should probably crop to the viewfinder to avoid the worst distortions.
Using it is simple. You wind the film, open the front hatch and press the shutter. The film counter is only approximate, and the whole mechanism feels creaky and wobbly, but it works. The stated focal length is 28mm, but I wonder if that isn't a bit of a white lie. The finder may be 28mm, but the shot you get on film is a lot wider than what the finder was showing you. Really - I wouldn't be surprised if the focal length is closer to 21mm or something like that. A wider lens would make sense for underwater use of course. Forget using the viewfinder for precise composition, and you can stop worrying about not getting everything in your shot; even if you didn't even see it in the finder, chances are you still got it on film.

Sakaisuji Honmachi station, Osaka.
This kind of light really is at or beyond the outer limit for this camera. It's mostly amazing that I got anything at all; at f/9 and 1/125 shutter speed the light here is about five to six stops too low.
With a lens this wide, and with absolutely no controls to set, you can use this camera completely unattended. Just point it vaguely in the general direction of the stuff you want to shoot, and you'll get it. Give it to a child and they'll be bound to more or less get what they wanted, and if it breaks it's cheap enough that it's no real loss.

The train stops at Ishikiri station on the way to Kita Ikoma. This station always strikes me as a sunny, cheerful place for some reason. Should get off one day and take a look at the area.
You can see all the rest of the pictures from my morning commute in this set
The camera stopped by here in Osaka last month. I opened the very light cardboard box to find this:
The Vivitar Mariner. Fifty grams of plasticky 35mm goodness.
The Travelling Camera is a film project so I thought it fitting to take this shot with film too. I used the Pentax 67 with 90mm lens; it doesn't focus very closely so I've had to crop this quite a lot. I really should get a set of extension tubes. The film is Ektar 100, a recent negative film from Kodak with strong colors and very fine grain; the results are akin to slide film, but with much better dynamic range.
Last year I tried a Fuji single-use camera on a day-trip to Kobe. It was simple and dingy but a lot of fun to use. I thought about having a camera just like it but reusable, so you wouldn't have to send it off for development just to change film. The Vivitar Mariner is exactly that camera. I'm not the only one who thinks it's a good idea, apparently, as prices for a used one - a used low-quality 35mm film camera, note - can reach 100 US dollars or more, though more normal prices seem to be around 15-30 Euro.
When I step out on my way to work the morning rush is already underway, and a fair a of office workers are bustling to reach the office early.
The resolution and contrast isn't exactly jumping off the page here. Compare to the medium-format shot above; cameras and lenses, and formats, really do matter a lot.
The complete Mariner has a water-proof enclosure - our one doesn't have it any more - but apart from that this is remarkably similar to the Fuji camera. There's no settable aperture or shutter speeds, and the cheap plastic lens is set at a fixed focus distance of a couple of meters. The body is a very lightweight plastic construction that doesn't exactly inspire confidence but is up to the task of keeping the film in and the light out.
Delivery trucks are still parked at the depot, waiting for the morning shift to get going.
The aperture and speed of the camera is about perfect for open shade like this when used with 400-speed film.
With a 400-speed film you get plenty of light for daylight shots. I would say it's even a little too bright, and if you want to use this on bright summer days you would probably want to try a 100-speed film instead. Of course, it's made for underwater use where the extra light makes sense. There's a flash built-in that takes a 1.5v pen battery, but I didn't try it so I have no idea what the results are like; my guess is that it's not much use beyond a meter or two.
Tosabori canal, Minami Senba, Osaka. On my way to work with just a tiny detour.
The lens is really wide, much wider than the viewfinder. On the positive side it's fun with a real wide-angle. Less positive is the distortion; the leftmost pillar here should really be straight, not bulging. Of course, the pillar wasn't even visible in the viewfinder. If you insist on decent image quality (and if you are, why are you using this camera?) you should probably crop to the viewfinder to avoid the worst distortions.
Using it is simple. You wind the film, open the front hatch and press the shutter. The film counter is only approximate, and the whole mechanism feels creaky and wobbly, but it works. The stated focal length is 28mm, but I wonder if that isn't a bit of a white lie. The finder may be 28mm, but the shot you get on film is a lot wider than what the finder was showing you. Really - I wouldn't be surprised if the focal length is closer to 21mm or something like that. A wider lens would make sense for underwater use of course. Forget using the viewfinder for precise composition, and you can stop worrying about not getting everything in your shot; even if you didn't even see it in the finder, chances are you still got it on film.
Sakaisuji Honmachi station, Osaka.
This kind of light really is at or beyond the outer limit for this camera. It's mostly amazing that I got anything at all; at f/9 and 1/125 shutter speed the light here is about five to six stops too low.
With a lens this wide, and with absolutely no controls to set, you can use this camera completely unattended. Just point it vaguely in the general direction of the stuff you want to shoot, and you'll get it. Give it to a child and they'll be bound to more or less get what they wanted, and if it breaks it's cheap enough that it's no real loss.
The train stops at Ishikiri station on the way to Kita Ikoma. This station always strikes me as a sunny, cheerful place for some reason. Should get off one day and take a look at the area.
You can see all the rest of the pictures from my morning commute in this set
Thursday, October 21, 2010
Paris Aftermath: Cameras
I used three cameras while in France. I brought the Yashica Mat and my Xperia smartphone, and Ritsuko brought her Canon Demi, which I borrowed when she wasn't using it. The idea was, I'd use the Yashica for "real" pictures and the phone for throwaway snapshots.
The Yashica Mat is a consumer-grade medium-format TLR from the early 1980's. It's compact and light - good for travel - and I have taken it on trips a number of times. This this time I wish I had brought a different camera, though. First, it was always a fairly inexpensive camera so the lens is not the greatest one out there. It's prone to flare and distortion, so you'll want to avoid any direct light sources, having anything important near a corner of the image, or open the aperture beyond f/6.7 or so.

Kansai Airport departure hall. A large, airy atrium, like a huge greenhouse. I used Ilford HP5+ at iso 800 for this trip. This film, at this speed, gives a pleasing contrast without getting too grainy. As I need to stop down this lens quite a bit the speed helps a lot, and the relatively low resolution of this film is no problem since the lens isn't very high resolution either. Anyway, with this film and camera I get 20mp or so, more than enough for me.

Charles de Gaulle departure hall. Illustrates the design difference to Kansai airport quite nicely. CdG is all curvy tunnels, like an enormous digestive system ingesting passengers in one end and emitting airplanes out the other after extracting as much money as possible along the way. It's cool but I like Kansai better.
Also, the build quality of the Mat is not the greatest. One reason the camera is so light is because parts of the mechanism is made of plastic rather than metal. The film advance started to lock up intermittently last winter, and it's getting more frequent. During the Paris trip, it locked up about once every other roll. So far it's always unjammed when I jiggle and rattle the crank, then fire the shutter with the lens covered, but sooner or later it is going to seize up permanently. The frame spacing on the roll is also getting more and more erratic, with some frames almost bumping into each other. It seems the entire film winder mechanism is starting to wear out, and rebuilding it will probably be more expensive than the camera is worth.
This time I also wish I had brought a real tripod on the trip; I've lost several potential low-light images simply due to camera shake. Perhaps I should have brought the Pentax 67. Sure, it's a pain to carry in a backpack all day, but the chance of photographing in the museum would have been worth it alone. Ideally I should have some camera with the image quality of the Pentax, but fixed lens and easy to bring on trips.
This may sound like I'm trying to excuse a future camera purchase, and you may well be completely correct. I'm idly evaluating possible cameras right now, and may get a replacement travel camera next year or so.

Quartier Latin. Fuji PN400N color film. And yes, the film does make a difference. The color rendering, the grain, the amount of detail you capture all change quite a lot with the film you use. PN400 is comparatively expensive, but really - I only shoot enough film in a month to pay for a lunch and a beer at the most. I'd rather get better images than save a couple hundred yen on film.
The second camera is my Xperia X10. It's an Android smartphone by Sony Ericsson, and noted for having a not-horrible camera; that's one of the reasons I chose it. It's nominally 8mp, but as with any camera this size you can pretty much ignore the stated resolution. Just treat is as having around 2mp - you're not recording any more detail than that. The dynamic range is pretty low so you'll tend to have parts blown out or blocked up. Unfortunately the noise reduction is too heavy-handed and not adjustable, so everything takes on a too-smooth plastic appearance. Images from this camera actually improve when you add a bit of noise afterwards. If there's any one thing I wish for it's being able to set the level of noise removal myself.
But the images really are useful. For this kind of blog posts they're sufficient, if not exactly great. Small prints will look decent. In low light or scaled up the images start falling apart but that's asking a lot of such a tiny camera unit. I don't expect it to perform as well as a dedicated camera, and it does well enough in many cases.

Lunch at the Clos Luce. You can see how all detail is sort of smeared out, giving it a watercolor appearance. If S-E would only allow us to reduce the amount of noise removal this image could improve a lot. But it still looks much better than my earlier cellphone camera, and I would say it's close enough to be usable for a blog like this.

Manga cafe in Paris. When it gets dark, image quality suffers of course. But if my aim was simply to show that yes, there are manga cafes in Paris, then this shot would be more than enough.
The Canon Demi is a half-frame 35mm film camera. "Half-frame" means it records two vertical half-sized images in the same area normally used for one horizontal 35mm film frame. These cameras were popular in the 1960's and 70's, when color film became wide-spread. It was expensive to buy and develop color film at the time, so cramming two images in place of one was a way to economize. They may have been born from a sense of thrift, but some of them are still high quality cameras. The Olympus Pen F, for instance, had a lens mount instead of a fixed lens, and there were a number of high-quality lenses available for it. That one is still fairly popular, and used bodies and lenses can sell for quite respectable amounts of money.
We've been sort of led to believe that digital is leaps and bounds ahead of film, and in many ways it is true. Higher-end digital cameras sport high resolution, high-quality lenses and low-light sensitivity beyond anything normal film is capable of. But of course those are fairly big, expensive cameras, and most people use small compacts with tiny sensors and much less performance. The Canon Demi - a compact camera with a small film format - is better compared to them rather than a DSLR. And it does quite well in comparison. It's automatic, so it meters and sets shutter speed. You only need to control focus - it's scale focusing so you just guess the distance - and optionally the aperture. The meter is pretty accurate and the lens is decent, so the results are surprisingly good.

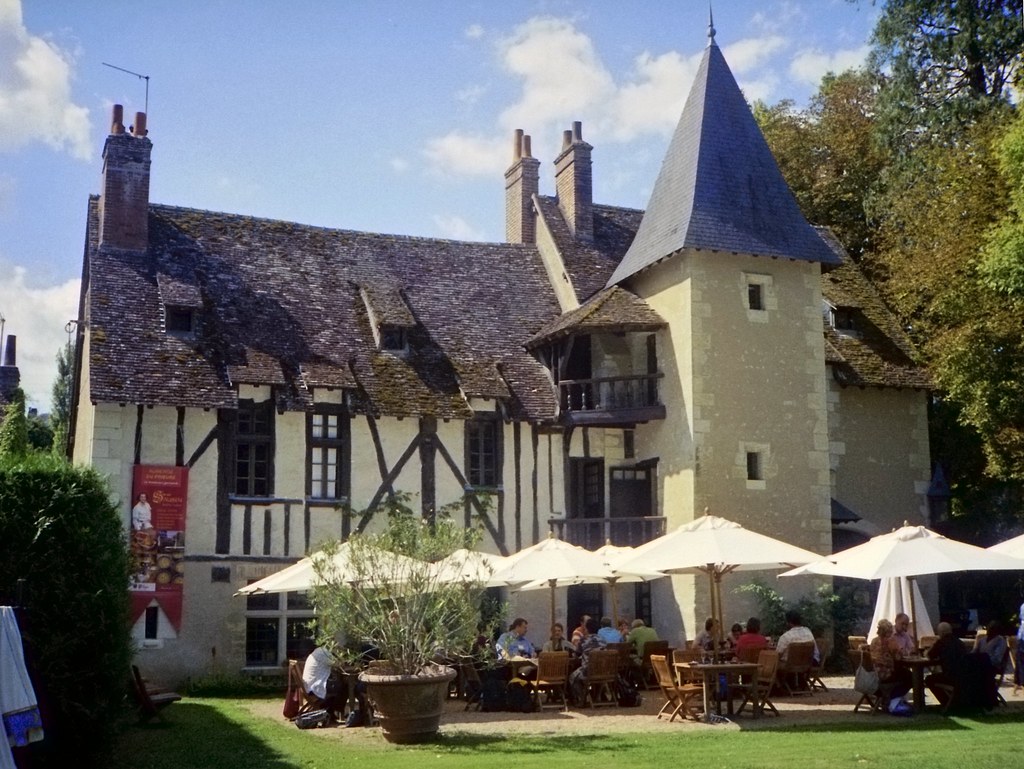
Lunchtime for the conference at the restaurant in the park of Clos Luce. Pretty good. It's film so there's plenty of dynamic range - I've increased contrast quite a bit from the original scan. Here's a larger version, and here's the size as scanned. There's a fair amount of detail in the image, and while it doesn't come anywhere near a serious camera it does about as well as a budget digital camera.
So, for travel I'd avoid the phone. It's really convenient for snapshots and it's always with me, but it's not acceptable as a single camera. It is a phone, not a camera, and it's just doesn't handle like a real one. You spend too much of your time staring at the screen controls rather than at your subject. The Yashica and the Canon are designed to be cameras from the ground up, with physical controls rather than menu items, laid out so they're easy to use without taking your eyes off the scene. The resulting image quality of the Canon Demi is also clearly better than the phone.
The Demi is fun, and it could work for travel if you're fine with lower-resolution, gritty street-life style images. You get 72 shots per roll, so you can snap away with abandon - treat it like a digital camera, really - without worrying about cost. But the lack of manual controls means you can't really use it at night, and the low resolution can make scenic images a bit disappointing.
Image quality-wise, the Yashica wins hands down. It's very pleasant to use; the controls are well laid out and I love the top-down view of the waist-level finder. It is a bit slow though, as you need to measure the light, set the shutter and aperture, use the loupe to focus, then frame the shot. It's the opposite of the Demi (or the Rollei 35) - great for contemplative shots, but too slow for fast-moving events. Still, it's the travel camera of choice for me.
The Yashica Mat is a consumer-grade medium-format TLR from the early 1980's. It's compact and light - good for travel - and I have taken it on trips a number of times. This this time I wish I had brought a different camera, though. First, it was always a fairly inexpensive camera so the lens is not the greatest one out there. It's prone to flare and distortion, so you'll want to avoid any direct light sources, having anything important near a corner of the image, or open the aperture beyond f/6.7 or so.
Kansai Airport departure hall. A large, airy atrium, like a huge greenhouse. I used Ilford HP5+ at iso 800 for this trip. This film, at this speed, gives a pleasing contrast without getting too grainy. As I need to stop down this lens quite a bit the speed helps a lot, and the relatively low resolution of this film is no problem since the lens isn't very high resolution either. Anyway, with this film and camera I get 20mp or so, more than enough for me.
Charles de Gaulle departure hall. Illustrates the design difference to Kansai airport quite nicely. CdG is all curvy tunnels, like an enormous digestive system ingesting passengers in one end and emitting airplanes out the other after extracting as much money as possible along the way. It's cool but I like Kansai better.
Also, the build quality of the Mat is not the greatest. One reason the camera is so light is because parts of the mechanism is made of plastic rather than metal. The film advance started to lock up intermittently last winter, and it's getting more frequent. During the Paris trip, it locked up about once every other roll. So far it's always unjammed when I jiggle and rattle the crank, then fire the shutter with the lens covered, but sooner or later it is going to seize up permanently. The frame spacing on the roll is also getting more and more erratic, with some frames almost bumping into each other. It seems the entire film winder mechanism is starting to wear out, and rebuilding it will probably be more expensive than the camera is worth.
This time I also wish I had brought a real tripod on the trip; I've lost several potential low-light images simply due to camera shake. Perhaps I should have brought the Pentax 67. Sure, it's a pain to carry in a backpack all day, but the chance of photographing in the museum would have been worth it alone. Ideally I should have some camera with the image quality of the Pentax, but fixed lens and easy to bring on trips.
This may sound like I'm trying to excuse a future camera purchase, and you may well be completely correct. I'm idly evaluating possible cameras right now, and may get a replacement travel camera next year or so.
Quartier Latin. Fuji PN400N color film. And yes, the film does make a difference. The color rendering, the grain, the amount of detail you capture all change quite a lot with the film you use. PN400 is comparatively expensive, but really - I only shoot enough film in a month to pay for a lunch and a beer at the most. I'd rather get better images than save a couple hundred yen on film.
The second camera is my Xperia X10. It's an Android smartphone by Sony Ericsson, and noted for having a not-horrible camera; that's one of the reasons I chose it. It's nominally 8mp, but as with any camera this size you can pretty much ignore the stated resolution. Just treat is as having around 2mp - you're not recording any more detail than that. The dynamic range is pretty low so you'll tend to have parts blown out or blocked up. Unfortunately the noise reduction is too heavy-handed and not adjustable, so everything takes on a too-smooth plastic appearance. Images from this camera actually improve when you add a bit of noise afterwards. If there's any one thing I wish for it's being able to set the level of noise removal myself.
But the images really are useful. For this kind of blog posts they're sufficient, if not exactly great. Small prints will look decent. In low light or scaled up the images start falling apart but that's asking a lot of such a tiny camera unit. I don't expect it to perform as well as a dedicated camera, and it does well enough in many cases.
Lunch at the Clos Luce. You can see how all detail is sort of smeared out, giving it a watercolor appearance. If S-E would only allow us to reduce the amount of noise removal this image could improve a lot. But it still looks much better than my earlier cellphone camera, and I would say it's close enough to be usable for a blog like this.
Manga cafe in Paris. When it gets dark, image quality suffers of course. But if my aim was simply to show that yes, there are manga cafes in Paris, then this shot would be more than enough.
The Canon Demi is a half-frame 35mm film camera. "Half-frame" means it records two vertical half-sized images in the same area normally used for one horizontal 35mm film frame. These cameras were popular in the 1960's and 70's, when color film became wide-spread. It was expensive to buy and develop color film at the time, so cramming two images in place of one was a way to economize. They may have been born from a sense of thrift, but some of them are still high quality cameras. The Olympus Pen F, for instance, had a lens mount instead of a fixed lens, and there were a number of high-quality lenses available for it. That one is still fairly popular, and used bodies and lenses can sell for quite respectable amounts of money.
We've been sort of led to believe that digital is leaps and bounds ahead of film, and in many ways it is true. Higher-end digital cameras sport high resolution, high-quality lenses and low-light sensitivity beyond anything normal film is capable of. But of course those are fairly big, expensive cameras, and most people use small compacts with tiny sensors and much less performance. The Canon Demi - a compact camera with a small film format - is better compared to them rather than a DSLR. And it does quite well in comparison. It's automatic, so it meters and sets shutter speed. You only need to control focus - it's scale focusing so you just guess the distance - and optionally the aperture. The meter is pretty accurate and the lens is decent, so the results are surprisingly good.
Lunchtime for the conference at the restaurant in the park of Clos Luce. Pretty good. It's film so there's plenty of dynamic range - I've increased contrast quite a bit from the original scan. Here's a larger version, and here's the size as scanned. There's a fair amount of detail in the image, and while it doesn't come anywhere near a serious camera it does about as well as a budget digital camera.
So, for travel I'd avoid the phone. It's really convenient for snapshots and it's always with me, but it's not acceptable as a single camera. It is a phone, not a camera, and it's just doesn't handle like a real one. You spend too much of your time staring at the screen controls rather than at your subject. The Yashica and the Canon are designed to be cameras from the ground up, with physical controls rather than menu items, laid out so they're easy to use without taking your eyes off the scene. The resulting image quality of the Canon Demi is also clearly better than the phone.
The Demi is fun, and it could work for travel if you're fine with lower-resolution, gritty street-life style images. You get 72 shots per roll, so you can snap away with abandon - treat it like a digital camera, really - without worrying about cost. But the lack of manual controls means you can't really use it at night, and the low resolution can make scenic images a bit disappointing.
Image quality-wise, the Yashica wins hands down. It's very pleasant to use; the controls are well laid out and I love the top-down view of the waist-level finder. It is a bit slow though, as you need to measure the light, set the shutter and aperture, use the loupe to focus, then frame the shot. It's the opposite of the Demi (or the Rollei 35) - great for contemplative shots, but too slow for fast-moving events. Still, it's the travel camera of choice for me.
Monday, September 13, 2010
Voltron
DPJ leadership election tomorrow. The heatwave may finally, really, actually be over soon (with "over" I mean temperatures around 30°, which is still way higher than it has any right to be). I'm working on the Paris pictures and posts, but as I'm discovering new and creative ways to be late with stuff I promise other people it will take a while.
Meanwhile, take a look at the Voltron Star Shooter on Feeling Negative. Two geeky hobbies - odd film formats, and robots - in beautiful harmony, topped with what must be the perfect name. Now, if they'd ever made a medium-format version of it...
Meanwhile, take a look at the Voltron Star Shooter on Feeling Negative. Two geeky hobbies - odd film formats, and robots - in beautiful harmony, topped with what must be the perfect name. Now, if they'd ever made a medium-format version of it...
Monday, September 6, 2010
Back - again, for real
The three day conference in Kobe is over. It was just on the heels of the Paris conference, so I've really had no time to sort out the material from Paris nor any time to prepare pictures or blog posts about anything. I commuted to Kobe each day, and the conference started early - morning sessions from 8:30 - so I've had the joy of getting up at half past five every morning while shrugging off jetlag and suffering through a cold I brought back. Not much energy left for anything else1.
I got some free time yesterday, so I finally developed the rolls I've shot in Paris. My fixer2 was apparently used up, but my head was still mushy enough that I just noted that the films seemed strangely foggy and opaque without making the connection until I'd already developed, dried and cut them all. I did get the point eventually, so I re-fixed, washed and dried them again, and now the negatives looks fine. Not a disaster, but it did waste an hour of my bedtime. Live and learn.
In fact, one reason I didn't get it was that I don't often test my fixer. You're supposed to take a small piece of exposed, undeveloped film and see how long it takes for it to clear. If it takes more than a couple of minutes, the fixer is exhausted and it's time to mix another batch. If you develop 35mm film you always get a good-sized piece of undeveloped film leader left that you can use. But with 120-format film you don't get any extra bits to use. Now I'm thinking I should use one roll of 35mm BW film as "fix tester", and just cut off slices to test it every now and then. You only need a thin slice, so one roll would last almost forever.
---
I got some free time yesterday, so I finally developed the rolls I've shot in Paris. My fixer2 was apparently used up, but my head was still mushy enough that I just noted that the films seemed strangely foggy and opaque without making the connection until I'd already developed, dried and cut them all. I did get the point eventually, so I re-fixed, washed and dried them again, and now the negatives looks fine. Not a disaster, but it did waste an hour of my bedtime. Live and learn.
In fact, one reason I didn't get it was that I don't often test my fixer. You're supposed to take a small piece of exposed, undeveloped film and see how long it takes for it to clear. If it takes more than a couple of minutes, the fixer is exhausted and it's time to mix another batch. If you develop 35mm film you always get a good-sized piece of undeveloped film leader left that you can use. But with 120-format film you don't get any extra bits to use. Now I'm thinking I should use one roll of 35mm BW film as "fix tester", and just cut off slices to test it every now and then. You only need a thin slice, so one roll would last almost forever.
---
#1 Cue the worlds tiniest violin playing the worlds saddest song.
#2 Film is covered with a light-sensitive silver salt. Light changes the crystal structure of the salt, and the developer converts those changed crystals to pure silver (which looks black). The fixer dissolves the remaining, unexposed, salts afterwards, leaving just the pure silver. If you don't get it all off, the remaining salts will turn a murky dark gray when exposed to light. It's not permanent (not in a short time frame) so you can re-fix the negatives, but it's a hassle and you risk scratching and damaging the negatives.
Thursday, July 29, 2010
Delta 100
I bought a roll of Ilford Delta 100 a couple of months ago, and shot it two weeks ago as we went to Akashi. The results were great - really great; I may have found my new favourite film.
My standard BW film is HP5, an iso 400 film that I often use at 800. Underexposed one stop like that it gives me fairly coarse grain and fairly low detail. Not that the lack of detail matters all that much; in medium format it still gives me more fine detail than my digital SLR, and plenty more than I need. I like the tonality, and at iso 800 there's enough speed to use it handheld in almost any situation.
Up until now, my normal 100-speed black and white film has been Fuji Acros. It has very fine grain and high resolution, but it tends to look flat, grey and washed out. When it's good it's really good (example). But when it's bad it's hopeless (example). I've shot several rolls of it, but I still don't have a handle on how to reliably avoid those flat, lifeless results.
Delta 100 really seems completely different. It has fine grain and resolution, just like Acros, but it has a much more pleasing contrast right from the start. The overall tonality is smooth and restful, and not at all flat. At the same time there's a sense of sharpness or "bite" to it that other films I've tried have lacked.

Here's four unedited shots with Delta 100, developed in D-76. The top two - an outdoor scene and an indoor one - are properly exposed. The bottom exposures are overexposed and underexposed respectively. I've set the black and white point, but they're otherwise unprocessed.
You can see the finished images in the previous post here.
The good: You get pleasant, clear images right out of the box. I shot this roll at iso 100, then developed it using D-76 (ND-76, actually) mixed 1:1 for 11 minutes; that's straight from the instructions. Scan the images with no brightness or gamma adjustment, set the black and white point (that is, make the darkest points black and the brightest points white) and you get results like above. No other film I've tried has given me something as pleasant with so little effort. You can see the finished versions in my previous post about Akashi here. Note how little I've had to edit them; I mainly just increased global contrast a bit and adjusted the brightness as needed. Sharpen a bit at the end. No heroics, no noise or grain reduction and no tricks with local contrast or anything.

Here's a sharpened crop of the planetarium from the original size image. The film holds a lot of detail, and the grain is hardly visible. The full image is 60Mp, but there's obviously not that much detail there. The scanner limits resolution to 30-35Mp or so; both the film and the lens is capable of more. As it is, if you see this on a normal monitor the whole image would be around 2 meters wide. Image resolution just isn't an issue for most of us any longer.
The bad: The downside of this clarity is that the film becomes fairly sensitive to exposure. The toe (the dark end of exposure) and the shoulder (the bright end) both seem fairly pronounced. So if you underexpose, most of the image will end up in the toe and become quite dark and moody. If you overexpose, much of the image will become washed-out.
This is exactly what's happened to the two bottom images in the unedited shots above. The octopus image is underexposed by about a stop, and the street scene is overexposed by perhaps two stops or so. Many films wouldn't bat an eye about such a small difference, but with this film it clearly matters. Good if you want this look on purpose of course, but if you don't it clearly pays to use a real light meter and make sure your exposure is right. I haven't tried playing with the processing, but I suspect the film is similarly sensitive to developing time and temperature as well.
Another negative is that, well, it is an iso 100 film. This is fairly slow. Anything less than daylight will need fairly fast lenses or a tripod. And if you use filters, not even sunlight may be enough - the planetarium above was shot with a red filter, and the slow shutter speed and an unstable vantage point (I was leaning halfway through a hedge) was enough to cause some real motion blur in the image.

A long exposure shot - five seconds or so - of a Kobe backstreet. That's the good thing with lugging a tripod around: long exposures become as easy to do as short ones, and you end up with much better detail and clarity than if you use a high-speed film or high-iso setting on your digital camera. Serious, professional people - people who know what they're talking about - often say that a tripod is the single most effective thing you can get for improving your images. I believe they're right.
I really like what I've seen of the film here, and I suspect it'd be great for doing landscapes and scenic shots, or long-exposure nighttime shots. You want lots of detail and your subject isn't going to be moving about a lot. I'm not sure how good this would be for street photography. At dusk or away from daylight people moving about will start to blur, and you can forget using this indoors without a tripod.
Delta 100 seems a very good fit for a high-quality medium-format (or large format I guess - I'd love to find out) camera like the Pentax 67. The optics can make good use of the high resolution and the lenses are fast enough to let you use the film handheld in daylight. For low light you need a tripod, but that's something you often use with this kind of camera anyway. It should be a good choice for a high-quality 35mm camera, for much the same reasons, and the fine grain and high resolution should help get the most out of the small film format. I should try it on the Minolta I have, or on the Canon SLR; a Leica or some other M-mount rangefinder should work very well too.
I wouldn't waste this film on cameras like the Voigtländer Bessa or Rollei 35. They're scale focusing cameras and best shot stopped down a fair bit. They'll usually be a bit out of focus, and the Voigtländer lens especially isn't all that sharp or contrasty. The high resolution of the film is wasted on them, and the low film speed is a real handicap as these cameras are best used handheld and stopped down to f/8 or less.
For street shooting and for old cameras with iffy optics I believe HP5 is a better choice. It's fast and it's easy to push with good results. But high-quality landscapes, daytime scenery or nighttime tripod shots with high-quality cameras is where I think Delta 100 should shine. We'll see if I still agree after I've used it for a while.
My standard BW film is HP5, an iso 400 film that I often use at 800. Underexposed one stop like that it gives me fairly coarse grain and fairly low detail. Not that the lack of detail matters all that much; in medium format it still gives me more fine detail than my digital SLR, and plenty more than I need. I like the tonality, and at iso 800 there's enough speed to use it handheld in almost any situation.
Up until now, my normal 100-speed black and white film has been Fuji Acros. It has very fine grain and high resolution, but it tends to look flat, grey and washed out. When it's good it's really good (example). But when it's bad it's hopeless (example). I've shot several rolls of it, but I still don't have a handle on how to reliably avoid those flat, lifeless results.
Delta 100 really seems completely different. It has fine grain and resolution, just like Acros, but it has a much more pleasing contrast right from the start. The overall tonality is smooth and restful, and not at all flat. At the same time there's a sense of sharpness or "bite" to it that other films I've tried have lacked.
Here's four unedited shots with Delta 100, developed in D-76. The top two - an outdoor scene and an indoor one - are properly exposed. The bottom exposures are overexposed and underexposed respectively. I've set the black and white point, but they're otherwise unprocessed.
You can see the finished images in the previous post here.
The good: You get pleasant, clear images right out of the box. I shot this roll at iso 100, then developed it using D-76 (ND-76, actually) mixed 1:1 for 11 minutes; that's straight from the instructions. Scan the images with no brightness or gamma adjustment, set the black and white point (that is, make the darkest points black and the brightest points white) and you get results like above. No other film I've tried has given me something as pleasant with so little effort. You can see the finished versions in my previous post about Akashi here. Note how little I've had to edit them; I mainly just increased global contrast a bit and adjusted the brightness as needed. Sharpen a bit at the end. No heroics, no noise or grain reduction and no tricks with local contrast or anything.
Here's a sharpened crop of the planetarium from the original size image. The film holds a lot of detail, and the grain is hardly visible. The full image is 60Mp, but there's obviously not that much detail there. The scanner limits resolution to 30-35Mp or so; both the film and the lens is capable of more. As it is, if you see this on a normal monitor the whole image would be around 2 meters wide. Image resolution just isn't an issue for most of us any longer.
The bad: The downside of this clarity is that the film becomes fairly sensitive to exposure. The toe (the dark end of exposure) and the shoulder (the bright end) both seem fairly pronounced. So if you underexpose, most of the image will end up in the toe and become quite dark and moody. If you overexpose, much of the image will become washed-out.
This is exactly what's happened to the two bottom images in the unedited shots above. The octopus image is underexposed by about a stop, and the street scene is overexposed by perhaps two stops or so. Many films wouldn't bat an eye about such a small difference, but with this film it clearly matters. Good if you want this look on purpose of course, but if you don't it clearly pays to use a real light meter and make sure your exposure is right. I haven't tried playing with the processing, but I suspect the film is similarly sensitive to developing time and temperature as well.
Another negative is that, well, it is an iso 100 film. This is fairly slow. Anything less than daylight will need fairly fast lenses or a tripod. And if you use filters, not even sunlight may be enough - the planetarium above was shot with a red filter, and the slow shutter speed and an unstable vantage point (I was leaning halfway through a hedge) was enough to cause some real motion blur in the image.
A long exposure shot - five seconds or so - of a Kobe backstreet. That's the good thing with lugging a tripod around: long exposures become as easy to do as short ones, and you end up with much better detail and clarity than if you use a high-speed film or high-iso setting on your digital camera. Serious, professional people - people who know what they're talking about - often say that a tripod is the single most effective thing you can get for improving your images. I believe they're right.
I really like what I've seen of the film here, and I suspect it'd be great for doing landscapes and scenic shots, or long-exposure nighttime shots. You want lots of detail and your subject isn't going to be moving about a lot. I'm not sure how good this would be for street photography. At dusk or away from daylight people moving about will start to blur, and you can forget using this indoors without a tripod.
Delta 100 seems a very good fit for a high-quality medium-format (or large format I guess - I'd love to find out) camera like the Pentax 67. The optics can make good use of the high resolution and the lenses are fast enough to let you use the film handheld in daylight. For low light you need a tripod, but that's something you often use with this kind of camera anyway. It should be a good choice for a high-quality 35mm camera, for much the same reasons, and the fine grain and high resolution should help get the most out of the small film format. I should try it on the Minolta I have, or on the Canon SLR; a Leica or some other M-mount rangefinder should work very well too.
I wouldn't waste this film on cameras like the Voigtländer Bessa or Rollei 35. They're scale focusing cameras and best shot stopped down a fair bit. They'll usually be a bit out of focus, and the Voigtländer lens especially isn't all that sharp or contrasty. The high resolution of the film is wasted on them, and the low film speed is a real handicap as these cameras are best used handheld and stopped down to f/8 or less.
For street shooting and for old cameras with iffy optics I believe HP5 is a better choice. It's fast and it's easy to push with good results. But high-quality landscapes, daytime scenery or nighttime tripod shots with high-quality cameras is where I think Delta 100 should shine. We'll see if I still agree after I've used it for a while.
Monday, July 5, 2010
Do It Right
While we're on the subject of checking things: Be careful when you load 35mm film, and check that the film really catches properly in the takeup spool. If it doesn't, nothing will happen when you try to wind the film. You're just winding empty air while the film sits in the canister. You can take pictures for weeks, only to end up with a completely blank roll at the end. Like this one:

A whole roll of nothing. Live and learn.
Oh well. Pictures are fleeting things anyway. Now I have a second chance at those shots I thought I took.
A whole roll of nothing. Live and learn.
Oh well. Pictures are fleeting things anyway. Now I have a second chance at those shots I thought I took.
Friday, March 12, 2010
Rollei 35
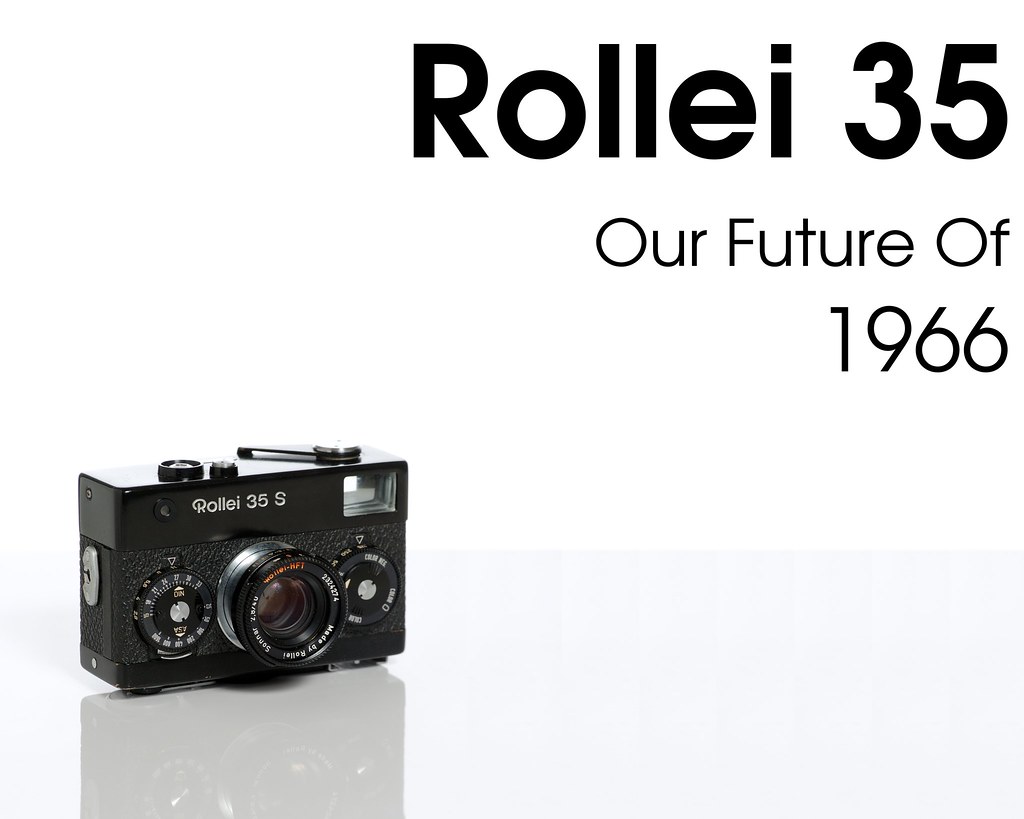
I wrote, oh, half a year ago about my experience with a disposable film camera. The Fuji camera was really small, light and fun to use. It had a cheap plastic lens, no way to focus and no way to adjust for the light but the results were still surprisingly good. I got the idea that I should try to find a small, manual film camera like that, only with a bit more flexibility and better build. An always-there camera I could keep in my coat pocket. I found this:

There's a lot of compact film cameras out there. You may think there's a lot of compact digital cameras to choose from today, but camera companies have been churning out compact cameras for as long as photography has existed; of course, what consitutes "compact" has changed over time. There's entire books cataloguing just compacts from a specific company, or from one era, or compacts with some technical feature in common. Most models aren't all that interesting, just cookie-cutter variations on the dominant designs of their era, and they've long since faded into obscurity. But some cameras do stand out.

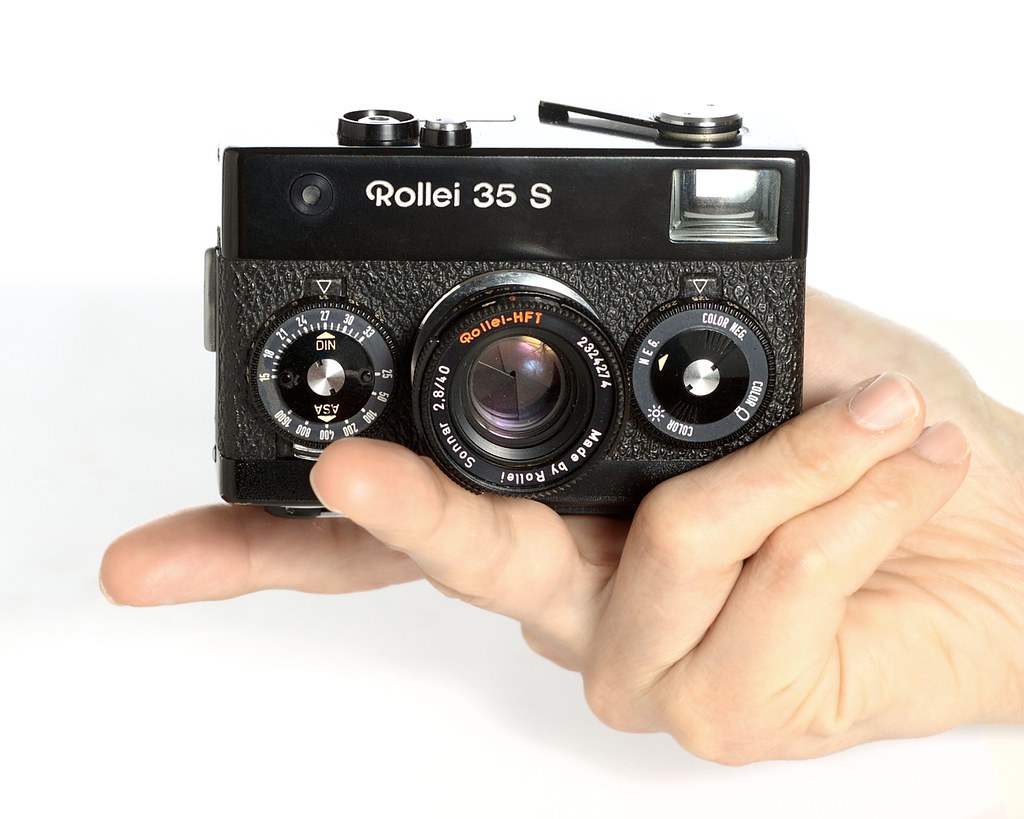
The Rollei 35 S. Pictures don't really convey just how small and compact this camera is.
The Rollei 35 appeared in 1966 and was the smallest 35mm camera ever at the time. It's still the smallest ever all-mechanical 35mm camera. As you can see above, it's quite literally built like a metal brick: a rectangular slab with controls that only barely stick out from the flat surfaces. The flat, circular knobs on the front set the aperture and shutter speed. The winding lever, lens lock and shutter button on the top, and hot shoe and rewind lever on the bottom are all almost flush with the surface. The lens retracts into the body when it's not being used. The small size and flat surfaces means you can even carry it comfortably in your front jeans pocket.

Rainy day in Wako city. This is the kind of shot that's difficult to get with a large camera. You have very little time, and the rain means you don't want to drop your umbrella and start messing about with a big DSLR, and get all wet, and probably miss the opportunity anyway.
Of course, this design has a few drawbacks. While small, the all-metal build is fairly heavy - it really feels like a small metal brick. And the flat rectangular design makes for some interesting ergonomics. The front wheels have small, hard-to-see markings along the edge (the front-facing labels are just there to help you remember the film you use). The film advance lever is on the left, rather than right - fine by me, but then, I'm left-handed. There's no grip or handle or place to keep your hands.
The hot shoe is on the bottom of the camera, right next to the tripod mount and the frame counter. You'll not be using a flash and a tripod at the same time. Or use a tripod and see how many frames you've shot. Or change the film while on a tripod. And a flash will either light your subject from below, for that spooky flashlight-under-your-chin look; or you hold the camera upside down and trigger the shot with your left little finger. But this is not a tripod or flash-kind of camera, so these are amusing oddities rather than real drawbacks.
The mechanics inside are a marvel of ingenuity, but they add to the quirkiness. The shutter mechanism is designed in two separate parts, one in the camera house, and one in the lens itself. The lens can only be folded in with the shutter cocked, and in fact the camera is designed to be stored with a wound-up shutter. My camera has probably been stored like that more or less constantly since it was manufactured in the 1970's, but the shutter still works fine at all speeds. As you need to wind the film to fold in the lens you can't just close it after taking the last frame as the film won't wind any further. You need to rewind the film right after the last shot; another small quirk.

Yebisu parade in Namba, Osaka. Grainy film, slow shutter speed and just wildly guessing the focus distance. Pictures don't need to be technically perfect to be good images.
This is a guess-focusing camera, like the old Voigtländer Bessa I have. No rangefinder of focusing screen in other words, just a scale on the lens telling you the distance. There's a battery driven light meter that is always turned on - you turn it "off" simply by covering the meter cell. It seems to work well, overall, but my camera has a slow current leak so the battery drains after a couple of weeks. No matter, as I always use an external meter anyhow.
A rectangular, odd film camera with fiddly collapsible lens, no focusing and strange control layout. Sounds horrible, I know, but it's a very pleasant camera to use in practice. First, this is not meant to be an all-in-one camera. It's not going to be used in a studio, it's not going to be used for huge, high-quality prints or slow, contemplative photography - there's better cameras for that. This camera is meant to slip into your pocket and simply be there whenever you feel like taking a quick snapshot of something. And in that role, it absolutely excels.

An old man is practicing outside his home in Nishitanabe, Osaka. On my way to my Japanese lesson and I had a bagful of books. Without a pocket camera I'd not have any way of getting this. And the film defects - the grain, the odd color balance - add to the image, I think.
The lens is a high-quality 40mm f/2.8. The focal length is fairly short, and you're not going to make huge prints from the camera anyway, so focusing is usually a non-problem. In daylight with a 400 iso film you can simply set the camera to f/11, set the distance to 4-5 meters or so and forget about it. Everything you need will be in focus. When it's dark you have to open up the lens so you'll need to start thinking about focus, but again, it's not hard. We're not bad at guessing distances, and we can quickly get better if we practice a bit. And getting focus right really only matters close up and with near-open aperture. If you shoot at around 1-1.5 meters at f/2.8 you'll better take two shots just in case. Any other time you'll most likely get it right without even trying.

Black and white is fun too, of course. But this camera came at the time color film was becoming a mass photographic medium, and at a time - the 1970's - when color exploded in media, in design and in fashion. This camera likes color film.
And despite the unforgiving shape and small size it really lies well in your hands. Everything is nearly flush with the body so you can easily cradle the whole camera in the hand without accidentally changing some setting or pressing something. The viewfinder is bright and clear and all the controls feel snappy and distinct. Loading the film is easy when you've done it once, and the small format means you can squeeze a few extra frames from the film; I get 27 or 28 shots on a 24-shot roll (the very first possible shot is just a little cut off).

Salaryman on his way home on the Tokyo-Osaka Shinkansen. This is about as bad as conditions will ever get: dim light that demands an open aperture and a slow shutter; flourescent lamps to mess up your color balance; fast-moving train shaking you and your subject; short focal distance and no time to steady yourself to catch that weary, resigned posture before he becomes self-concious about it and you lose the moment.
Using the Rollei 35 means guess-focusing, flare-prone (though good quality) lens, fast film, cheap scanner and - quite often - slow shutter speeds. And as the camera encourages a breezy the-devil-may-care attitude to using tripods or stable handholding, the resulting pictures aren't all that high resolution. The shots I normally get are, in practice, oh, 4-6 megapixels or so. Use a high-resolution film, put the camera on a tripod and measure the actual distance and you can probably get upwards of 10mp, and more than that with a high-quality scanner. But why would I? If I want high resolution I already have other cameras for that. And I enjoy the pictures I get all the more for their grain, slightly off color and motion blur.
In fact, apart from the weight this is very nearly exactly what I was looking for when I wrote about the reusable Fuji camera last year: a tiny, fun wide-angle point and shoot, but with better optics and some way to set focus, aperture and shutter speed. I got all that, and a camera that oozes precision engineering out of every pore (being a Rollei, it of course oozes it in a predictable, reliable, perfectly controlled manner).

Standing bar in Ikebukuro. For whatever reason, people seem much less self-concious about film cameras than digital ones. A digital camera is a nuisance, or even threatening. A film camera is amusing and a little quaint.
A few tips for use:
Would I use this as my main camera? Nope. It's too limited - though what it does do, it does well. Would I recommend it as a beginner's film camera? Umm, no. It's a bit too weird and unforgiving. But I can happily recommend it for those who like using film, who like street photography and who want a tiny camera to take along for those chance opportunities that keep showing up if only you look for them.

Kita Ikoma station, Nara.
There's a lot of compact film cameras out there. You may think there's a lot of compact digital cameras to choose from today, but camera companies have been churning out compact cameras for as long as photography has existed; of course, what consitutes "compact" has changed over time. There's entire books cataloguing just compacts from a specific company, or from one era, or compacts with some technical feature in common. Most models aren't all that interesting, just cookie-cutter variations on the dominant designs of their era, and they've long since faded into obscurity. But some cameras do stand out.
The Rollei 35 S. Pictures don't really convey just how small and compact this camera is.
The Rollei 35 appeared in 1966 and was the smallest 35mm camera ever at the time. It's still the smallest ever all-mechanical 35mm camera. As you can see above, it's quite literally built like a metal brick: a rectangular slab with controls that only barely stick out from the flat surfaces. The flat, circular knobs on the front set the aperture and shutter speed. The winding lever, lens lock and shutter button on the top, and hot shoe and rewind lever on the bottom are all almost flush with the surface. The lens retracts into the body when it's not being used. The small size and flat surfaces means you can even carry it comfortably in your front jeans pocket.
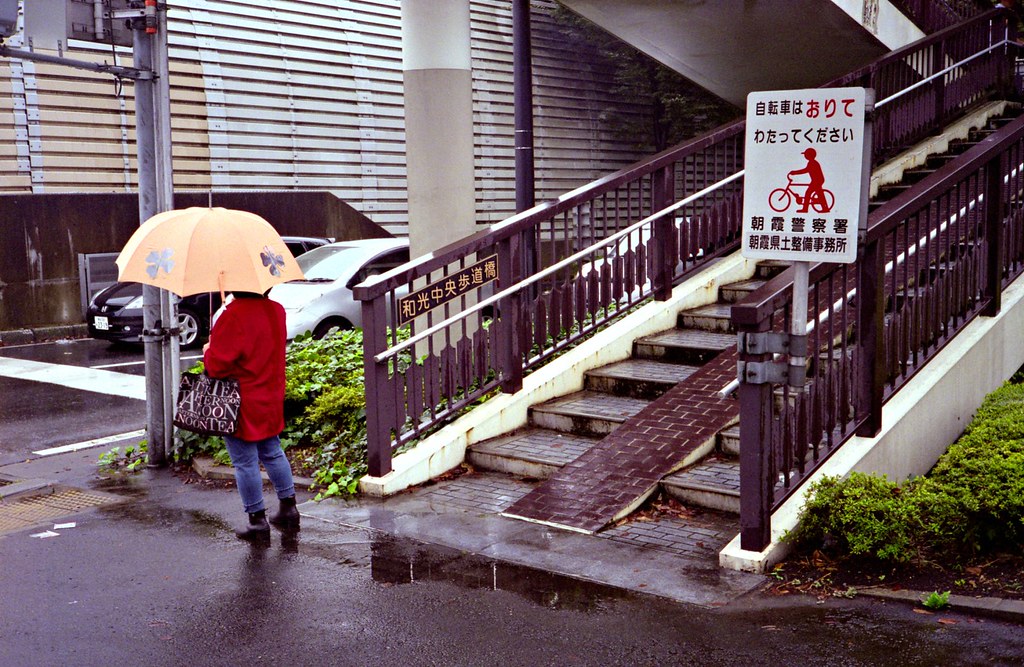
Rainy day in Wako city. This is the kind of shot that's difficult to get with a large camera. You have very little time, and the rain means you don't want to drop your umbrella and start messing about with a big DSLR, and get all wet, and probably miss the opportunity anyway.
Of course, this design has a few drawbacks. While small, the all-metal build is fairly heavy - it really feels like a small metal brick. And the flat rectangular design makes for some interesting ergonomics. The front wheels have small, hard-to-see markings along the edge (the front-facing labels are just there to help you remember the film you use). The film advance lever is on the left, rather than right - fine by me, but then, I'm left-handed. There's no grip or handle or place to keep your hands.
The hot shoe is on the bottom of the camera, right next to the tripod mount and the frame counter. You'll not be using a flash and a tripod at the same time. Or use a tripod and see how many frames you've shot. Or change the film while on a tripod. And a flash will either light your subject from below, for that spooky flashlight-under-your-chin look; or you hold the camera upside down and trigger the shot with your left little finger. But this is not a tripod or flash-kind of camera, so these are amusing oddities rather than real drawbacks.
The mechanics inside are a marvel of ingenuity, but they add to the quirkiness. The shutter mechanism is designed in two separate parts, one in the camera house, and one in the lens itself. The lens can only be folded in with the shutter cocked, and in fact the camera is designed to be stored with a wound-up shutter. My camera has probably been stored like that more or less constantly since it was manufactured in the 1970's, but the shutter still works fine at all speeds. As you need to wind the film to fold in the lens you can't just close it after taking the last frame as the film won't wind any further. You need to rewind the film right after the last shot; another small quirk.
Yebisu parade in Namba, Osaka. Grainy film, slow shutter speed and just wildly guessing the focus distance. Pictures don't need to be technically perfect to be good images.
This is a guess-focusing camera, like the old Voigtländer Bessa I have. No rangefinder of focusing screen in other words, just a scale on the lens telling you the distance. There's a battery driven light meter that is always turned on - you turn it "off" simply by covering the meter cell. It seems to work well, overall, but my camera has a slow current leak so the battery drains after a couple of weeks. No matter, as I always use an external meter anyhow.
A rectangular, odd film camera with fiddly collapsible lens, no focusing and strange control layout. Sounds horrible, I know, but it's a very pleasant camera to use in practice. First, this is not meant to be an all-in-one camera. It's not going to be used in a studio, it's not going to be used for huge, high-quality prints or slow, contemplative photography - there's better cameras for that. This camera is meant to slip into your pocket and simply be there whenever you feel like taking a quick snapshot of something. And in that role, it absolutely excels.
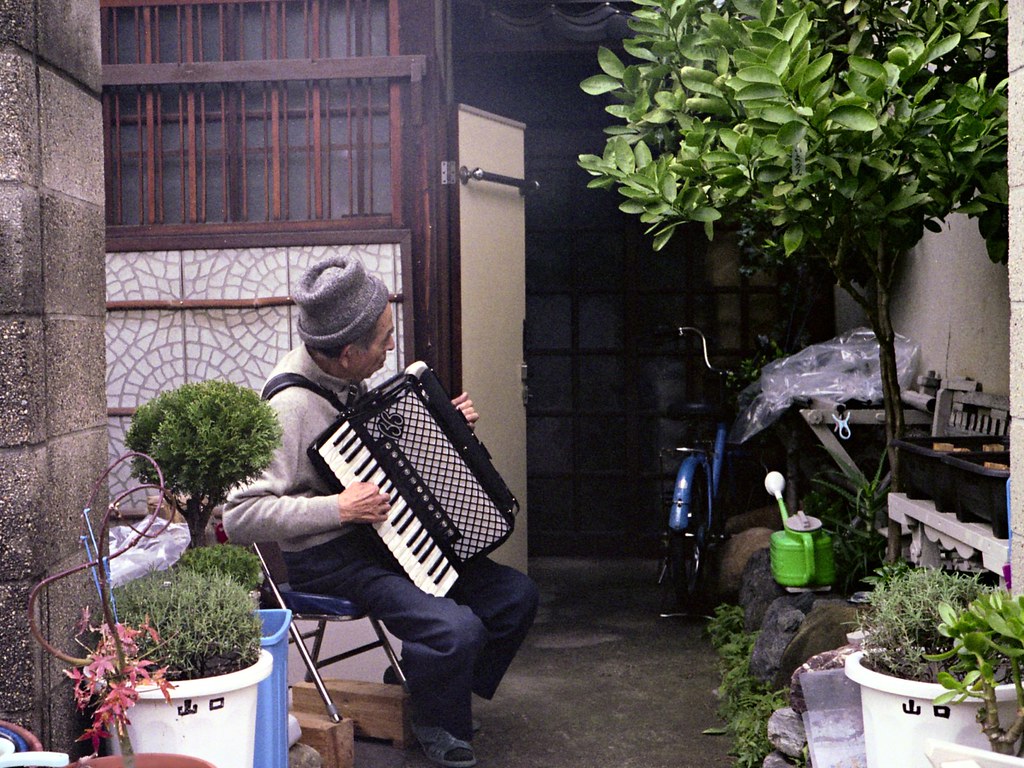
An old man is practicing outside his home in Nishitanabe, Osaka. On my way to my Japanese lesson and I had a bagful of books. Without a pocket camera I'd not have any way of getting this. And the film defects - the grain, the odd color balance - add to the image, I think.
The lens is a high-quality 40mm f/2.8. The focal length is fairly short, and you're not going to make huge prints from the camera anyway, so focusing is usually a non-problem. In daylight with a 400 iso film you can simply set the camera to f/11, set the distance to 4-5 meters or so and forget about it. Everything you need will be in focus. When it's dark you have to open up the lens so you'll need to start thinking about focus, but again, it's not hard. We're not bad at guessing distances, and we can quickly get better if we practice a bit. And getting focus right really only matters close up and with near-open aperture. If you shoot at around 1-1.5 meters at f/2.8 you'll better take two shots just in case. Any other time you'll most likely get it right without even trying.
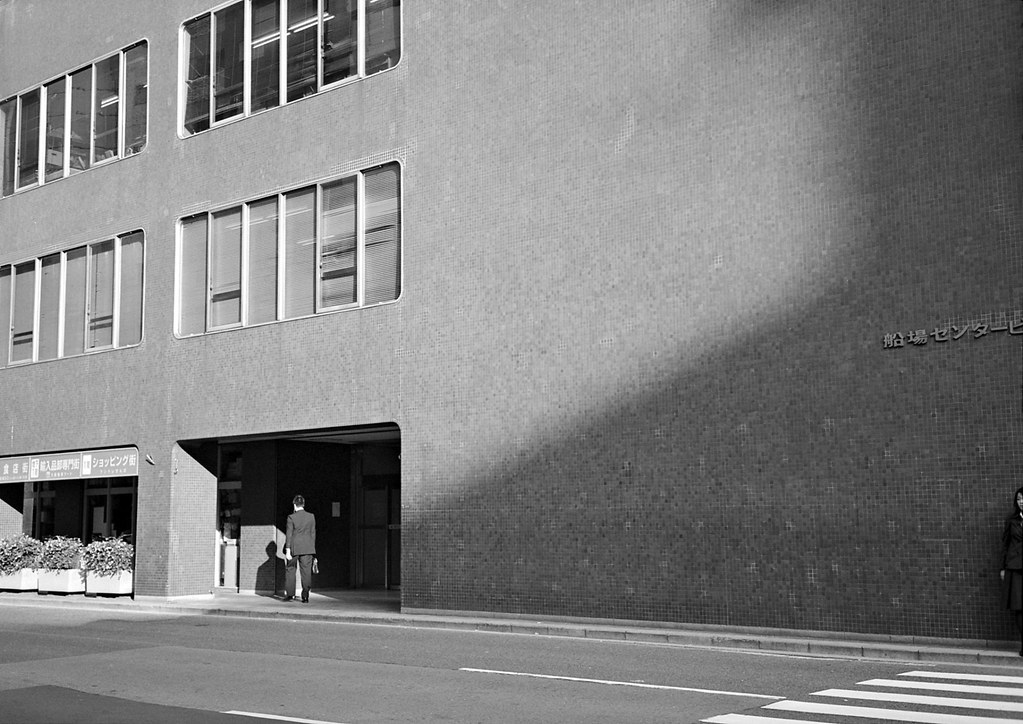
Black and white is fun too, of course. But this camera came at the time color film was becoming a mass photographic medium, and at a time - the 1970's - when color exploded in media, in design and in fashion. This camera likes color film.
And despite the unforgiving shape and small size it really lies well in your hands. Everything is nearly flush with the body so you can easily cradle the whole camera in the hand without accidentally changing some setting or pressing something. The viewfinder is bright and clear and all the controls feel snappy and distinct. Loading the film is easy when you've done it once, and the small format means you can squeeze a few extra frames from the film; I get 27 or 28 shots on a 24-shot roll (the very first possible shot is just a little cut off).
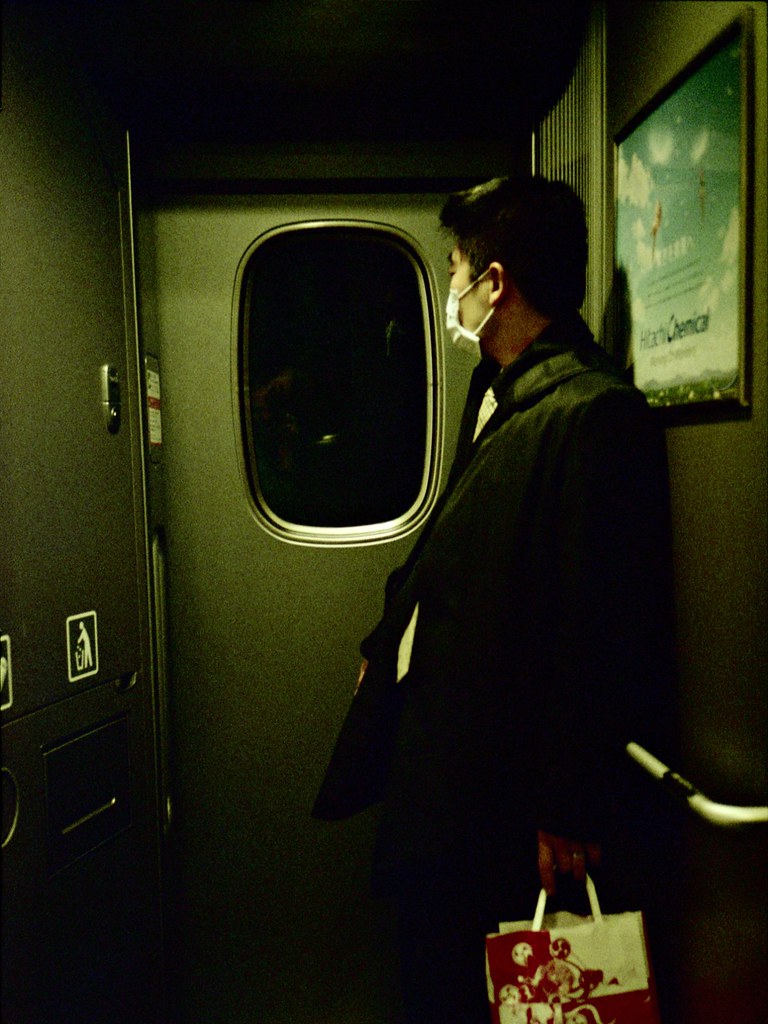
Salaryman on his way home on the Tokyo-Osaka Shinkansen. This is about as bad as conditions will ever get: dim light that demands an open aperture and a slow shutter; flourescent lamps to mess up your color balance; fast-moving train shaking you and your subject; short focal distance and no time to steady yourself to catch that weary, resigned posture before he becomes self-concious about it and you lose the moment.
Using the Rollei 35 means guess-focusing, flare-prone (though good quality) lens, fast film, cheap scanner and - quite often - slow shutter speeds. And as the camera encourages a breezy the-devil-may-care attitude to using tripods or stable handholding, the resulting pictures aren't all that high resolution. The shots I normally get are, in practice, oh, 4-6 megapixels or so. Use a high-resolution film, put the camera on a tripod and measure the actual distance and you can probably get upwards of 10mp, and more than that with a high-quality scanner. But why would I? If I want high resolution I already have other cameras for that. And I enjoy the pictures I get all the more for their grain, slightly off color and motion blur.
In fact, apart from the weight this is very nearly exactly what I was looking for when I wrote about the reusable Fuji camera last year: a tiny, fun wide-angle point and shoot, but with better optics and some way to set focus, aperture and shutter speed. I got all that, and a camera that oozes precision engineering out of every pore (being a Rollei, it of course oozes it in a predictable, reliable, perfectly controlled manner).
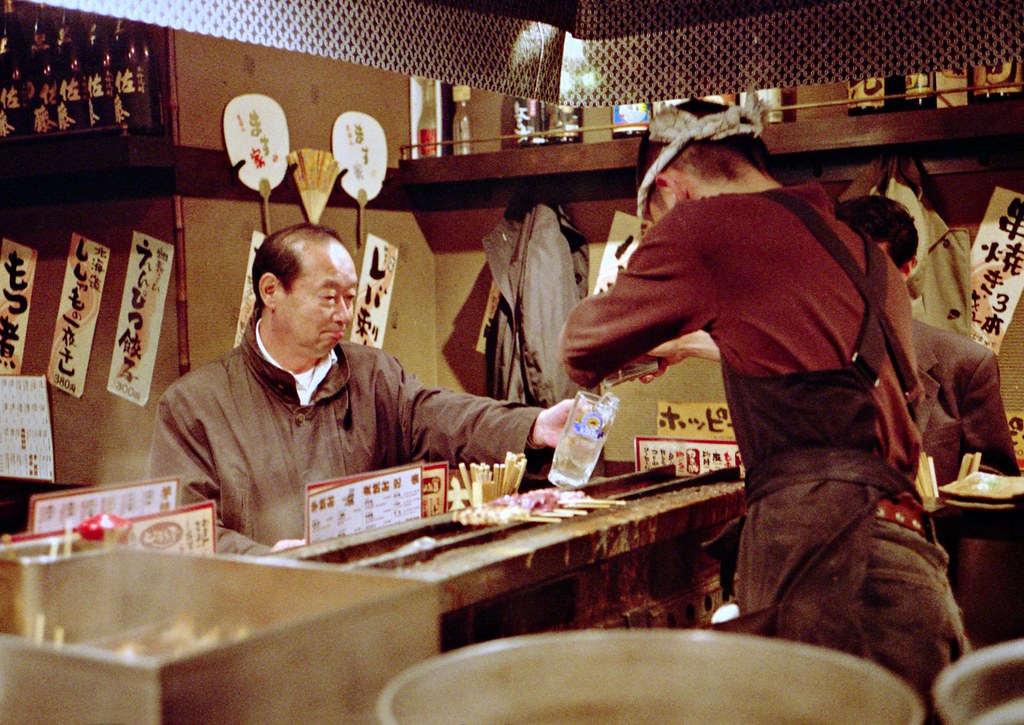
Standing bar in Ikebukuro. For whatever reason, people seem much less self-concious about film cameras than digital ones. A digital camera is a nuisance, or even threatening. A film camera is amusing and a little quaint.
A few tips for use:
- To wind the film you close the cover, pull out the lens and shoot-wind-shoot-wind... until you get to frame '1'. However, in practice the first "real" frame is two frames before '1', so you may want to make use of that.
- Remember, the lens needs to be pulled out, then twisted to lock. Nothing happens if you forget this. And you can't unlock and retract the lens until you wind the film. If you shot the last frame you can't wind the film any longer, so you need to wind back the roll before you can close the camera.
- Make sure you don't hold your finger on the shutter as you wind the film; it can accidentally disengage the winding mechanism, so you end up taking a double exposure. Unfortunately, this doesn't seem to be reliably repeatable (and I'm not sure it's good for the mechanism) so you can't really use it on purpose either.
- The lens is prone to flare. A hood is a good idea. I got a Rollei collapsible rubber hood with my camera that fits perfectly.
- The shutter button is not a trigger. It actually holds the shutter open, while the shutter timer is a trigger that closes the shutter again. So if you release the shutter button before the exposure is done you'll close the shutter too early and get an underexposed picture. Keep the finer on the shutter until you're done, in other words.
- There's no visual indication when you have rewound the roll. Make sure you've really rewound the whle thing before you open the camera. I lost part of my first roll when I opened it halfway.
Would I use this as my main camera? Nope. It's too limited - though what it does do, it does well. Would I recommend it as a beginner's film camera? Umm, no. It's a bit too weird and unforgiving. But I can happily recommend it for those who like using film, who like street photography and who want a tiny camera to take along for those chance opportunities that keep showing up if only you look for them.
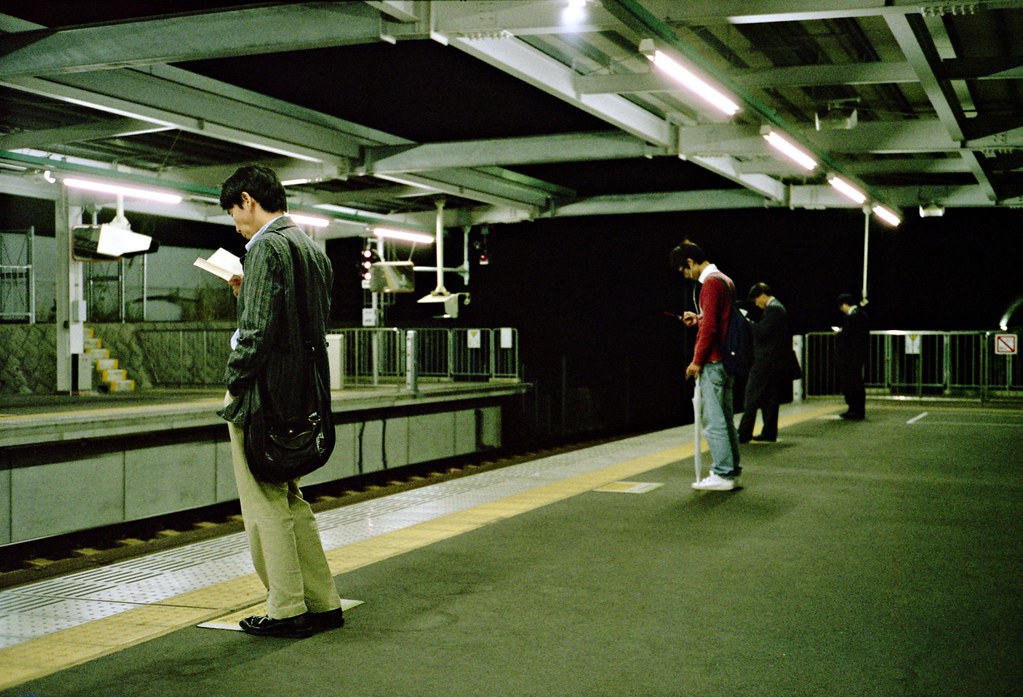
Kita Ikoma station, Nara.
Sunday, January 3, 2010
Favourite Pictures of 2009
My favourite picture each month, chosen for the image itself or for the subject matter. Also check out MTC:s review with his more scenic monthly take of the past year.

January. ATR research project final presentation at Miraikan hall in Tokyo. Mike Mistry, here, was one of the doctoral students at ATR. The following month I start on a new project at Kyoto university and NAIST.

February. Ritsuko gives me these insanely cool tools made of chocolate. I spend a happy Sunday afternoon trying to shoot them, with this as the result.

March. I go playing with the Handy Box and try multiple exposures for low-light shooting. The results range from "interesting" to really good. This is the corner of Nagahori and Sakaisuji.

April. Difficult month - I must have half a dozen real favourite pictures here. This is a rainy afternoon in Shinsaibashi, when the city is at its most city-like.

May. It's Golden Week, the weather is getting hot and most people are off work. This man is obviously not, though. I catch him on his lunch break and he happily adopts a suitably miserable expression when I ask to take his picture.

June. Swine flu has broken out in the Kobe-Osaka area and people are worried about infection. Nankinmachi, the Kobe Chinatown, sees a huge drop in visitors as companies and schools cancel trips. Most stores are still open and gradually the visitor numbers edge back to normal again.

July. Another month of favourites. Here's a couple of nightclub hosts and their dog loitering in the shade outside their apartment building in Shimanouchi.

August. The owner of Omiya kushikatsu restaurant in Shinsaibashi. This kushikatsu place is a favourite of mine, but I don't get to come here so often. Ritsuko went to Sweden for a week while I stay behind to work. Cooking by yourself isn't all that fun so I take the opportunity to indulge.

September. The Huge, Friendly Duck appears in Okawa river near Nakanoshima for the first time. People are impressed, and the duck shows up for a repeat performance later this winter. It seems, now, that it will be a regular visitor on the Osaka waterways.
October. Meeting in Waco city, Saitama. Wet autumn weather, with that wonderful faint shimmering autumn light and the muted, distinct colors that tell you summer now is well and truly over.
November. The Honmachi building complex is swept by winter light during my morning commute.
December. Last Shinkansen home to Osaka from Tokyo. Most passengers are weary business people that are half-asleep, slightly drunk or both.
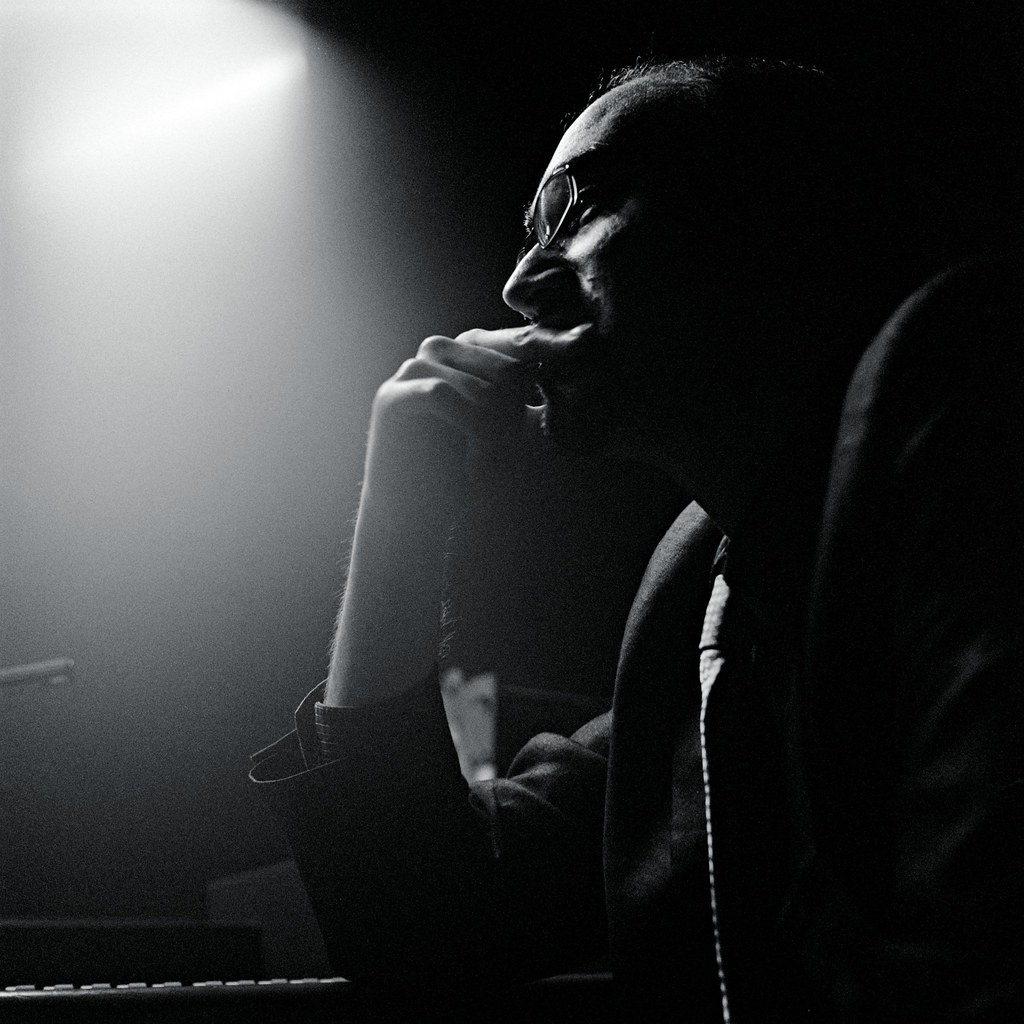
January. ATR research project final presentation at Miraikan hall in Tokyo. Mike Mistry, here, was one of the doctoral students at ATR. The following month I start on a new project at Kyoto university and NAIST.
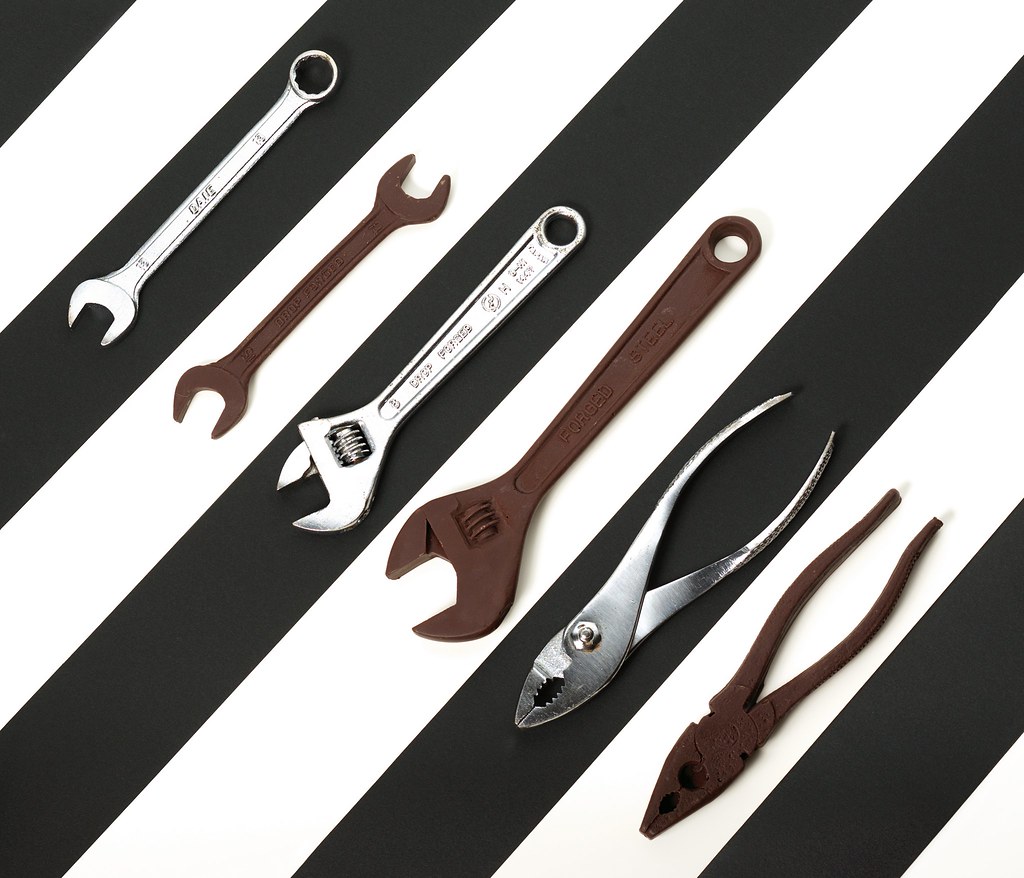
February. Ritsuko gives me these insanely cool tools made of chocolate. I spend a happy Sunday afternoon trying to shoot them, with this as the result.

March. I go playing with the Handy Box and try multiple exposures for low-light shooting. The results range from "interesting" to really good. This is the corner of Nagahori and Sakaisuji.
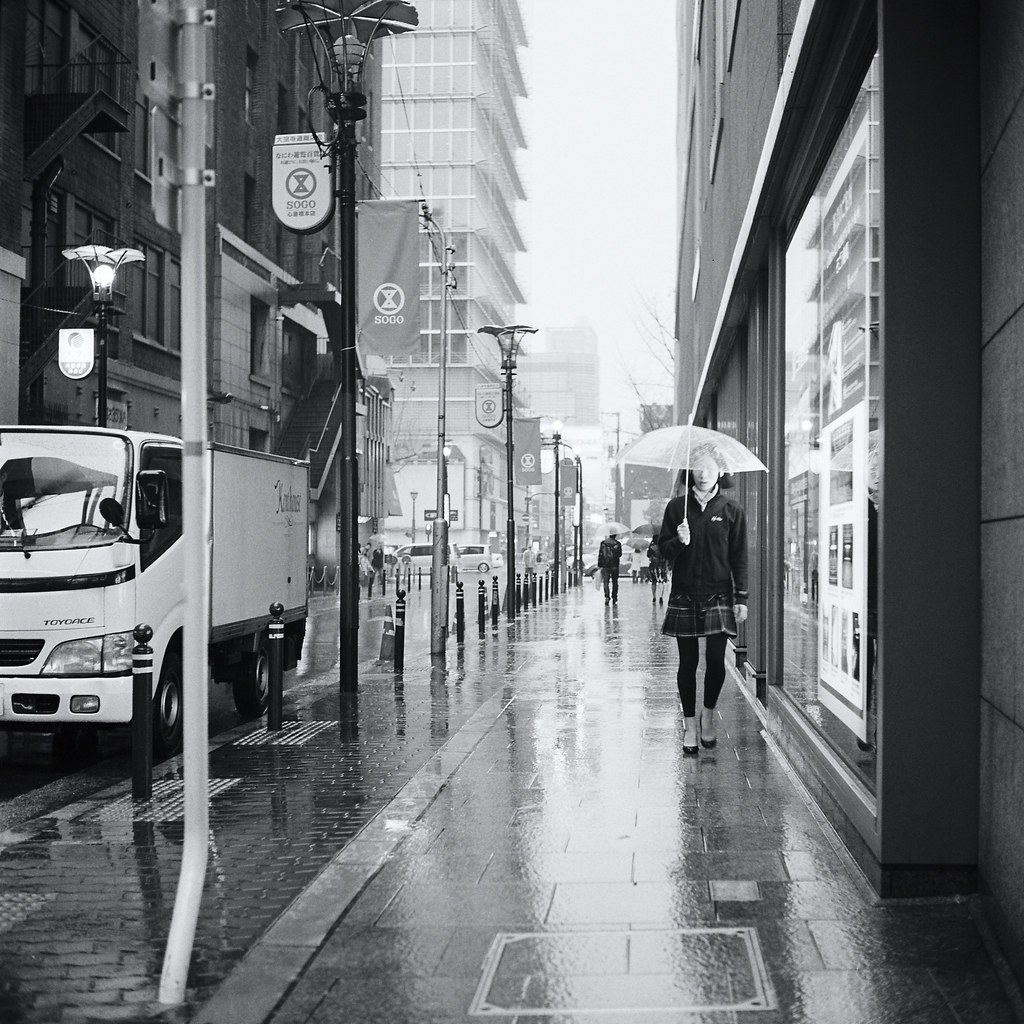
April. Difficult month - I must have half a dozen real favourite pictures here. This is a rainy afternoon in Shinsaibashi, when the city is at its most city-like.

May. It's Golden Week, the weather is getting hot and most people are off work. This man is obviously not, though. I catch him on his lunch break and he happily adopts a suitably miserable expression when I ask to take his picture.
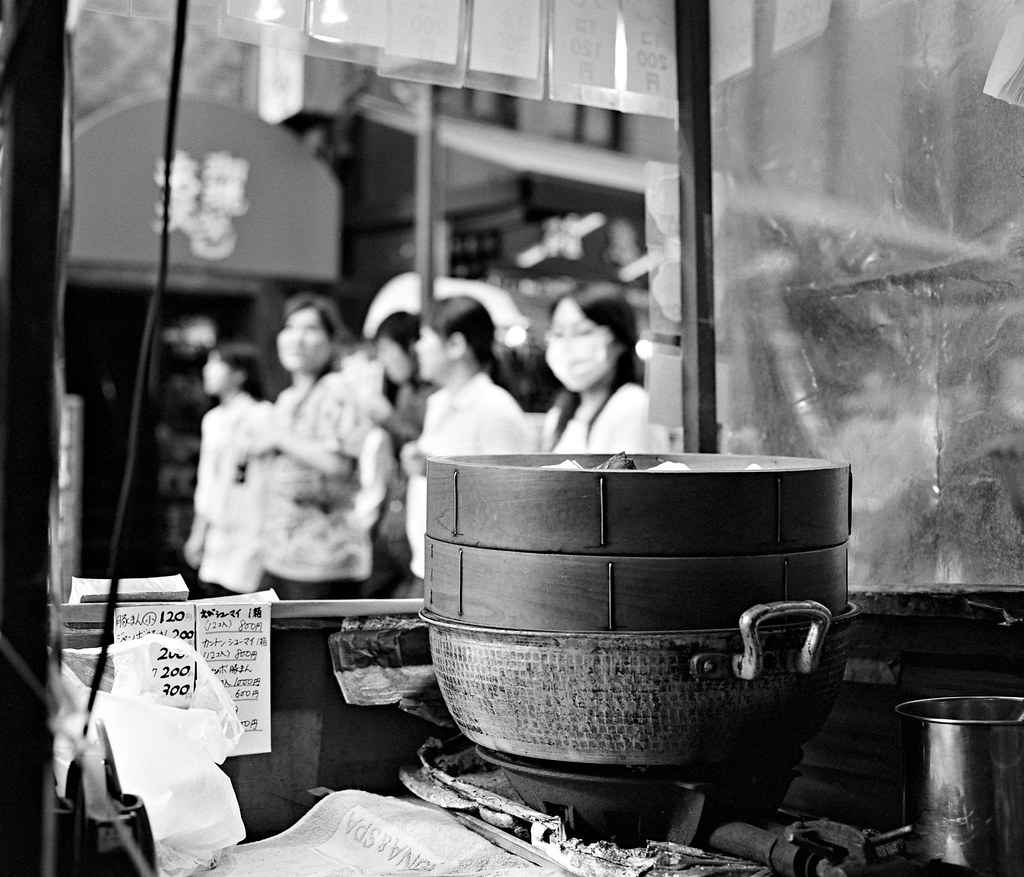
June. Swine flu has broken out in the Kobe-Osaka area and people are worried about infection. Nankinmachi, the Kobe Chinatown, sees a huge drop in visitors as companies and schools cancel trips. Most stores are still open and gradually the visitor numbers edge back to normal again.
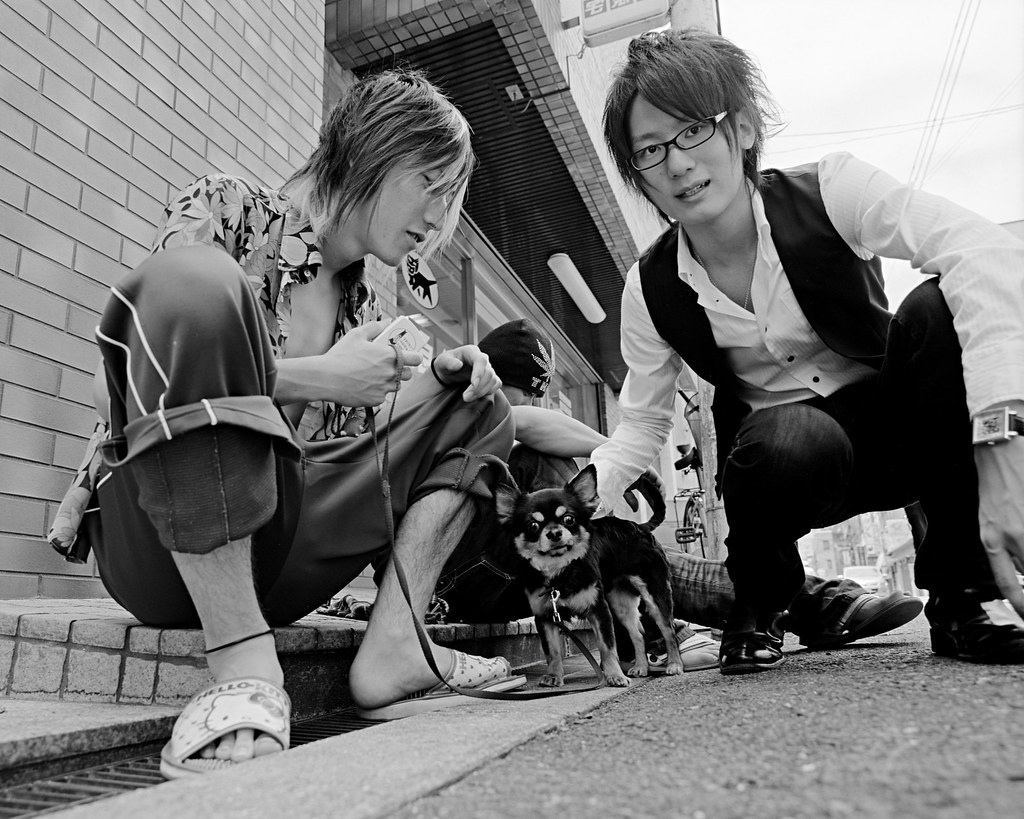
July. Another month of favourites. Here's a couple of nightclub hosts and their dog loitering in the shade outside their apartment building in Shimanouchi.
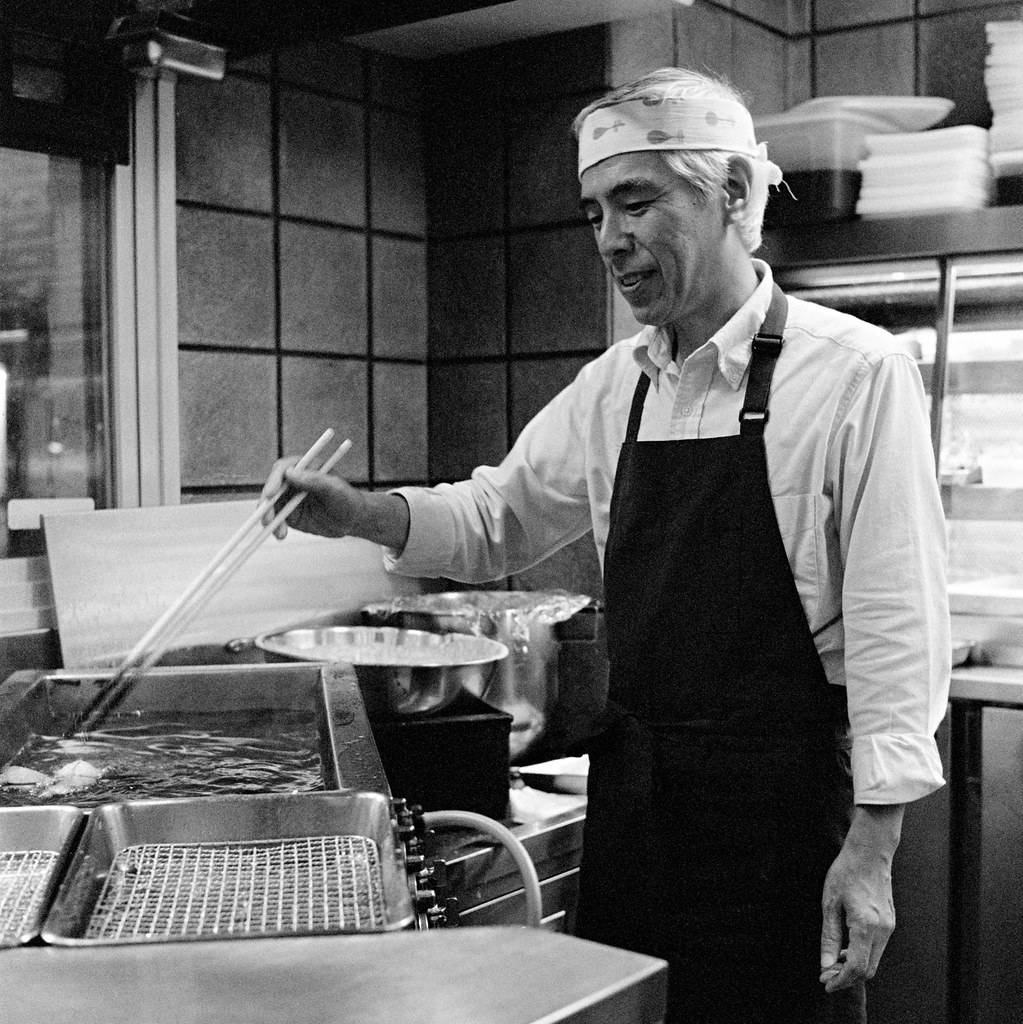
August. The owner of Omiya kushikatsu restaurant in Shinsaibashi. This kushikatsu place is a favourite of mine, but I don't get to come here so often. Ritsuko went to Sweden for a week while I stay behind to work. Cooking by yourself isn't all that fun so I take the opportunity to indulge.
September. The Huge, Friendly Duck appears in Okawa river near Nakanoshima for the first time. People are impressed, and the duck shows up for a repeat performance later this winter. It seems, now, that it will be a regular visitor on the Osaka waterways.
October. Meeting in Waco city, Saitama. Wet autumn weather, with that wonderful faint shimmering autumn light and the muted, distinct colors that tell you summer now is well and truly over.
November. The Honmachi building complex is swept by winter light during my morning commute.
December. Last Shinkansen home to Osaka from Tokyo. Most passengers are weary business people that are half-asleep, slightly drunk or both.
Monday, October 12, 2009
Utsurundesu - Fuji one-use camera
We went to Kobe a few weeks ago (as usual, I know - but it's a nice place). The weather was absolutely perfect; a cool, completely clear day with pure blue sky and just a hint of approaching autumn in the air. After lunch at a south Indian restaurant and inspired by the weather we walked to the mountainside and took the Shin-Kobe cable car up the mountain. For whatever reason, however, I had neither a digital camera nor a color film camera with me. Black and white film is a wonderful medium, but it's admittedly less than ideal for capturing brilliant blue autumn skies.

Kobe, from the ropeway. At the top is a restaurant and a few souvenir shaps (of course), and a public herb garden that is quite nice, though a bit bedraggled from too many visitors.
Fortunately help was close at hand. I've often seen these disposable one-use film cameras for sale in convenience stores and shops, and here we had an opportunity to test one. It seemed like fun, it was certainly better than nothing, and if the results were really disastrously bad we'd still be no worse off than without it.

The Fuji "Utsurundesu" single-use camera. "Film With Lens" is a pretty accurate slogan. There's several variants, with iso 400 film as well as 1600 and with various length of film. There's a waterproof version, and yes, there's a Hello Kitty one too. This one is 400 speed film, with 27 shots and a built-in flash. Cost is just shy of 1000 yen - about twice the price of just buying the film itself.
The camera is a snap-together plastic shell with a fixed lens, fixed shutter and a flash. The 35mm film is already wound out in the camera, and as you shoot you wind the film back into the canister. You don't have to rewind it once you're done, and your shots are safe inside the can if anything would happen. The camera store takes out the film and develops it as usual. They send the shell back to Fuji where they put in a new film, attach a new wrapper and send it out to the shops again. It's really a rental camera rather than a disposable one in other words.


On the left, Kobe's Kitano district, with its old European-style buildings. On the right, the ground station for the Shin-Kobe ropeway. The two pictures are taken with the exact same shutter speed and aperture. The left image is in direct, cloudless midday sunshine, while the right one is indoors, with only a shadow-side window and north-facing opening letting in dim light. Despite the large difference in light, the film manages to record both scenes nicely - though the indoor scene is probably near the practical limit for it, as the grain increases a lot.
This camera is a latter-day descendant of the box camera, like the one I wrote about last summer. It aims to be simple to use, robust and inexpensive, and like a box camera it succeeds admirably. The focus distance, the shutter speed and the aperture are all fixed1. The lens is 32mm - that's pretty wide. No focusing errors, ever; with a wide lens and a small aperture everything is more or less in focus. You really have no exposure problems either. Negative film has lots and lots of exposure latitude, so whether you're in bright sunlight or dim shadows you'll still get a usable image. The small flash is only needed for night-time shots or dim indoor light.

Isuzu Bakery, Kobe
This is the most portable camera I've ever used. It weighs 88 grams - less than even the smallest digital camera. It really is small enough to fit in your shirt pocket (and the light weight means your shirt doesn't sag). The shutter emits a discreet "clk" sound that you wouldn't notice a meter away. Apart from the flash there's no need for a battery or external power so you could stuff one of these into your bag and just forget about it until you need it.
And a fair number of here people do just that: they keep one of these in the car. If they get involved in an accident they may need to document the scene and any damage. And they use these not just because of the reliability and cost; film is seen as more trustworthy than digital cameras since it's very hard to manipulate a negative without leaving traces. Just keep one in the trunk and replace it every few years.
The results? Good. In fact, surprisingly good. The small prints we got (9x11) look just fine if a little contrasty; the shop probably use their "holiday snapshots" setting, with lots of color and contrast, when printing from these cameras. They'd be perfect for passing around to friends and relatives. As you can see in the images here they're clearly good enough for web use too.

A man observes Kobe from the greenhouse balcony.
Of course, "good enough" is not the same as "perfect". It has a cheap, plastic lens after all, so it flares a lot, there's plenty of light falloff in the corners (arguably not a bad thing for blue-sky shots like these), fairly low contrast and low resolution. This is a great snapshot camera, but it's a complement, not a replacement for a more serious camera if you are interested in photography.

Kobe ropeway in late afternoon. Fuji Utsurundesu camera.

Kobe ropeway in late afternoon. Pentax 67.

The medium format camera and the 35mm instant camera pictures, showing the same spot at the same size. My digital SLR camera would end up somewhere in between, though fairly close to the MF shot in resolution. Good to know there's a reason to keep lugging the 6x7-format camera around.
I like this camera - and the idea of this camera - so much, in fact, that I'd like to have one like it for real. I'd basically want a reusable version of this camera with selectable aperture and focus, but still very simple and very compact; something I could throw in my bag and forget about until I need it. It would be a near perfect street camera, backup camera and small camera to take along on business trips. Ritsuko has a Canon Demi half-frame camera; it comes close, though it's completely dependent on its light meter. I'll see what I can find.
Update: My blog entries usually take a fair amount of time to write, and scanning film for the illustrations doesn't exactly speed it up either. Since I first wrote this I got myself a candidate camera that seems to fit my requirements. I'll write about it when I've used it for a while.

Sakaisuji subway line entrance. Late afternoon, bad weather and under cover so it was getting fairly dark already. I used the built-in flash to brighten up the entrance and get the light level closer to the outside street. Grainy, yes, but I feel it enhances this picture.
--

Kobe, from the ropeway. At the top is a restaurant and a few souvenir shaps (of course), and a public herb garden that is quite nice, though a bit bedraggled from too many visitors.
Fortunately help was close at hand. I've often seen these disposable one-use film cameras for sale in convenience stores and shops, and here we had an opportunity to test one. It seemed like fun, it was certainly better than nothing, and if the results were really disastrously bad we'd still be no worse off than without it.

The Fuji "Utsurundesu" single-use camera. "Film With Lens" is a pretty accurate slogan. There's several variants, with iso 400 film as well as 1600 and with various length of film. There's a waterproof version, and yes, there's a Hello Kitty one too. This one is 400 speed film, with 27 shots and a built-in flash. Cost is just shy of 1000 yen - about twice the price of just buying the film itself.
The camera is a snap-together plastic shell with a fixed lens, fixed shutter and a flash. The 35mm film is already wound out in the camera, and as you shoot you wind the film back into the canister. You don't have to rewind it once you're done, and your shots are safe inside the can if anything would happen. The camera store takes out the film and develops it as usual. They send the shell back to Fuji where they put in a new film, attach a new wrapper and send it out to the shops again. It's really a rental camera rather than a disposable one in other words.
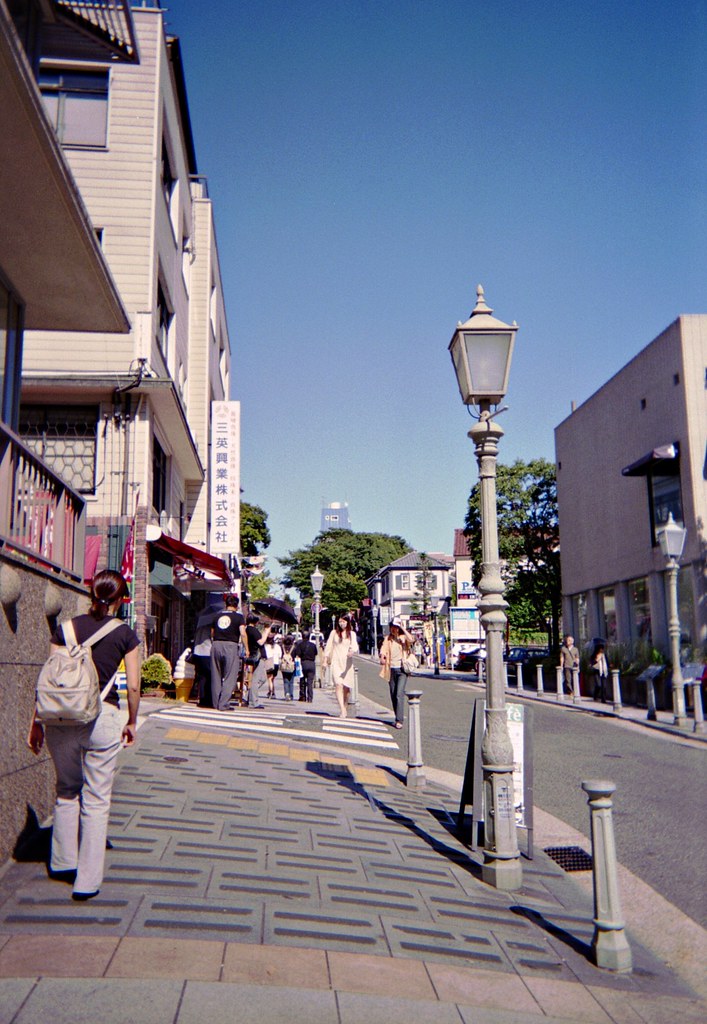

On the left, Kobe's Kitano district, with its old European-style buildings. On the right, the ground station for the Shin-Kobe ropeway. The two pictures are taken with the exact same shutter speed and aperture. The left image is in direct, cloudless midday sunshine, while the right one is indoors, with only a shadow-side window and north-facing opening letting in dim light. Despite the large difference in light, the film manages to record both scenes nicely - though the indoor scene is probably near the practical limit for it, as the grain increases a lot.
This camera is a latter-day descendant of the box camera, like the one I wrote about last summer. It aims to be simple to use, robust and inexpensive, and like a box camera it succeeds admirably. The focus distance, the shutter speed and the aperture are all fixed1. The lens is 32mm - that's pretty wide. No focusing errors, ever; with a wide lens and a small aperture everything is more or less in focus. You really have no exposure problems either. Negative film has lots and lots of exposure latitude, so whether you're in bright sunlight or dim shadows you'll still get a usable image. The small flash is only needed for night-time shots or dim indoor light.
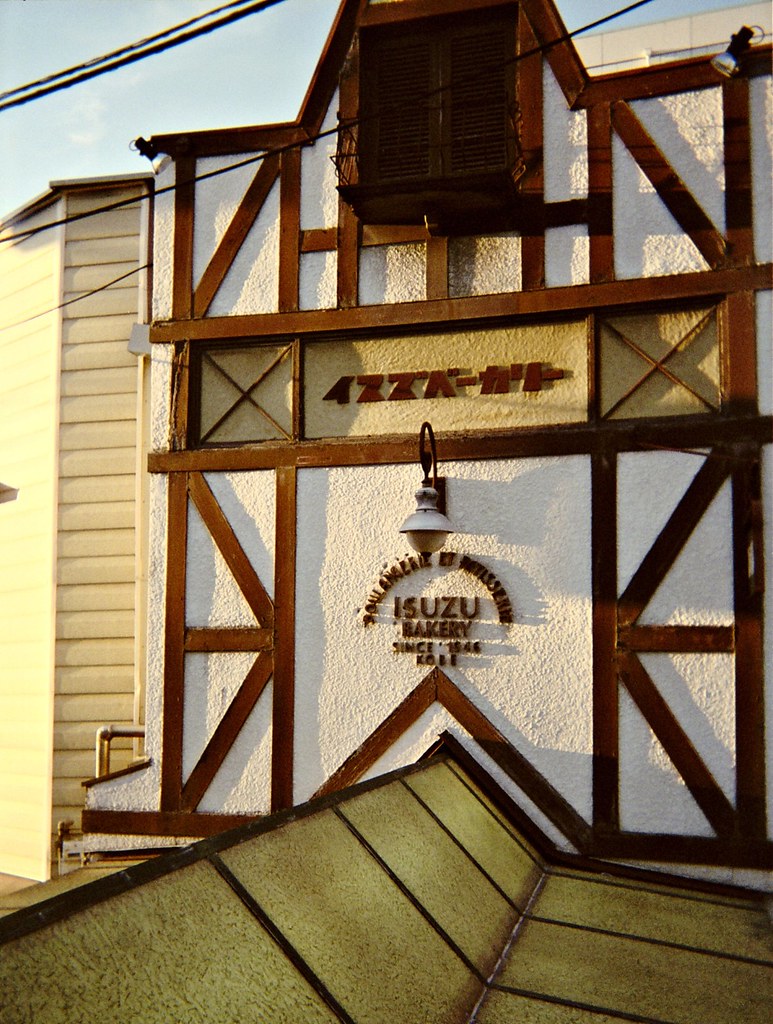
Isuzu Bakery, Kobe
And a fair number of here people do just that: they keep one of these in the car. If they get involved in an accident they may need to document the scene and any damage. And they use these not just because of the reliability and cost; film is seen as more trustworthy than digital cameras since it's very hard to manipulate a negative without leaving traces. Just keep one in the trunk and replace it every few years.
The results? Good. In fact, surprisingly good. The small prints we got (9x11) look just fine if a little contrasty; the shop probably use their "holiday snapshots" setting, with lots of color and contrast, when printing from these cameras. They'd be perfect for passing around to friends and relatives. As you can see in the images here they're clearly good enough for web use too.
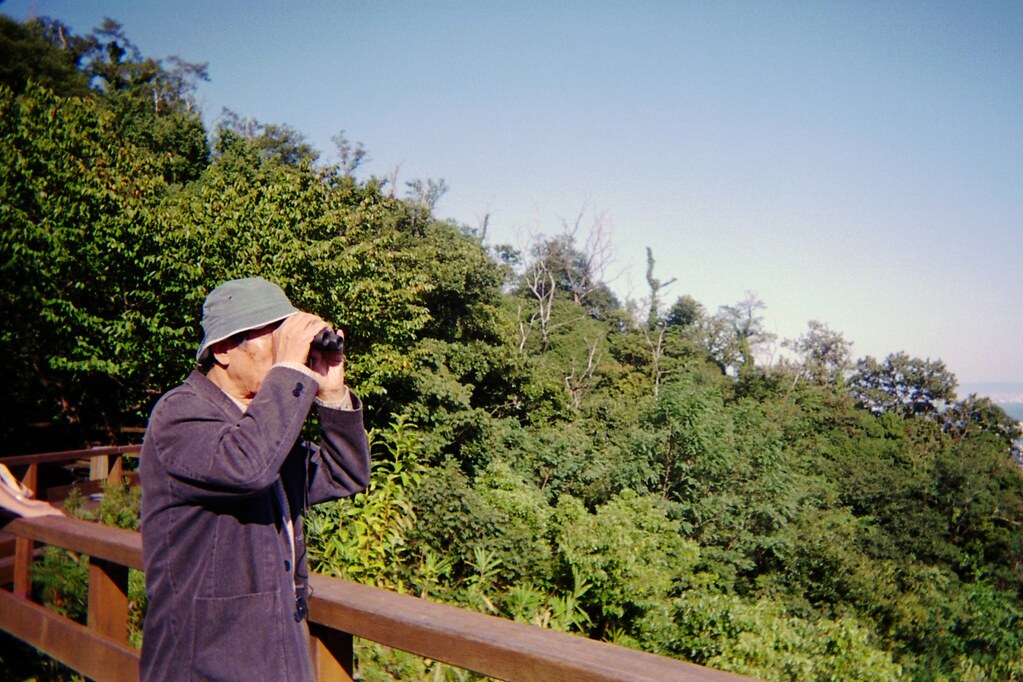
A man observes Kobe from the greenhouse balcony.
Of course, "good enough" is not the same as "perfect". It has a cheap, plastic lens after all, so it flares a lot, there's plenty of light falloff in the corners (arguably not a bad thing for blue-sky shots like these), fairly low contrast and low resolution. This is a great snapshot camera, but it's a complement, not a replacement for a more serious camera if you are interested in photography.
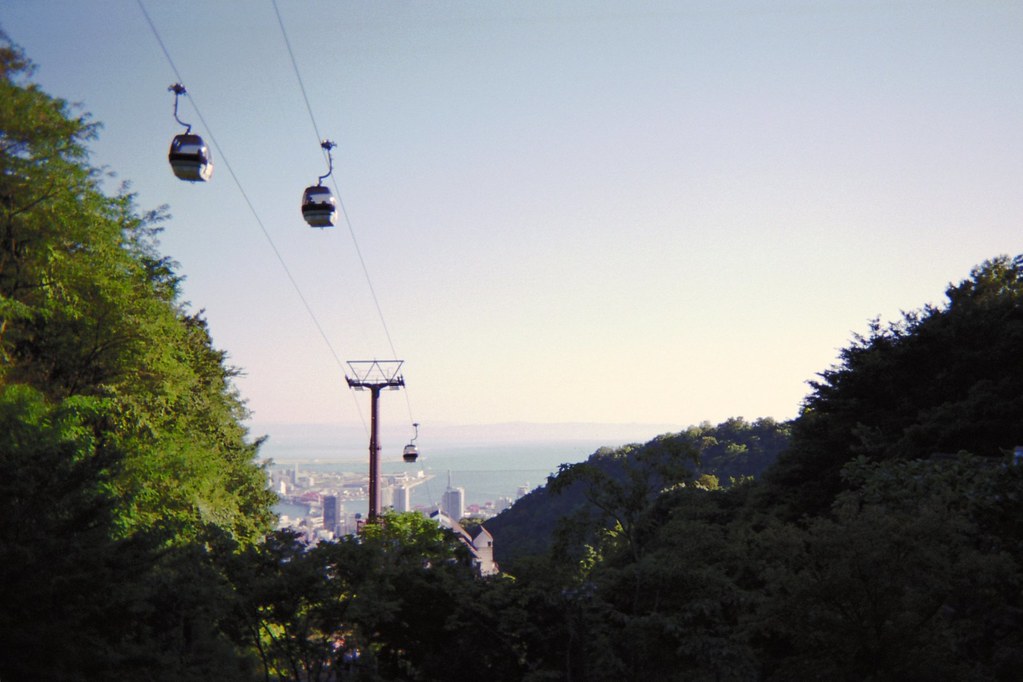
Kobe ropeway in late afternoon. Fuji Utsurundesu camera.
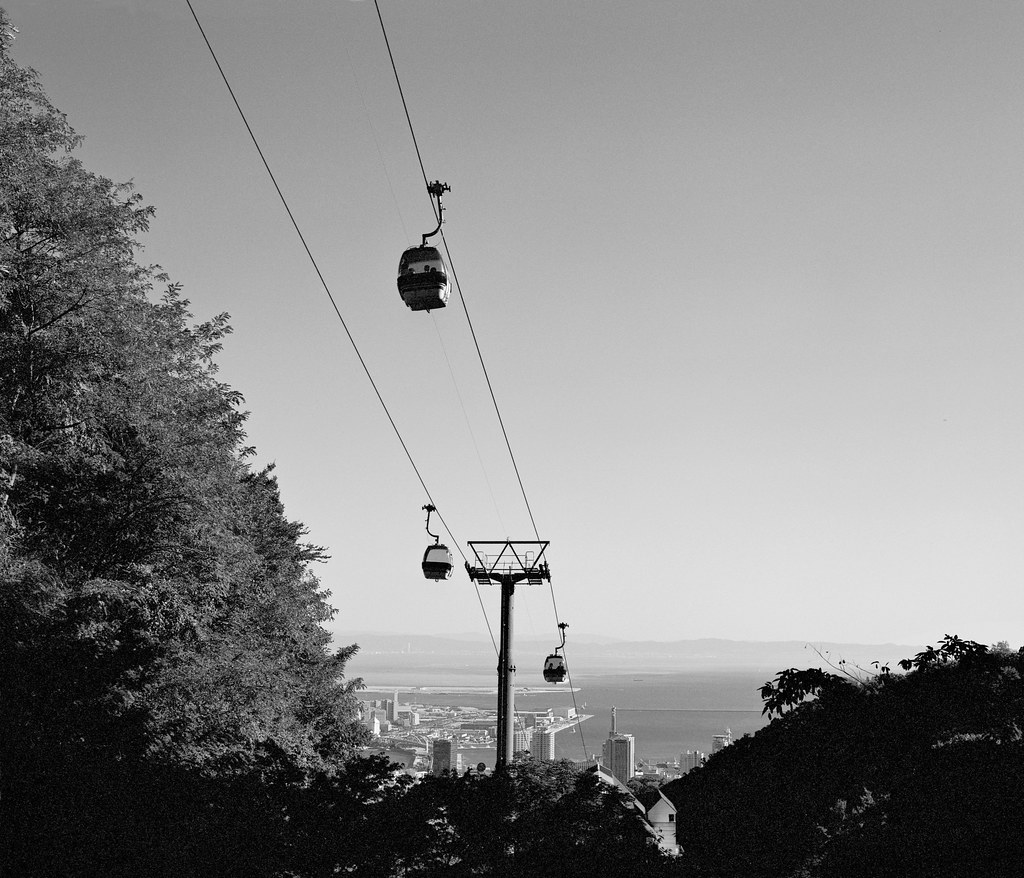
Kobe ropeway in late afternoon. Pentax 67.
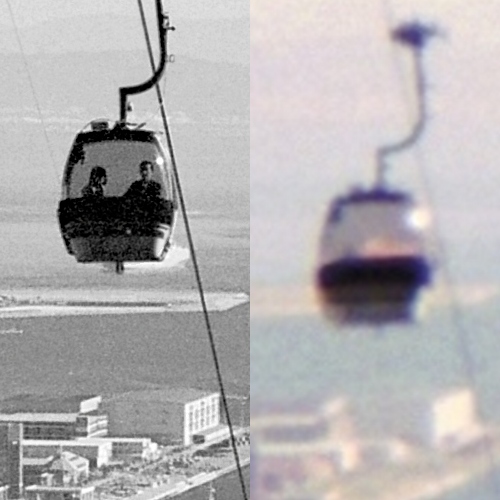
The medium format camera and the 35mm instant camera pictures, showing the same spot at the same size. My digital SLR camera would end up somewhere in between, though fairly close to the MF shot in resolution. Good to know there's a reason to keep lugging the 6x7-format camera around.
I like this camera - and the idea of this camera - so much, in fact, that I'd like to have one like it for real. I'd basically want a reusable version of this camera with selectable aperture and focus, but still very simple and very compact; something I could throw in my bag and forget about until I need it. It would be a near perfect street camera, backup camera and small camera to take along on business trips. Ritsuko has a Canon Demi half-frame camera; it comes close, though it's completely dependent on its light meter. I'll see what I can find.
Update: My blog entries usually take a fair amount of time to write, and scanning film for the illustrations doesn't exactly speed it up either. Since I first wrote this I got myself a candidate camera that seems to fit my requirements. I'll write about it when I've used it for a while.
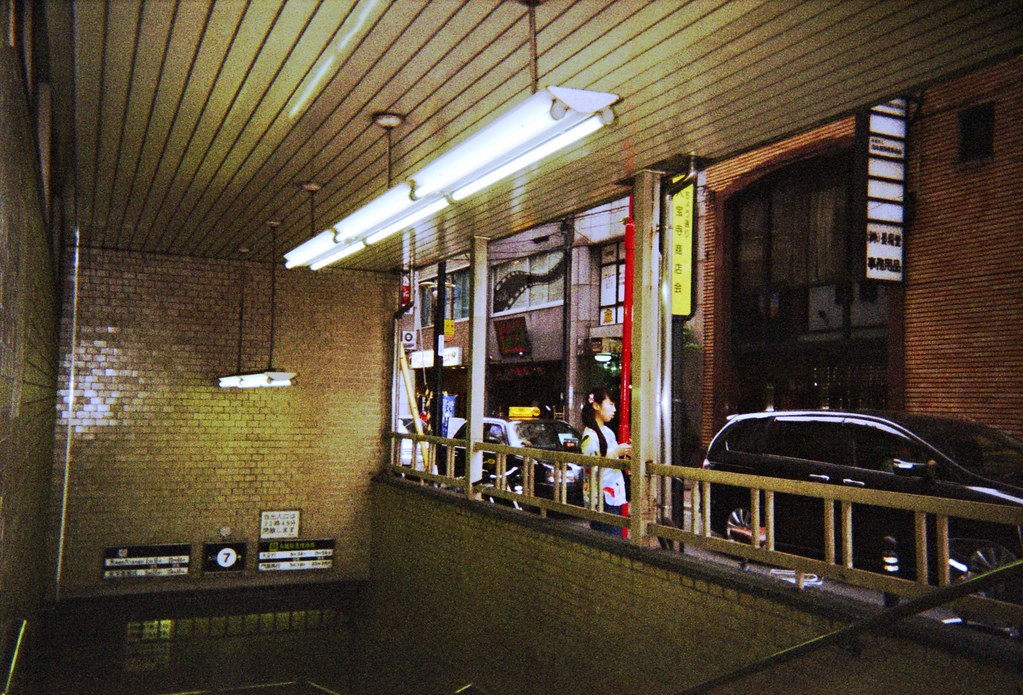
Sakaisuji subway line entrance. Late afternoon, bad weather and under cover so it was getting fairly dark already. I used the built-in flash to brighten up the entrance and get the light level closer to the outside street. Grainy, yes, but I feel it enhances this picture.
--
#1 The shutter speed is 1/140 and aperture is f/10 according to Fuji's online documentation. With a 400-speed film it's about right for decently sunny days.
Subscribe to:
Posts (Atom)