Showing posts with label film. Show all posts

Thursday, March 8, 2012

Velvia

Velvia by Fuji Film is perhaps the single most famous family of modern slide films in existence1. It's actually a number of different films, but what they have in common is vivid (some would say garish) colour rendering that can really highlight nature scenes. That rendering does make it a less good choice for shooting people, though, as the bold colours that tend towards green can easily make your subjects resemble that of a seasick drunk. Which is not the impression you want to convey if you shoot, say, a wedding or a fashion show.

Leaves
Velvia in its native habitat. Bold, vivid nature colours.

Slide films are a very small market even within the shrinking market for film in general. Some estimate that slide films are perhaps 5-6% of the entire film market and I have no trouble believing it. It's easy to see why: They're the most expensive films you can buy, and they tend to have short shelf-life. They have low latitude so you need to meter the light carefully or end up over- or underexposing them. They tend to have lower resolution than other film types. The large contrast means they're difficult to scan or print.

Modern negative films are really as good or better in every way, except that a properly treated slide film will give you an exact, repeatable colour rendering every time, and you can see the image right there on the negative. That is the reason magazines and other print have preferred slide film over other media.

NAIST
Nara Institute of Science and Engineering, Nara.

But now, of course, digital cameras do it just as well — they have many of the same characteristics, with repeatable colour and high contrast — so the market for slide film, never big, has dropped off a cliff. The movie industry — the part that still haven't switched to digital — uses negative colour film, as do most hobbyists. It is cheaper, has much better latitude and tends to have better resolution. If you are going to scan the film, it's easy to adjust the final colour to your liking today, removing most of the advantage of slides. Kodak recently discontinued its last slide films, leaving Fuji as the sole manufacturer.

With that said, a slide image on a light table (or projected) is a beautiful sight to behold. There is something viscerally satisfying about the almost glowing colors that render even a mundane scene otherworldly beautiful. That glow does not quite translate into the scan or print, unfortunately, but it does give you something to aim for. And shooting slide film is fun if nothing else.

Chinatown
Nankinmachi, Kobe, at dusk.

Velvia is really made for nature photography. It pushes muted colours, greens especially, to make them clearer and more vivid. Drab leaves brighten up. Flat, rainy scenes glitter and sparkle. Autumn reds and yellows will pop. Of course, human skin will also "pop" and become ruddy and saturated, and any green tones will get exaggerated. It may give you a healthy outdoorsy look in some people, but make others look like they are drunk or suffer from high blood pressure. Man-made, colourful structures will tend to become overly garish.

Leaves
Sunlit winter leaves.

For these reasons, Velvia has been considered a bad choice for portraits and street photography. I agree that you want something subtler for portraits, but I think it makes a fine film for street and urban photography. With digital photography, and with "HDR photography" especially, the goal posts have moved. With it-hurts-so-bad-I-must-claw-my-eyes-out hypersaturated images everywhere today, Velvia doesn't seem all that bold or saturated by comparison.

Shinsaibashi
Shinsaibashi, Osaka. Note how the high contrast is a draback in this case; the film could barely capture both the sunlit and shaded areas at once.

Sakaisuji Honmachi
Sakaisuji Honmachi station, Osaka. This is home.

--
#1 Kodachrome, discounted a couple of years ago, is far more iconic but it was not a modern film by any means, and did not use the same chemistry as today's slide films.


Thursday, July 29, 2010

Delta 100

I bought a roll of Ilford Delta 100 a couple of months ago, and shot it two weeks ago as we went to Akashi. The results were great - really great; I may have found my new favourite film.

My standard BW film is HP5, an iso 400 film that I often use at 800. Underexposed one stop like that it gives me fairly coarse grain and fairly low detail. Not that the lack of detail matters all that much; in medium format it still gives me more fine detail than my digital SLR, and plenty more than I need. I like the tonality, and at iso 800 there's enough speed to use it handheld in almost any situation.

Up until now, my normal 100-speed black and white film has been Fuji Acros. It has very fine grain and high resolution, but it tends to look flat, grey and washed out. When it's good it's really good (example). But when it's bad it's hopeless (example). I've shot several rolls of it, but I still don't have a handle on how to reliably avoid those flat, lifeless results.

Delta 100 really seems completely different. It has fine grain and resolution, just like Acros, but it has a much more pleasing contrast right from the start. The overall tonality is smooth and restful, and not at all flat. At the same time there's a sense of sharpness or "bite" to it that other films I've tried have lacked.

Straight scan of Delta 100

Here's four unedited shots with Delta 100, developed in D-76. The top two - an outdoor scene and an indoor one - are properly exposed. The bottom exposures are overexposed and underexposed respectively. I've set the black and white point, but they're otherwise unprocessed.

You can see the finished images in the previous post here.


The good: You get pleasant, clear images right out of the box. I shot this roll at iso 100, then developed it using D-76 (ND-76, actually) mixed 1:1 for 11 minutes; that's straight from the instructions. Scan the images with no brightness or gamma adjustment, set the black and white point (that is, make the darkest points black and the brightest points white) and you get results like above. No other film I've tried has given me something as pleasant with so little effort. You can see the finished versions in my previous post about Akashi here. Note how little I've had to edit them; I mainly just increased global contrast a bit and adjusted the brightness as needed. Sharpen a bit at the end. No heroics, no noise or grain reduction and no tricks with local contrast or anything.

Planetarium

Here's a sharpened crop of the planetarium from the original size image. The film holds a lot of detail, and the grain is hardly visible. The full image is 60Mp, but there's obviously not that much detail there. The scanner limits resolution to 30-35Mp or so; both the film and the lens is capable of more. As it is, if you see this on a normal monitor the whole image would be around 2 meters wide. Image resolution just isn't an issue for most of us any longer.


The bad: The downside of this clarity is that the film becomes fairly sensitive to exposure. The toe (the dark end of exposure) and the shoulder (the bright end) both seem fairly pronounced. So if you underexpose, most of the image will end up in the toe and become quite dark and moody. If you overexpose, much of the image will become washed-out.

This is exactly what's happened to the two bottom images in the unedited shots above. The octopus image is underexposed by about a stop, and the street scene is overexposed by perhaps two stops or so. Many films wouldn't bat an eye about such a small difference, but with this film it clearly matters. Good if you want this look on purpose of course, but if you don't it clearly pays to use a real light meter and make sure your exposure is right. I haven't tried playing with the processing, but I suspect the film is similarly sensitive to developing time and temperature as well.

Another negative is that, well, it is an iso 100 film. This is fairly slow. Anything less than daylight will need fairly fast lenses or a tripod. And if you use filters, not even sunlight may be enough - the planetarium above was shot with a red filter, and the slow shutter speed and an unstable vantage point (I was leaning halfway through a hedge) was enough to cause some real motion blur in the image.

Backstreets

A long exposure shot - five seconds or so - of a Kobe backstreet. That's the good thing with lugging a tripod around: long exposures become as easy to do as short ones, and you end up with much better detail and clarity than if you use a high-speed film or high-iso setting on your digital camera. Serious, professional people - people who know what they're talking about - often say that a tripod is the single most effective thing you can get for improving your images. I believe they're right.


I really like what I've seen of the film here, and I suspect it'd be great for doing landscapes and scenic shots, or long-exposure nighttime shots. You want lots of detail and your subject isn't going to be moving about a lot. I'm not sure how good this would be for street photography. At dusk or away from daylight people moving about will start to blur, and you can forget using this indoors without a tripod.

Delta 100 seems a very good fit for a high-quality medium-format (or large format I guess - I'd love to find out) camera like the Pentax 67. The optics can make good use of the high resolution and the lenses are fast enough to let you use the film handheld in daylight. For low light you need a tripod, but that's something you often use with this kind of camera anyway. It should be a good choice for a high-quality 35mm camera, for much the same reasons, and the fine grain and high resolution should help get the most out of the small film format. I should try it on the Minolta I have, or on the Canon SLR; a Leica or some other M-mount rangefinder should work very well too.

I wouldn't waste this film on cameras like the Voigtländer Bessa or Rollei 35. They're scale focusing cameras and best shot stopped down a fair bit. They'll usually be a bit out of focus, and the Voigtländer lens especially isn't all that sharp or contrasty. The high resolution of the film is wasted on them, and the low film speed is a real handicap as these cameras are best used handheld and stopped down to f/8 or less.

For street shooting and for old cameras with iffy optics I believe HP5 is a better choice. It's fast and it's easy to push with good results. But high-quality landscapes, daytime scenery or nighttime tripod shots with high-quality cameras is where I think Delta 100 should shine. We'll see if I still agree after I've used it for a while.

Monday, July 5, 2010

Do It Right

While we're on the subject of checking things: Be careful when you load 35mm film, and check that the film really catches properly in the takeup spool. If it doesn't, nothing will happen when you try to wind the film. You're just winding empty air while the film sits in the canister. You can take pictures for weeks, only to end up with a completely blank roll at the end. Like this one:

I Don't Remember It Being So Dark At The Time

A whole roll of nothing. Live and learn.


Oh well. Pictures are fleeting things anyway. Now I have a second chance at those shots I thought I took.

Tuesday, April 7, 2009

Pentax 67

Pentax 67
Pentax 67

I got a Yashica Mat a year ago, just to try out medium format film photography. I got bitten hard, and I now use film as much as digital. The Yashica is compact, lightweight and fun to use; it's a perfect second camera, but as a main camera it has some shortcomings. I'd like a rugged camera with high quality interchangeable lenses and preferably a waist-level finder like the one on the Yashica. Oh, and I prefer a large 6x6 or 6x7 format over 6x4.5; if I use film I may as well use the largest format I find practical. I did consider the Mamiya 7, but it's a rangefinder and known to be somewhat delicate. The Hasselblad 500 system is fairly light and high quality but it's very expensive even used. The Mamiya RB and Bronica systems are large and bulky, and really intended for studio use.

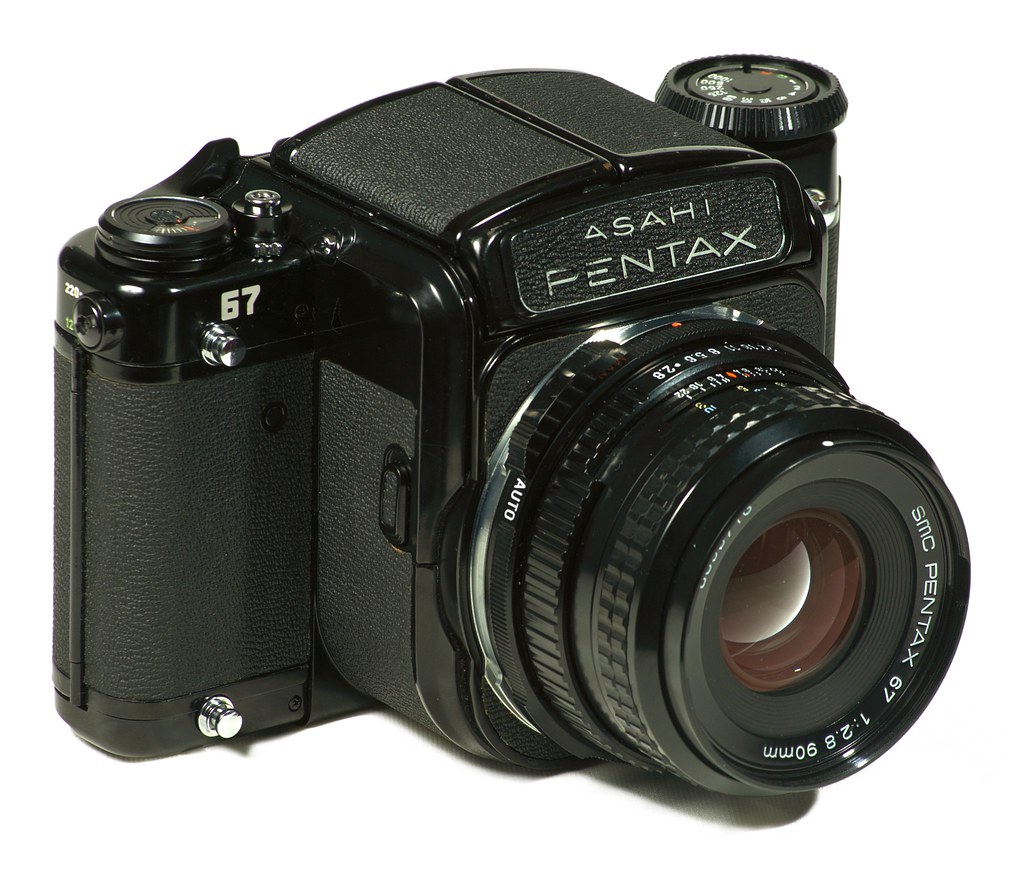
Instead I got a used Pentax 67 with a 90/2.8 lens. It's a manual-focus 6x7 format SLR camera with a body style similar to that of a 35mm camera. This camera system has been around for a long time; it was introduced in 1969 (the same year I was born) and has been in production right up until 2009. Production of the third and last generation will stop in September; parts, lenses and second-hand gear will no doubt be plentiful for decades to come. My camera is a second generation one, introduced in 1989.
 
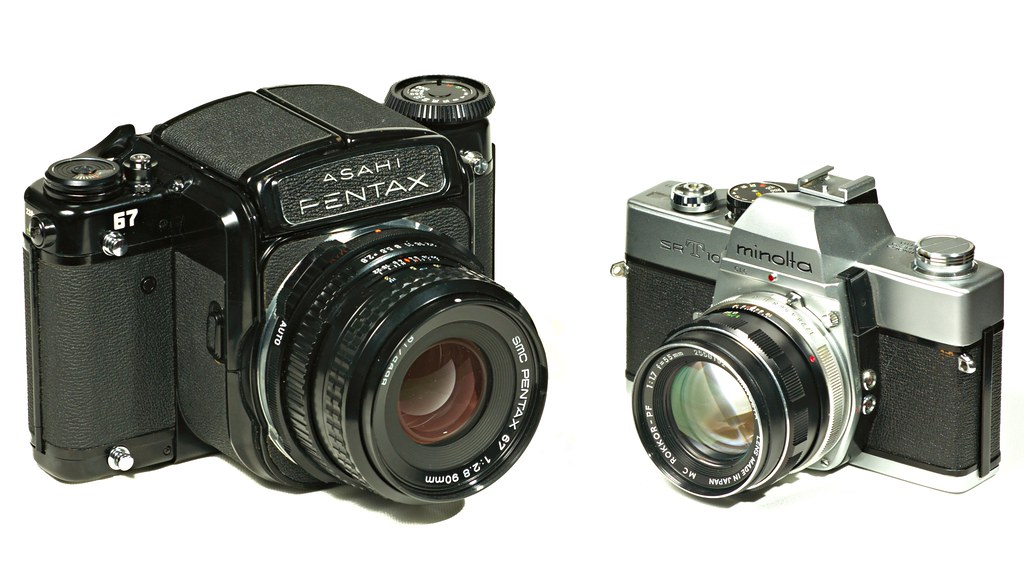
Pentax 67 and Minolta SRT101

A size comparison between the Pentax and a typical film-era SLR. The Pentax is to the left.


Some people will say the Pentax 67 is huge and heavy; others will say it's compact and lightweight (and all will agree that it's rugged and solid, and has a noisy shutter with lots of vibration). This mixed reputation is due in large part because of its looks. It invites comparison to 35mm SLR cameras, and compared to them it's absolutely huge, like a giant-sized or novelty version of a normal camera. It's heavy too - about 1.7kg with the prism viewfinder, two or three times as much as most 35mm film cameras. Small-format users find it enormous.

To most medium and large-format camera users, on the other hand, it's fairly compact and portable. There is no other 6x6 or larger medium format SLR camera that is as light and compact, and probably none other as rugged. The camera is designed to be a field camera as much as studio equipment, and it's been a long-time favourite of landscape photographers and astro-photographers, hikers and travelers especially. With a waist-level finder the camera is closer to 1.2kg (the glass prism in the prism finder weighs half a kilo by itself), and the 90mm normal lens is again fast and small.

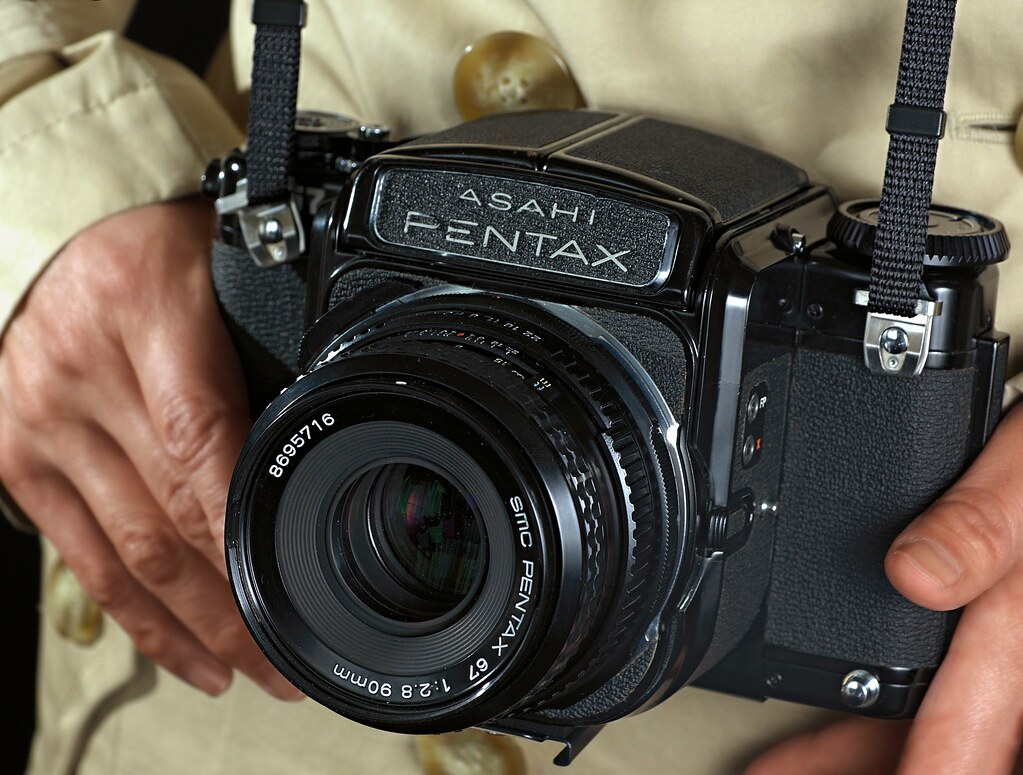
Pentax 67

It may look big sitting right next to a small 35mm SLR, but it's really not bulky or cumbersome to bring along; certainly no more so than any other 6x7 format camera.


Besides, when you compare it to current digital SLR cameras it's no longer all that big. The current digital Canon and Nikon flagships - the 1Ds and the D3X - are about the same size and weight as this camera, but a lot more expensive and fragile, and needing multiple batteries or a charger and frequent access to electricity.

The design is clean and basic, and largely unchanged since 1969. Manual focus, aperture and shutter speed, manual film advance (thumb crank) and manual film loading - no motor drives or automation here. There is a prism finder with a light meter meter available for the 67 model I have, but it only meters passively: you set speed and aperture manually and get feedback from the meter. The newest model - the 67 II - does have a modern matrix meter with aperture-priority mode, but only as a prism finder. I prefer a waist-level finder and like to use an external meter anyway so I didn't want to spend a premium for the latest model. Film loading is easy, and it loads and unloads exactly the same way the Yashica Mat does. I mean exactly; you could write one set of detailed instructions covering both cameras.

Back street

Back street in Kobe. The residential areas up towards the mountain side often look like this, with a mix of new buildings, traditional Japanese houses and old European architecture. As a major port, Kobe has long had a large influx of foreign residents, and affluent traders built their mansions and residences up on the mountainside rather than near the dingy, smelly harbor. The remaining old European-style buildings are now protected and the ones along the main streets are mostly converted to restaurants and wedding chapels, but the ones along the back streets are still used as family residences.

To me, this camera - the 6x7 format, the near-normal angle of view, the waist-level finder - is perfect for shots like this. You can relax with the camera hanging in front and just wait until you see the picture you want on the large, clear ground glass.


This is an SLR (single lens-reflex) camera with a focal plane shutter (a curtain just in front of the film, covering it), just like your normal SLR or DSLR camera. It has a mirror in front of the shutter that reflects the light from the lens onto the viewfinder screen. When you press the shutter, the mirror first swings up, then the shutter curtains move across the film plane to expose the film. As anyone who's used a 35mm SLR or DSLR camera knows, this design can be a little noisy as the mirror swings up, then the shutter snaps across the film or sensor. The film format here is bigger - almost 6x7 cm in size - so it means the mirror and shutter is also much bigger, heavier and noisier.

To put a not too fine a point on it: the camera is loud. Not the high-pitched metallic click of a small-format camera, but a distinct, heavy "Flubbupp" from the mirror and a solid "Ka-lock" from the shutter. Nobody nearby is in any doubt that A Picture Was Taken. And you're in no doubt yourself either; all that fast-moving mass really shakes the camera in your hands as the shutter fires. Like most SLR cameras the Pentax 67 has a mirror lock-up function; it is a really good idea on this camera.

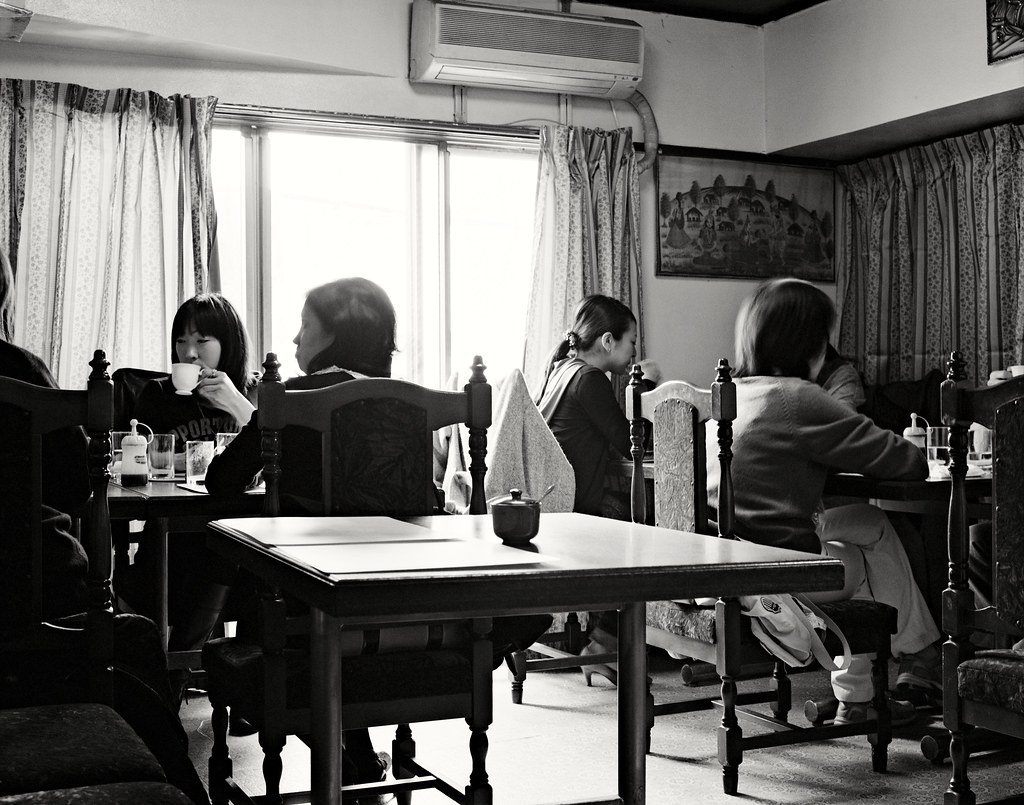
Kusumu

This is Kusumu, an Indian restaurant housed in a dingy, unmaintained 3rd floor apartment in an old concrete building in Kobe. The wallpaper is flagging, the floor buckles, the furniture, cutlery and decorations are mismatched and second hand, and at least part of the place is clearly used as living space for the family that runs it. Next door they have another apartment where they're selling Indian imported ingredients such as spices, rice and lentils in bulk.

The food, however, is cheap, home-cooked (literally) and delicious. There is no menu, just the meal of the day. You get samosa as a starter, then a plate with rice, three kinds of curry and chapati, which you get as much of as you want (in fact it's hard to stop the steady flow of food). In a sign of just how good it is, normally fastidious young Japanese women seem to come here in droves despite the messy, unkempt environment.

This image - taken on a tripod - pushes my scanner to the limit. It's about 35mp as scanned, and there's more detail on the film than the scanner is able to pick up. No matter; it's more resolution than I know what to do with anyway.


With that said, people exaggerate the problem of shutter and mirror shake. Yes, it does give you a bit of added vibration, but it only really start to matter at slower shutter speeds (1/30 and slower) where you really should be using a tripod and mirror lock-up anyhow. At 1/125 and faster there seem to be no such problems at all. Other large medium-format SLR cameras have the same design issue but don't have the same reputation; I suspect the noise makes people believe the problem is worse than is really the case. There is apparently a specific, real issue with long lenses (200 mm and beyond) and shutter speeds from 1/15 where the shutter can make the setup oscillate unless you have the body and lens anchored to the tripod at two points rather than just one. As I normally only use normal and wide lenses it's a non-issue for me.

Artsy

Ritsuko is making a point of me spending too much time taking pictures, I think. Or she just wanted a shot titled "Oddball Foreign Guy With Oversize Camera".

Anyway, this shows one reason to shoot negative film: The white wall is sunlit while the inside of the parking garage is in deep shadow. And yet, the wall is not blown out but has lots of detail and the dark garage is not blocked. This is, take note, after I've actually increased the total contrast to make the sunlit feeling stronger. A digital camera would have given you pure white walls or solid black shadows.


In practice it's really comfortable to use. The weight is no more than my usual K10D and a set of lenses, and it fits into my usual camera bag. It's not a fast camera by any standards however (no MF camera is), so it's not well suited for quick snapshooting. You just can't focus and frame a picture fast enough to follow a rapidly unfolding event. A better way is to decide beforehand where to take an image, set the camera, then wait until the light, the people and other elements come together. You get to decide exactly what background and elements you get in your image, and you give yourself time to prepare. Of course more often than not I never get the combination of elements I was looking for - or the idea turns out not to work at all once I see the result.

Neat & Grog

Neat & Grog, a tequila bar in Shinsaibashi, and an occasional waterhole for me and Ritsuko. Haru, the owner, is an entertaining guy, and the variety of tequilas he's got is amazing.

In this case I really wanted a more interesting-looking passersby in the image, but I was losing the light (see how long the shadows are on the front) and in another minute or two the front would have been in shadow. Can't get what you want, always.


This sit-and-wait approach is very suited for a waist-level finder. You focus once, then let the camera hang from the neck strap when you frame and take the picture. When you use a tripod (and you really should), the waist-level finder is much easier and faster to use than a prism finder. An added benefit is that you're not hiding your face behind the camera so people don't react negatively to you. The camera is big, of course, but despite the size of it and the racket it makes it still looks like a plain old film camera, so people don't feel threatened by it.

A tripod, just to repeat it once again, is a really good idea. You can certainly use the camera hand-held and the results will be fine as long as you stay at 1/125 or faster. Those speeds will still benefit from a tripod, adding just that extra bit of crispness (resolution) to the image, and at slower speeds - 1/30 or slower - some kind of steady support is really no longer an option. Besides, when you're doing sit-and-wait photography a tripod is a lot more comfortable than holding the camera yourself. This goes for your digital camera too, by the way: use a tripod and you'll immediately see an improvement in the quality of your pictures, but especially when you zoom in or when it's getting dark.

At this point I have only the 90mm f/2.8 lens. It's the smallest lens available and one of the fastest. The coverage is about the same as a 45mm lens on film or 31mm on a DSLR; the Yashica, the Voigtländer and the Handy Box all sport lenses with similar coverage. It's the focal length I use most often by far so I'm in no hurry to get another one. At some point I would like a really wide lens, like the 45mm f/4, but that is for later. The 90mm will do me fine until I've learned to use this camera fully.

Surprise!

You perhaps saw this shot in an earlier post. Just wanted to test flash photography with the Pentax 67, and it's easier to just do a self-portrait than ask Ritsuko. Out of focus (I'm sitting too close) but otherwise OK.

The Pentax has a flash sync speed of 1/30, which means you have to use 1/30 shutter speed or slower. This is one of the few real drawbacks on this camera. By way of comparison, my Pentax DSLR will sync at up to 1/180, and the Yashica, with its leaf-shutter, will sync all the way to 1/500. A slow sync speed means you can't use a flash in combination with daylight to fill in shadows for instance. For real indoor ("studio") use like here the only light is from the strobes so the sync speed doesn't really matter.

Wednesday, February 25, 2009

Your Last Camera

Have you recently bought a digital camera, or are you thinking of buying one? If you are, it may be the last camera you buy. Ever.

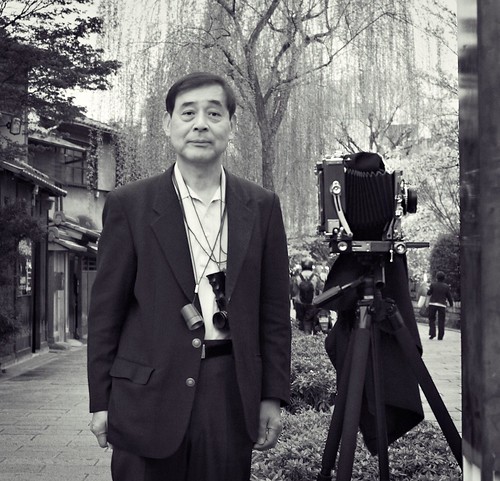
Kyoto Photographer
Not obsolete. Not unused.
Just no longer mass market.

First, film. Film is dead - as a mainstream consumer format, that is. Now, that does not mean that film will disappear; as a niche it looks to be thriving and long-lasting. The number of users are stabilizing, with film era holdouts being joined by amateurs and professionals picking up film again as a complementary medium to digital. I'm one of those recent users myself.

Holga, Diana, Seagull and other cheap-and-cheerful film cameras are making film a popular alternative among some young photographers. Leica, Fuji, Cosina, Mamiya, Hasselblad and Rollei are still producing film cameras. Fuji and Cosina is even jointly launching a new medium-format folding camera this spring (and for the record: yes, I want one very, very much; if any reader happens to have 200k yen cluttering up their apartment and making a mess, feel free to give me one of these instead of throwing the money in the trash).

But any business plan that depends on many hundreds of millions of people using film for their photography is sure to fail today. Fuji and Kodak both seem determined to keep their film and chemicals business going (they're reportedly profitable), but most other film-era companies have disappeared or left the field. More often than not their assets have been spun off or acquired by small companies able to thrive in a niche market where a large company can't. The film photographer has joined the portrait painter as a niche business, as an art medium and hobby.


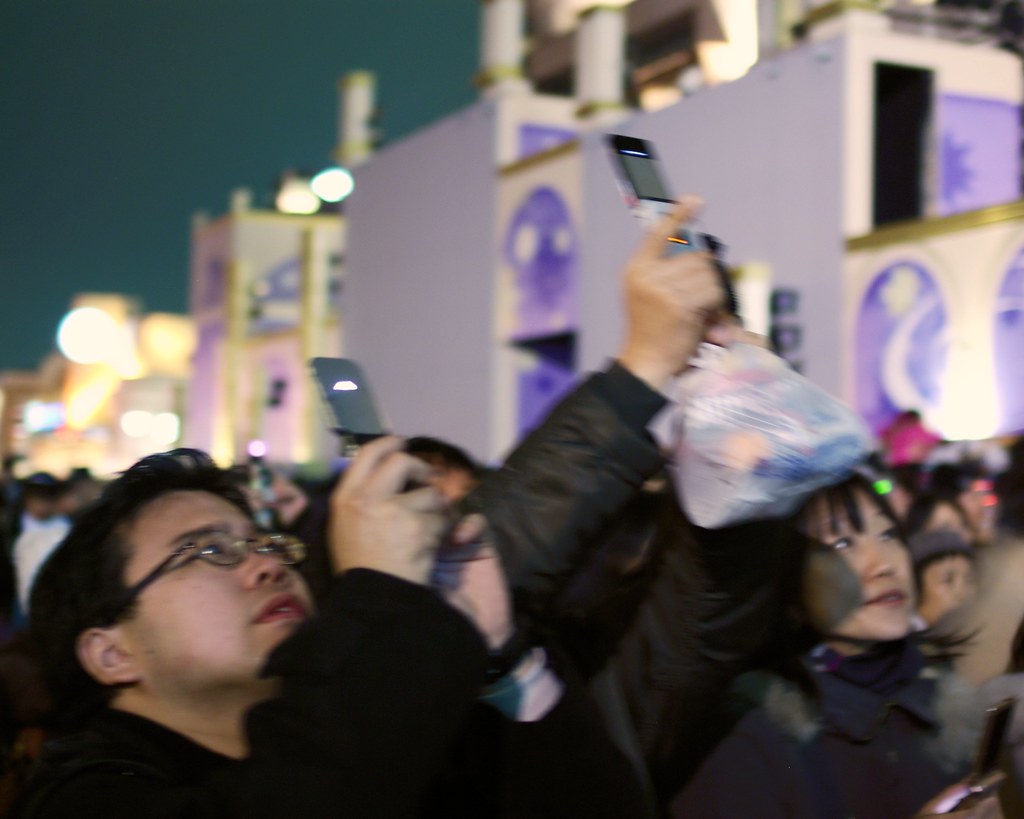
So, what about the camera itself? We went to Universal Studios Japan with a couple of relatives just before Christmas. The place was absolutely packed. Throngs of people from all over Japan and east Asia were mobbing the attractions and food vendors, watching the live shows and oogling the characters, Christmas decorations and fake street views. And people were constantly taking pictures, of everything and everybody. There were digital SLRs and even a few film users, but easily five or ten times more pocket digital cameras. However, all the cameras combined were completely outclassed by people simply using their cellphones, perhaps ten or twenty people for each one with a "real" camera. It's not just USJ; wherever you go here it's the same thing - "everybody" has a cellphone and only a minority bother with a separate camera.

Ah, the cellphone camera. A low resolution, noisy image with fine detail smeared out by heavy-handed noise reduction and white balance only vaguely related to reality. Fiddly handling, half a second or more focus lag - that is, unless the cam is fixed-focus - and another half a second to actually take the picture. The images are printed (if they are printed at all) in automatic kiosks giving you a strangely colored print the size of one of my medium format negatives.

None of that matters. You don't hear most users complain, and they don't complain because the results are good enough for their use - a memento, something to show your friends and relatives, a memory aid. The motive is everything; image quality and composition is secondary or completely unimportant. To be fair, image quality has increased quite a lot lately. A good cellphone camera in even, natural light will give you a perfectly fine picture. And that increasingly means that a free camera in your cellphone will trump even the best designed, inexpensive pocket camera in the market.

Phone Cam

The future of photography.


It's not easy to find freely available, directly comparable statistics over time, but here's what I could get hold of after literally minutes of googling (what don't I do for my readers). Most of these sources aren't directly comparable; it's the general trends that are interesting, not the numbers.

  • In 2004, 257 million camera phones were sold, already outselling digital cameras 4 to 1 (source)


  • In 2007, around 700 million camera phones were sold (source), while digital cameras reached 101 million (source), for about a 7 to 1 difference.


  • Sales of digital SLR cameras have consistently been increasing faster than the lower-end fixed lens cameras, and the trend is continuing. The CIPA forecast for next year is flat, but with DSLR sales to increase by 6.8%, and fixed-lens cameras to decrease by 1.3% (PDF source)


In other words, camera phones have been outselling "real" cameras for at least five years, have been growing faster and now completely dominates the market for devices capable of taking pictures. There is also a sustained trend for higher-end DSLRs to increase faster than lower-end cameras, a possible indication that camera phones are eating into the market for low-end cameras. It would be interesting to see the figures for low-end and high-end fixed-lens cameras tabulated separately.

The standalone camera is itself becoming a niche market, something for the enthusiast or gearhead. The very idea of buying yourself a camera is becoming unusual. The camera, as the dominant image taking device, is dying.

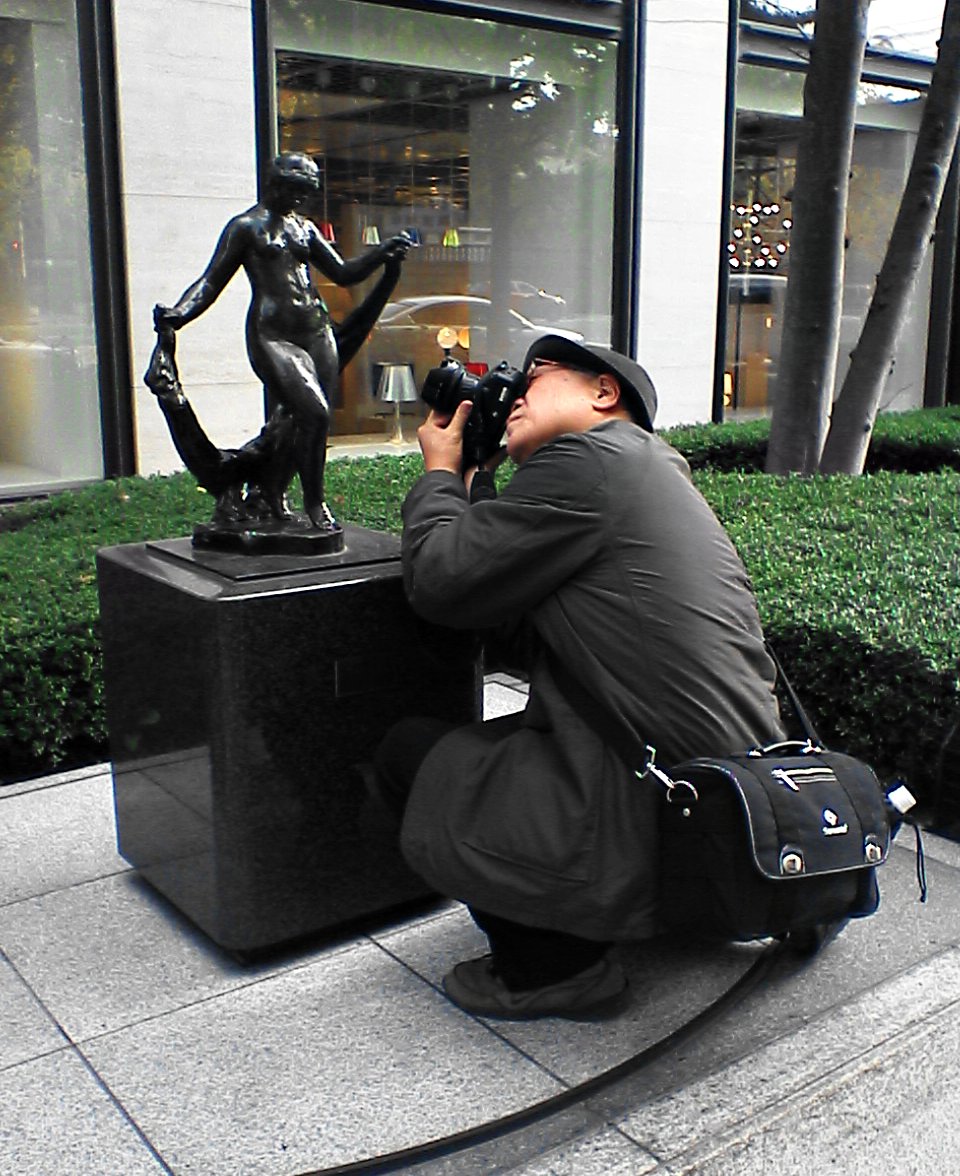
Art Appreciation

It's becoming rare to see people bring a "real" camera and a bag of gear just to take pictures. For most people the ever-present phone cam is already good enough.

This picture, by the way, was taken with my old cellphone; that one would be more than three years old now. My current one gives me higher quality, and models selling today do better still.


As with film, of course, but even more so, it doesn't mean the camera as an object will disappear or anything. We're still talking about 100 million cameras made every year after all. The numbers will dip a bit over the next couple of years, but there's a huge amount of cameras being sold out there. Nor do I think the market shift will be as fast as the shift from film to digital. The decline of the low-end mass-market camera will be gradual.

I do believe that the low-end digital camera market will eventually disappear, while the high-end pocket camera and DSLR continues to thrive, selling to those who take an interest in photography itself. That means that any business aiming for the photographic mass market - cheap printing, image sharing, accessories and so on - will consider cellphone users first and foremost, not camera owners. It means the standard of amateur imaging and man-on-the-spot pictures of significant events will be - and perhaps already is - the cellphone camera.

Monday, December 1, 2008

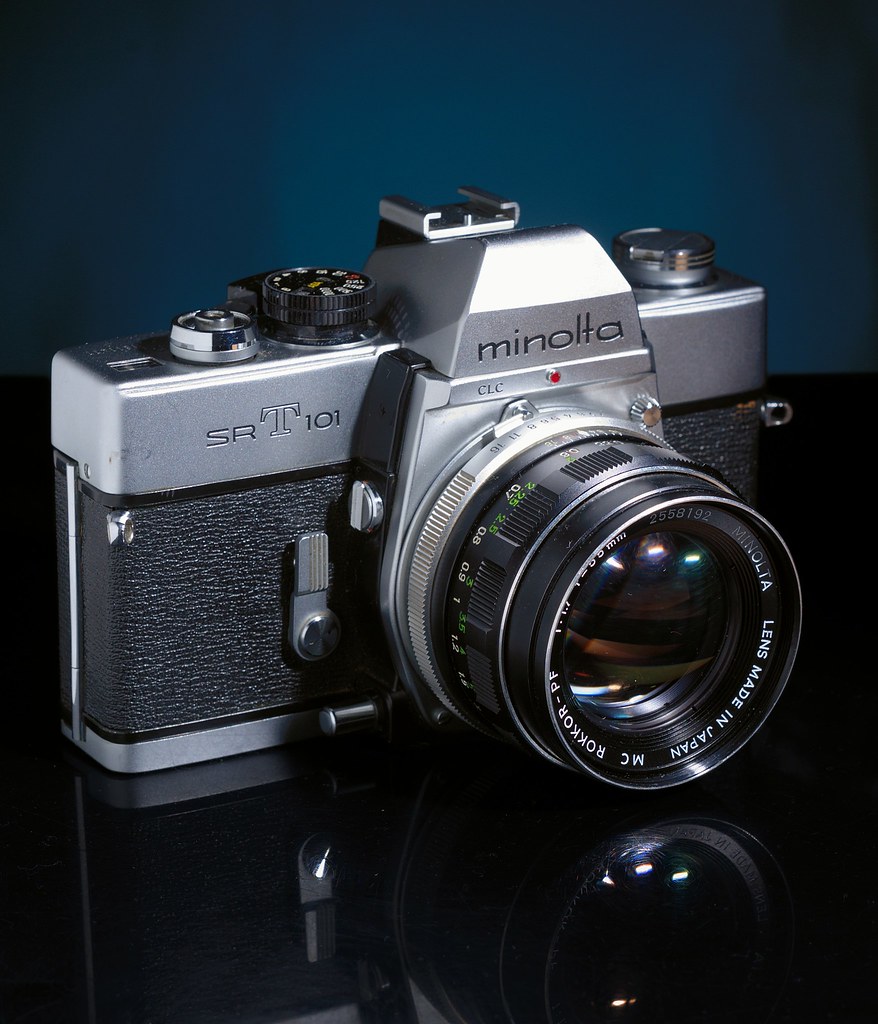
Minolta SRT 101

Minolta SRT 101
Minolta SRT 101


The Minolta SRT101 is one of the classic cameras of the 1970's. It was introduced in 1966 and was in production for fifteen years - an eternity by today's standards. It was hugely popular, in part because of its light-metering system, but also because it is an extremely solid, reliable camera with a large array of high-quality lenses available. This is not a "vintage camera"; it is quite capable of excellent results used today, and apart from autofocus there is nothing this camera lacks compared to its modern counterparts. Except for it being a film camera, of course; I'll come to that.

This is notable for being one of the first mainstream cameras with "open aperture metering". It meant that unlike earlier SLR cameras, the lens aperture setting is coupled to the body, so the camera knows which aperture you would be using. The light meter measures the light with the lens wide open, then compensates for the aperture you'll actually use. Very convenient, and perhaps obvious today, but it was a real innovation at the time.

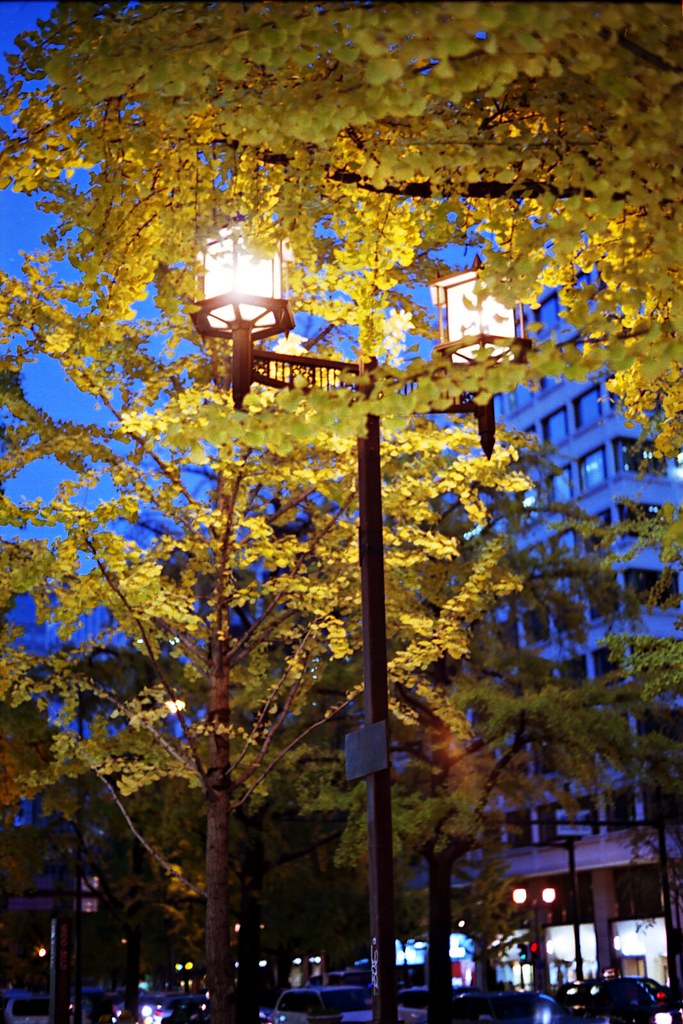
Evening Light
Autumn, Midōsuji street
Mirror lockup used

This camera has several other real benefits such as a dedicated mirror lock-up knob. When you take a picture, the mirror inside slams up so the light can reach the shutter instead of the viewfinder, but that jolts the camera and creates blur at lower shutter speeds. To avoid that, especially on a tripod, you want to fold up the mirror beforehand. Many modern DSLR cameras unfortunately hide this useful function in some obscure menu (Pentax, to their credit, have a really smart function for this). This camera has a very convenient dedicated lever for it. And when something is convenient you tend to use it, which results in better images.

But the most notable feature of this camera is the body itself. It's squared-off, all metal, and built to last. To make it short, it feels like a steel ingot in your hands. This is good and bad. Good thing is, it can probably take quite a lot of abuse with only superficial wear and tear. On the downside, it really is quite heavy; it certainly feels heavier than my K10D despite being a lot smaller. It's dangerous in a way; it feels so solid and reliable you tend to forget to be careful. And solid or not, if you bang it hard enough the small mechanical assemblies inside are not going to like it very much. In reality, of course, modern camera design with a rigid metal cage surrounded by a plastic shell is lighter, cheaper and just as durable, if not more so.
 
But while the time of all-metal bodies have gone, the shape is a different matter: A square slab with well-defined edges feels much better in your hands than the rather bulbous, swollen camera bodies of today. A modern DSLR feels like a large balloon-animal toy version of the Minolta. They look like they have the mumps. I really, really wished camera makers could return to this kind of sleek, well defined body shape.

As far as taking pictures with the Minolta, things are remarkably simple. Look through the viewfinder, adjust aperture and shutter speed until a little paddle thingy matches the light meter needle, focus and shoot. Film has a remarkable latitude so this simple light meter is plenty accurate enough, and as the camera has an old-style coarse ground glass it's very easy to see when you're in focus (unlike today's brighter but smaller viewfinders).

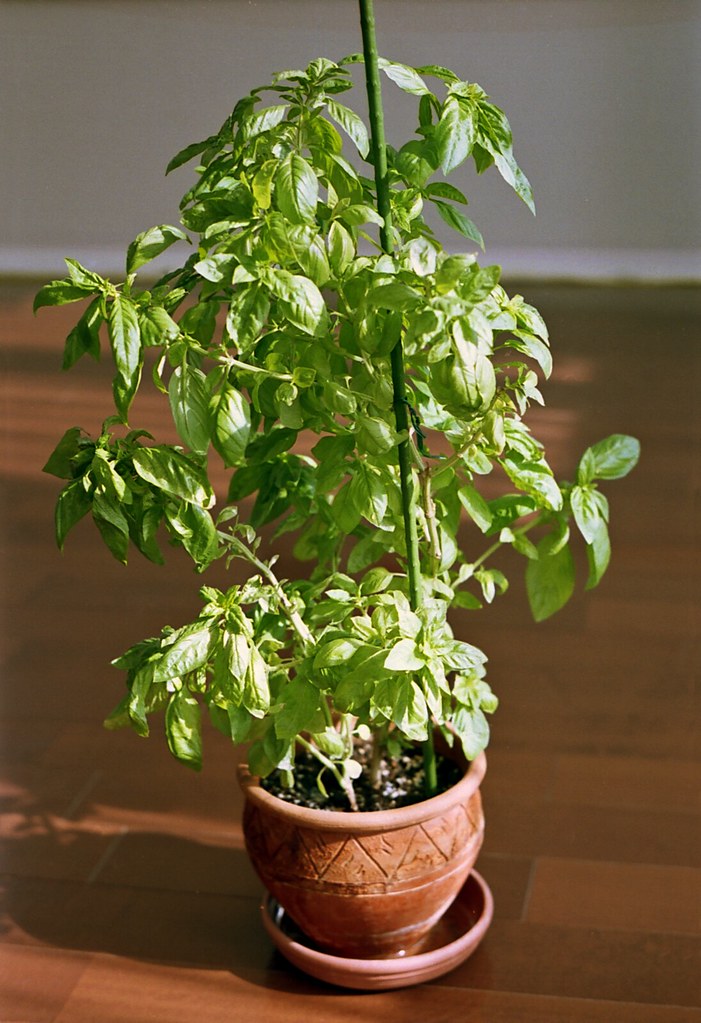
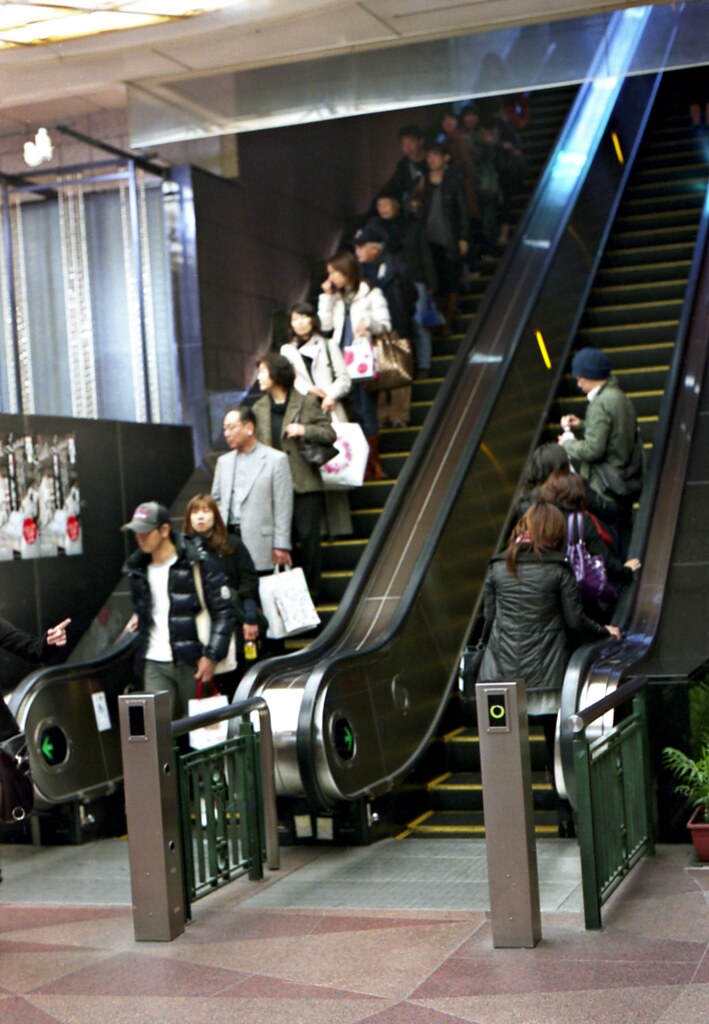
Basil Crysta

Our basil plant just before we cut it down to make pesto; and the escalators in Crysta Nagahori leading up to the street level. White balance used to be an issue with film, but when you process the images digitally you can tweak it as much as you want.


And About That Film Issue?

The last issue is that of film. I've already mentioned that I've started to use film in addition to digital. But that is medium-format film, and black and white rather than color. the thing is, the larger the film area the easier it is to get good results, and the easier it is to scan. We may think of 35mm - and APS format digital SLRs - as a consumer format, if we even realize that other formats exist. But because the film or sensor area is relatively small it needs higher quality lenses and higher precision than medium format to achieve good results.

Medium and large-format lenses are usually less sharp and resolve less detail than 35mm lenses, and - counterintuitively for a "professional" format - they are cheaper as a result. Sure, there are medium format lenses that approach the resolution of a good 35mm lens but they're relatively rare and expensive. With all that sensor area medium format lenses don't need to be very sharp; instead some sharpness is sacrificed in exchange for lower noise and higher dynamic range.

Basil and Mikan Basil and Mikan

The same scene shot with 35mm film (left) and digital SLR (right). Somewhat different colors, and a somewhat more muted rendering with the film version than the digital one. I think I prefer the film version in this case.

As far as resolution there's no meaningful difference I can see when comparing the negative with the digital file. In reality, neither film nor digital camera sensors are constrained by resolution any more; it's other factors like lens aberrations and resolution, diffraction and so on that are the limits today.


This same principle holds at the other end too. Medium format negatives are really large and forgiving so even a mediocre scanner will still get a high resolution, decent quality scan out of it. But with the small frame size of a 35mm negative you need a better scanner for decent results. We have two scanners at home - an old but good quality flatbed that Ritsuko uses for work and I scan medium format with, and our HP all-in-one printer, copier and scanner which also has the ability to scan 35mm film.

The good quality flatbed does a decent job, with low noise and OK color rendering, though white balance needs to be adjusted afterwards. Flatbed scanners normally achieve only half their theoretical optical resolution or even less, however, so at a practical limit of 1200 dpi this one gives rather small images for 35mm. The all-in-one is a fine document scanner and copier but for film it gives results so bad that I won't even show them here; they're completely useless, with lots of shadow noise with some strange random shot noise, blocked highlights, striping and wonky color rendering (not just a white balance problem, but wrong altogether). Lesson: for scanners the low end really can be worse than nothing.

In the End

I'll keep using this camera, I think. It's a stellar camera and the 50/1.7 normal on it does it justice. For all its bulk it is still smaller than my MF cameras, and it should be fun to keep it in the bag as an always-around camera. Not sure if I'll keep using color film or if I go with BW here too, and start developing 35mm myself as well. Time will tell. The whole set of images is available here.

Sunday, November 9, 2008

Development

Learning about stuff is fun. And the more we learn the more we want to learn more; in other words, we want to learn more about the things we already learned more about. Or something to that effect. Anyway, I started using film a while ago, just to play with some older cameras and get some experience with the medium. That turned out to be amazingly fun so I've continued to use film this autumn. That made me want to learn more about the whole process, so now I've started to develop film myself.

Art Appreciation
A fellow hobbyist on Midōsuji street.


Black and white film development turns out to be easy. It is cheaper than having a store do it (half price or much less, depending), and for medium-format it's much faster: the store takes three or four days, while doing it at home takes an hour or so. It gives you more control over the result - and more ways to screw up too, of course. You don't need a blacked-out room or anything, and all equipment, chemicals and stuff fits on one shelf in my study. The one single thing that takes a bit of practice is the first step of rolling up the film onto a spool for development, and doing it without seeing what you do. I had to practice doing it half a dozen times with an expired roll of film until it "clicked" and I got the knack of how to do it easily.

Some more examples below; please click through as the images are better viewed large.

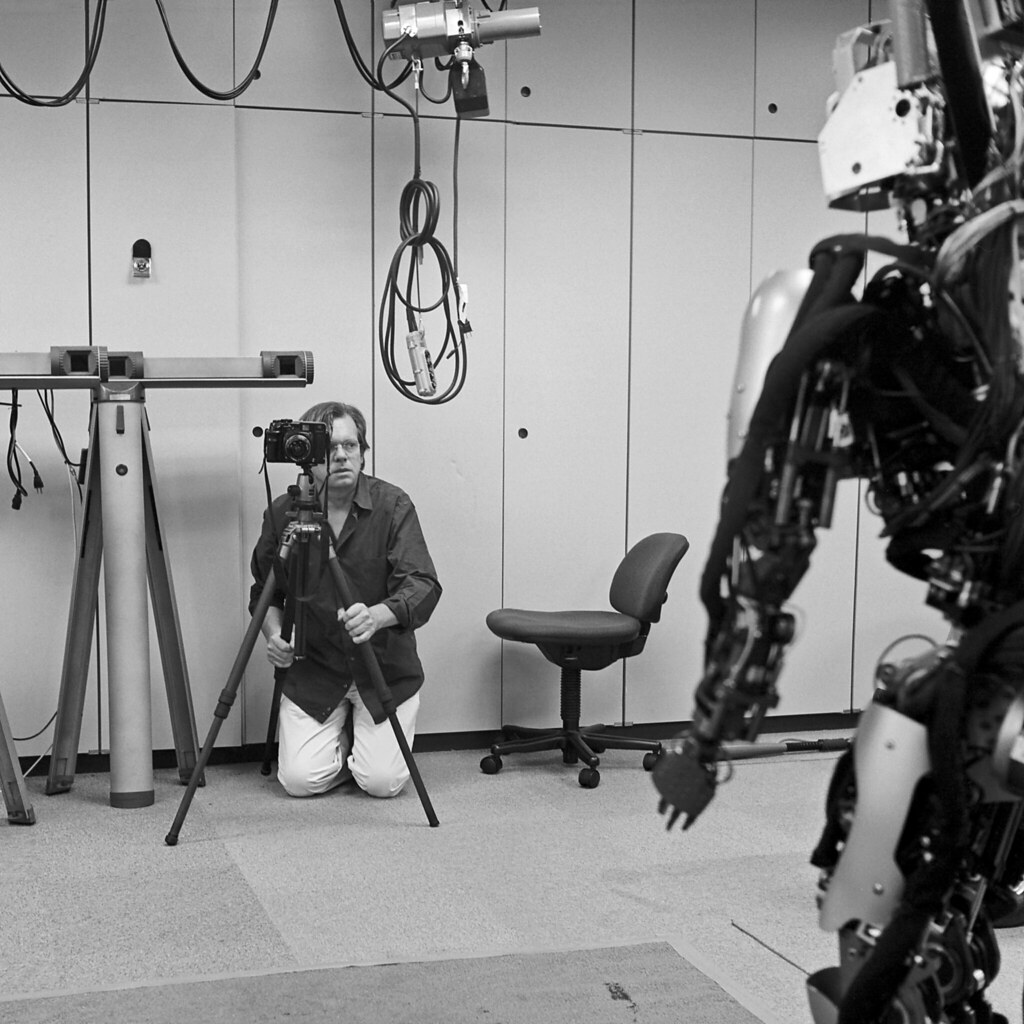
Photographer CBi

Yves Gellie is a french photographer that can take better pictures using a pointed stick than I cold ever do with a camera. He visited the lab to take a picture for a project of his. Of course I had to take a shot of him working. That's a Mamiya 7 he's using in that picture, by the way, and no, I would not mind having one.

I realized I hadn't taken a robot picture in black and white so I set up a simple cross lighting setup and the Yashica on a tripod. One of the great things about black and white, by the way, is that you don't have to care about the color of your lights. The lighting are two dirt-cheap construction site lights and nothing else. Had I taken it in color it'd be a confused riot of red and orange from the construction lights, green from the ambient overhead flourescents and a bit of bluish daylight from out on the left. In black and white it's all smooth, pleasant tones of gray.


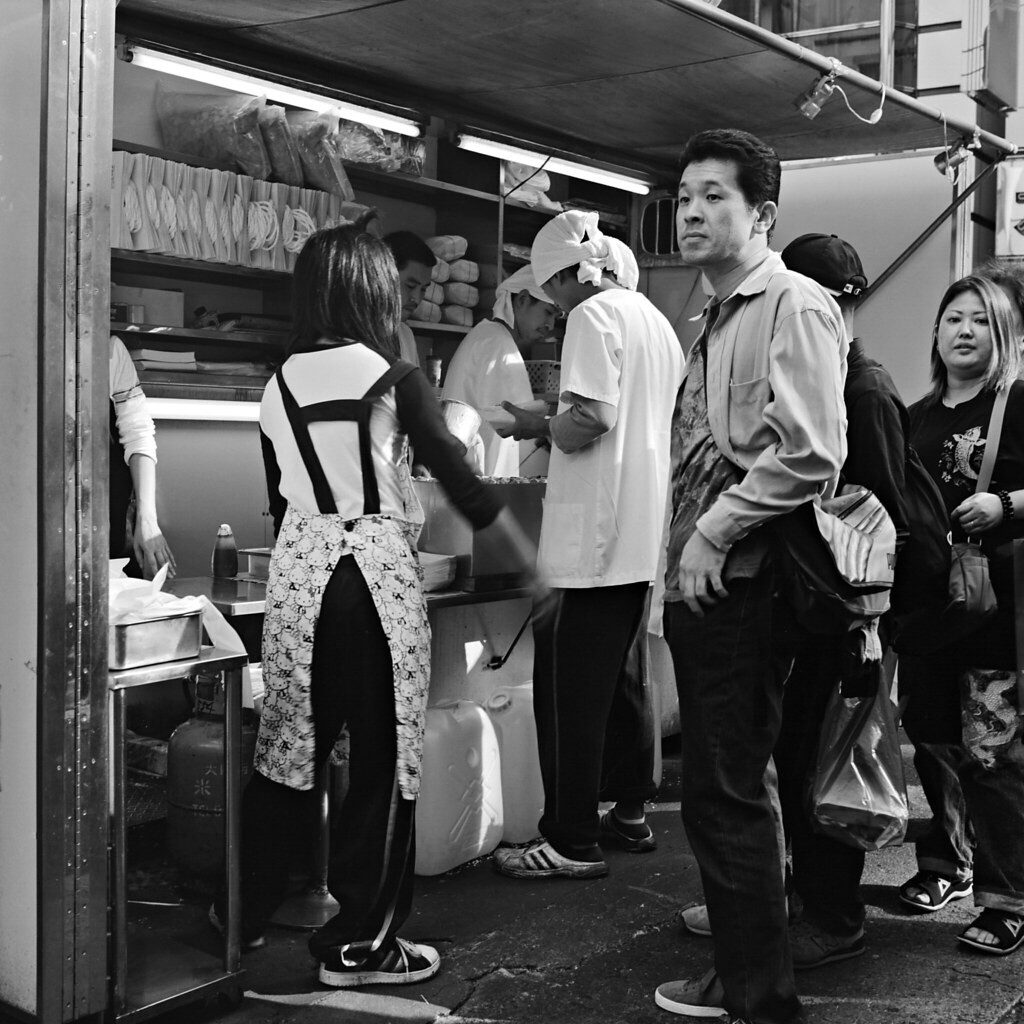
Hosts Takoyaki

Two host club hosts on their way; and people lining up at the most popular takoyaki stand in Doutonbori.

Thursday, September 18, 2008

The $50 Camera competition

Handy Box
The handy Handy Box

A while ago I wrote a review of The Handy Box, an excellent box camera, as an entry to the $50 Film Camera competition. The idea was that you pick up a film camera worth less than 50 US dollars, write a review and post a roll of shots from the camera. And from 80 entries and against all odds, my review was picked as one of the three winners. The price is a Diana+ camera and ten rolls of Ilford film - I'm sure Ritsuko will be delighted to have yet another camera in the house. ^_^

Anyway, the real excitement is still to come. All the 80 entries are now posted online, for you to browse and be amazed at. Two winners were picked by a small jury, but the third winner is an open vote - go to the site, look through the reviews and vote for the one you like best. The entries cover any kind of camera you could think of, from late-model pocket cameras to TLR's to Russian SLR's to pinhole cameras - even a 3D camera. And with all cameras cheap and cheerful - cheaply made or old and well used - the resulting images are all over the place, in quality and tone. Even if you never intend to use film ever again, the breadth of results is inspiring.
 
So go here, marvel at the scope of human ingenuity, and vote for your favourites. You can vote for as many or as few as you like (it's an approval voting system) so don't hesitate.

Monday, August 25, 2008

The Handy Box

In my neverending efforts to complicate my life - also, I wanted to join the $50 film camera project - I have been making use of another old camera. The Handy Box is a box camera, one of the earliest, most common, easiest to use and cheapest camera types ever produced. It is sometimes said that a camera really just is a box with a hole in one end and a film strip in the other; the box camera comes close. Of course, any camera could be said to be a "box camera" but a rough definition is a rigid, non-foldable camera with simple, straightforward design, no automation and very limited settings. If it needs a battery, or if you can change lenses, it is most definitely not a box camera.

Handy Box
It's handy. It's a box. It's Handy Box!


This kind of camera first showed up in the 1880's, and has been in continuous production in some form ever since. While the traditional squarish box shape is no longer used, Instamatic-type cameras are really box cameras with a slightly different shape, and today's disposable cameras are really just small box cameras without a way to change the film.

You can find box cameras just about anywhere. They were made in huge numbers over many years so they keep showing up in garage sales, antiques fairs and second-hand stores, often for tiny sums, or even for free. Since they are so simple it's easy to check if it still works. Open it and trip the shutter a few times to see that it works. Look through the lens to see if it is in reasonable condition. Look for any holes or cracks (it should be pretty obvious if there are any). Make sure the film winder isn't stuck.

The Handy Box is somewhat rare, as it is Swedish-made; while Hasselblad is the only well-known Swedish maker today there were quite a few other camera makers over the last century. "Göteborgs Kamerafabrik" in Gothenburg had been producing a box camera called the "Mefag"; when the company folded around the second world war, the design and tooling was bought by "Svensk Kameraindustri" who produced the Handy Box around 1947 and 19481. There's lots more on the Swedish camera history on Per-Anders Westman's informative site, so far only in Swedish, unfortunately.

This is a solid all-metal 6x6 medium-format box camera, with a leather case and carrying handle. And despite being over 60 years old, it's still in quite good condition. There's a small chip or scratch on the lens, some paint scratches in the corners and a bit of surface rust on the inside but that's about it. The shutter mechanism is smooth and reliable and the viewfinder finds views just like it's supposed to.

Handy Box
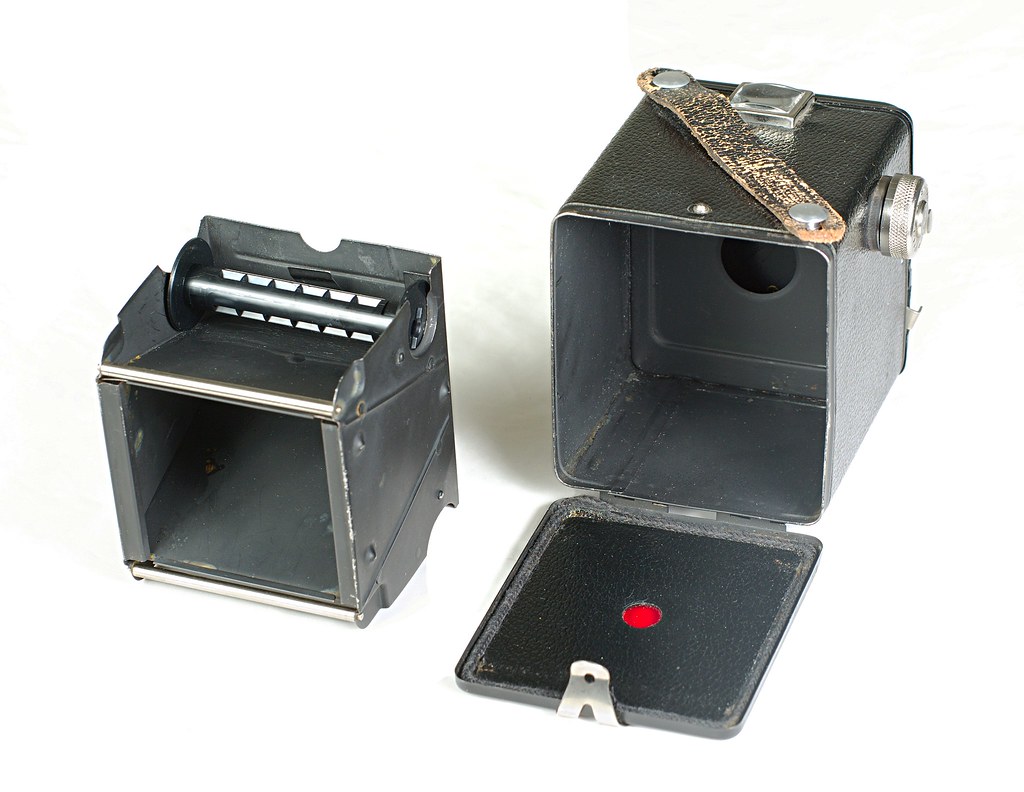
The camera insert to the left, and the shell to the right. At the top of the insert is an empty film spool; the full spool goes into the opposite side, on the bottom. The red round window is where you see the markings on the film back so you know which frame you're at and how far to wind the film.


It's simple to load the camera. Open the back, pull out the winding knob and pull out the insert. The lens is actually mounted in the insert, not the outer box. Take out the empty roll in the camera - if it's a wooden roll, save it and get a cheap plastic one from your camera store. Put the film roll in the bottom, pull out the film a bit and insert the end tab of the film into the slit in the empty roll (it's easiest to do this before you put the empty roll in place). Wind the roll a couple of turns then put the empty roll into place at the top of the insert. Slide the insert back into the body. Push the winding knob back; you need to wiggle and twist it a bit to make it catch the slot on the film roll. Wind the film until you get to a wide arrow across the film. Close the back, then wind the film until you get to the first frame.

Once you've shot the film, unloading is even easier. It's best to be in the shadow or indoors. Keep on winding until you see the film end pass in the red window. Wind another couple of turns, open the camera as above and take out the roll. A medium-format roll has a strip of gluey paper at the end that you wet just like a stamp, then wrap around the roll (often in the opposite direction). The roll is actually well-protected from light despite appearances so you don't need to keep it in the dark. It is a good idea to have it developed fairly soon, though.


Operation

The Handy Box aims for simplicity, just like a modern digital point and shoot camera. Unlike the point and shoot, however, it achieves it superbly. A modern camera tries - and fails - to be simple by automating all settings. The Handy Box achieves Zen-like simplicity by having no settings to change.

Handy Box manual Handy Box manual
The Handy Box manual. All two pages of it. When the Handy Box aims for simplicity it's not kidding around. How many pages does your typical digital camera manual have? Left of page one describes "instant" photography, and the right side describes "time". The table reads: "Indoors near windows, 1-3 seconds; in gray weather or in shadow, 1-5 seconds; Indoors with window light, 5-30 seconds". Page two describes how to load and unload film.

A big thank you to Per-Anders Westman who kindly scanned his manual for me and sent me the images. It's people like him that make this hobby so rewarding.


A modern camera will try to autofocus for you, but it will take time and it will sometimes focus on the wrong thing or fail to focus at all. Older cameras like the Yashica TLR or Voigtländer Bessa that I've written about need to be focused manually. The Handy Box has a far simpler, more reliable solution: you don't focus the camera at all. The lens is permanently set to a medium distance. It is the ultimate autofocus. If the picture got blurry it's not the camera's fault, you were just not standing in the right place. Selecting the aperture is solved in the same, radically simple way: It is fixed - I measured it to f/16 - and unchangeable. You no longer need to worry about depth of focus issues.

With shutter speed and exposure, too, the Handy Box lives up to its name. Measuring the exposure and setting the right shutter speed is a major worry in modern photography, with whole books devoted to the subject. The Handy Box cuts through this web of complexity: we need no exposure metering since we can't set the shutter speed. The shutter has only two settings: "time" (what we call "bulb" today) and "instant". With the "time" setting, you push the shutter lever one way to open the shutter, and the other way to close it again. At the "instant" setting the shutter will open briefly when you pull the lever, whether up or down. I measured the shutter speed to 1/50 going one way and 1/60 going the other; similar enough to be the same in practice.

Handy Box Viewfinder
The Handy Box viewfinder. It's fairly dim - only useful in daylight, really - and you need to be very precisely positioned to see through it. It's often easier to simply guess your composition.


Fixed focus, fixed aperture, fixed shutter speed - truly, worries about camera settings are a thing of the past with the oh so very handy Handy Box!


What? No settings?

When I first loaded the film and picked up the camera I felt utterly lost. There was no way for me to adjust anything. Our modern cameras give us very precise control; we can adjust every possible setting, and we get instant feedback on everything we do. But while this control is wonderful it is also deceptive; once we can control our settings precisely we soon start to believe that we must do so. We start thinking that a picture that isn't perfectly controlled - perfect focus, perfect exposure, perfect color - is not a good image.

We amateurs and enthusiasts tend to forget that the picture is not the image (professional photographers know this, which is why they spend their time arguing royalty rates and licensing, not pixel-level sharpness). The World Press Photo exhibition passed by Osaka two weeks ago. It honours the best press photography of the year. When you look closely, you realize that a lot of those images are not well controlled; focus, exposure and color may all be off. But a soft or dark image may convey its subject as strongly as a technically perfect one. Many things go into making a good image and technical quality is only one of them.

The most important advice for using an old camera like this is to work with the camera, not fight against it. Use its strengths and embrace its weaknesses. When you have no control over focus or exposure, you don't want to try shooting a wedding album. If your camera is slow to set up and use, don't use it for sports photography. If it's unreliable and erratic, it's no good for scientific imaging ("the camera didn't fire. We have to redo the experiment. All twelve hours of it.").

The Handy Box is not a sharp camera. It has a good amount of distortion, both barrel distortion and vignetting. The images are pretty low contrast and really benefit from a healthy contrast bump in postprocessing. But it is small and light, it's fast (no need to set anything, remember), it's quiet and it is very discreet - people often don't realize it's a camera at all. In other words, it's a really good street camera. Street photography is often in daylight, and the low-fi quality of the images will often complement and enhance the urban motives.

I have another couple of tips for users of older cameras. First, establish a routine. Whenever you have taken a shot, always set the camera back to its standard settings. In my case (as I learned the hard way - see the second picture below) I always wind the film to the next frame and set the shutter to "instant" as soon as I had taken a shot. If you don't make this a habit you will inevitably make a mistake, with interesting consequences. Interesting is good from time to time, of course (I really like that second picture myself), but it's still better to avoid them when you can.

Second, keep a notebook. Your digital camera records all the technical details of your images, but with an older film camera the responsibility is your own. Just make note of the settings you used for each frame so you can go back and compare with the results. And when you're taking notes anyhow it's a good idea to note what you're trying to shoot, and what you're trying to do with the image. It's not easy to remember what you were thinking perhaps weeks after taking it; just a few words jotted down can really help. That helps you improve your composition, not only the technical aspects.


Examples

I shot and developed a roll of Ilford HP5 with this camera last week. The camera is set for sunlit days with the ISO 100 speed films of the time so I figured an ISO 400 film like HP5 should enable me to get decent shots in shadow or when overcast. Sunny days would be too bright so I'd want to avoid that.

The camera really is as easy to use as I say above. When outside, use the "instant" shutter. When inside and it's bright, use something like 1 second (just guesstimate it). In dim light, go to about 3 seconds. If you don't get it exactly, don't worry - black and white film is pretty forgiving, so you'll have a recognizable image even if you're way off on your shutter speed.

Digital photo technology helps us here: since we can easily scan the images and post-process on our computers, exposure problems - and dust, and scratches, and vignetting, and a host of other issues - are much easier to fix today than they were when people printed directly from the negatives. In many ways, these old, manual medium-format cameras are far easier to use than ever before, with the support we can get from digital technology. All the images below have been postprocessed: I removed some dust - not all, just the most obvious specks - adjusted brightness and added some contrast. These are standard tools at our disposal today, we use them for all our other images, and it would be strange not to take advantage of them here as well.

The image quality I get from the Handy Box is pretty even and dependable. Even the images with the most technical issues don't actually look much worse than the technically best ones. When you take a picture with this camera you know what you're going to get. This dependability is part of why it's so amazingly easy to handle: I never measured the light level for any of the images above, and I didn't time the shutter; still, the images turned out good. And with no worries about any technical aspects I had a blast taking them.

I've collected all images related to this camera in its own Flickr set.
Below are the twelve frames from this roll of film, in order.

Handy Box #1
"Ok, so I'll wind the film to frame 1. And I'm winding and winding, and here's an arrow in the small red window, and another arrow, and some other symbols, and a small horizontal line, and I'm winding and winding, and here's number '2'. '2'?! Agh, was that a '1' before, not a horizontal line? Oh cr*p."

I scanned this without the film holder so I'd get the film markings on the side. Chalk it up as a learning experience.


Handy Box #2
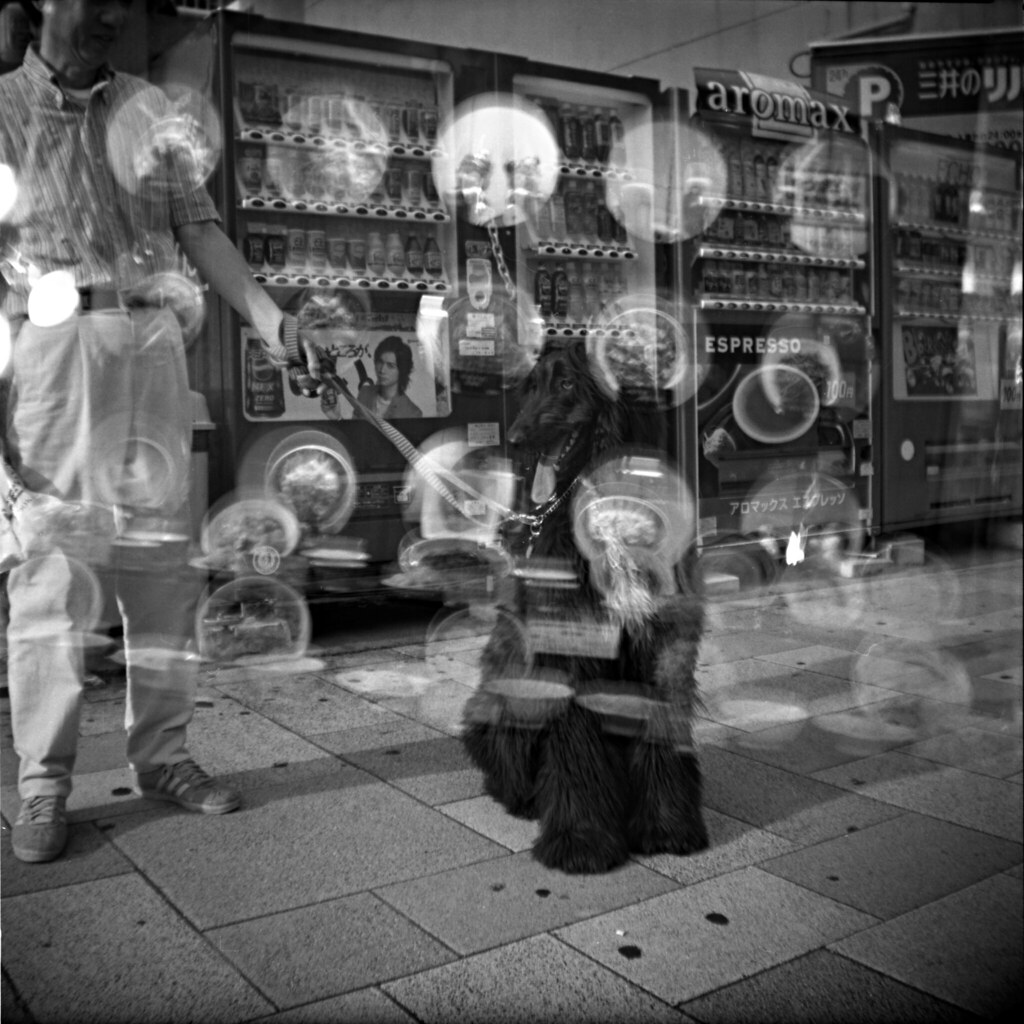
"Ahh, look at that dog! Cute, friendly and thin enough to be almost two-dimensional. The owner looks affable enough. 'Excuse me, could I take a picture?'" The dog owner sees an obviously foreign person brandishing an ancient camera and improbably decides this is a good thing. "'Great! Hold it riiight there. Thank you very much.'"

"It's really hot up on street level; the underground arcade is nice and cool right now. Gotta take a picture of that Ramen restaurant display too. That'll give me an excuse to try longer exposures. Hmm, viewfinder is really hard to see here. Ah, got it. There. Now, wind the film... wind.. the.. film...... Aggh, I forgot to wind it after the dog picture! Poor doggie, and shame about the Ramen."


Easy mistake to avoid, this - make sure you establish a routine as I wrote above. That said, this picture is rather more interesting than either the dog or Ramen display would have been on their own. Almost like a frame from some old Hammer Film horror feature; all it needs is a Vincent Price voice-over.

Composite shot; one taken with "instant" shutter, one at about 1 second.


Handy Box #3
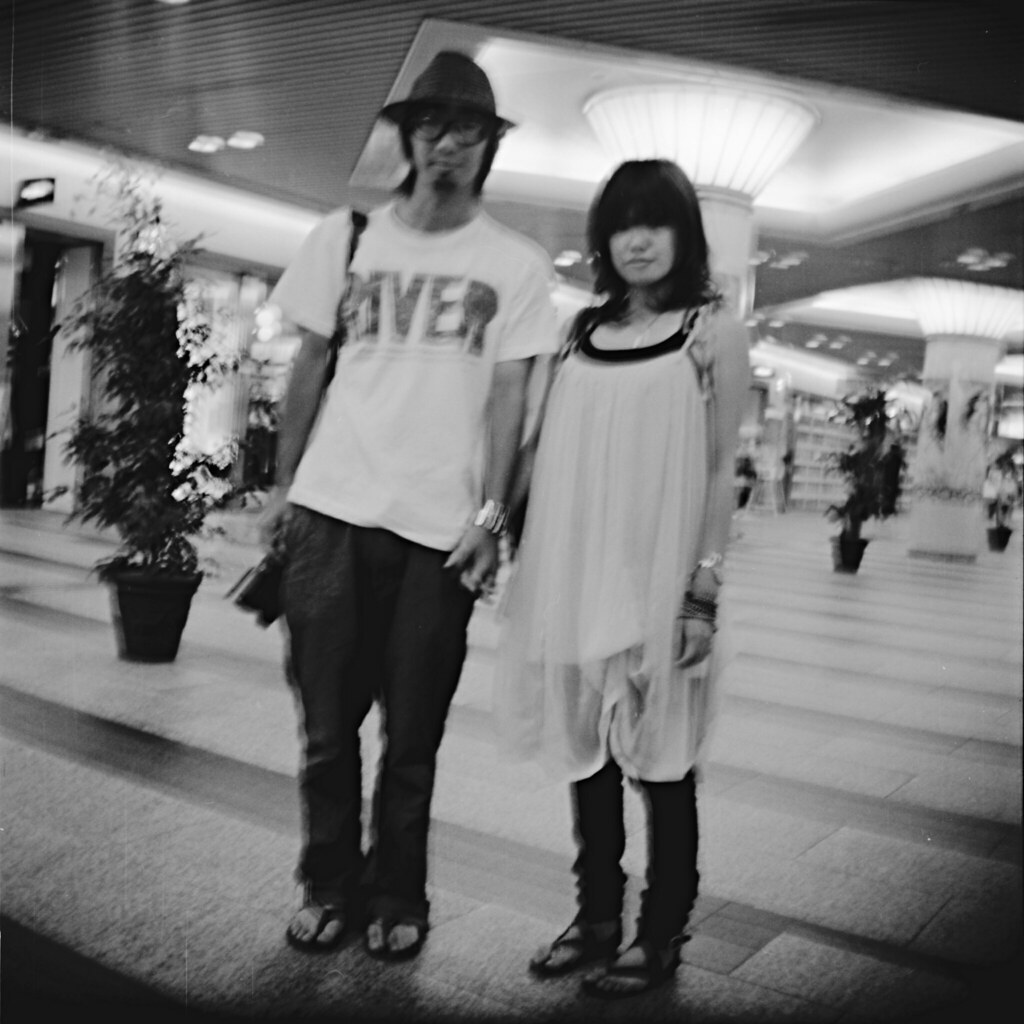
"Oh look, a hip couple, and with camera and all. Low light portrait time! 'Excuse me, could I take your picture?' 'Yes, both of you; you look cool together. There, just stand there so I get the pillar in the back. It'll be a second or so - stand very, very still.' ... 'Got it, thanks!'"

1 second shutter, underexposed. 2-3 seconds would have been better. Of course, that would have gotten me even more motion blur.


Handy Box #4
"The high ceiling and those pillars here look cool. Could I get the pillar with that escalator? Worth a try. Get motion blur on the people riding it too."

1 second. The whole image is too blurry for the motion blur idea to work.


Handy Box #5
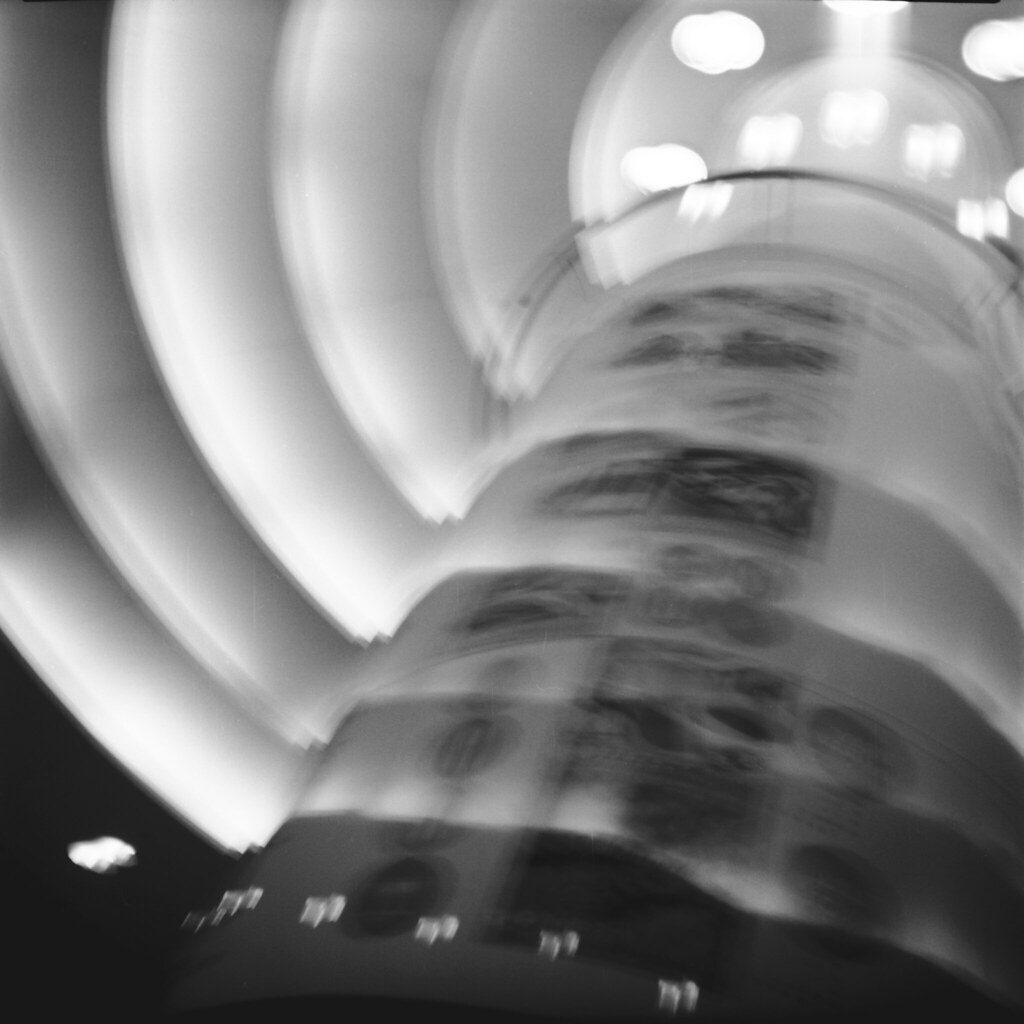
"What if I try to get just the pillar, from below, make it abstract? Try to hold it steady somehow; lean the corner of the camera on the floor I think. Aaand guesstimate the time - umm, the light is pretty bright so a bit less than the other shots should be OK."

About 0.5-0.8 seconds or so. My favourite image.


Handy Box #6
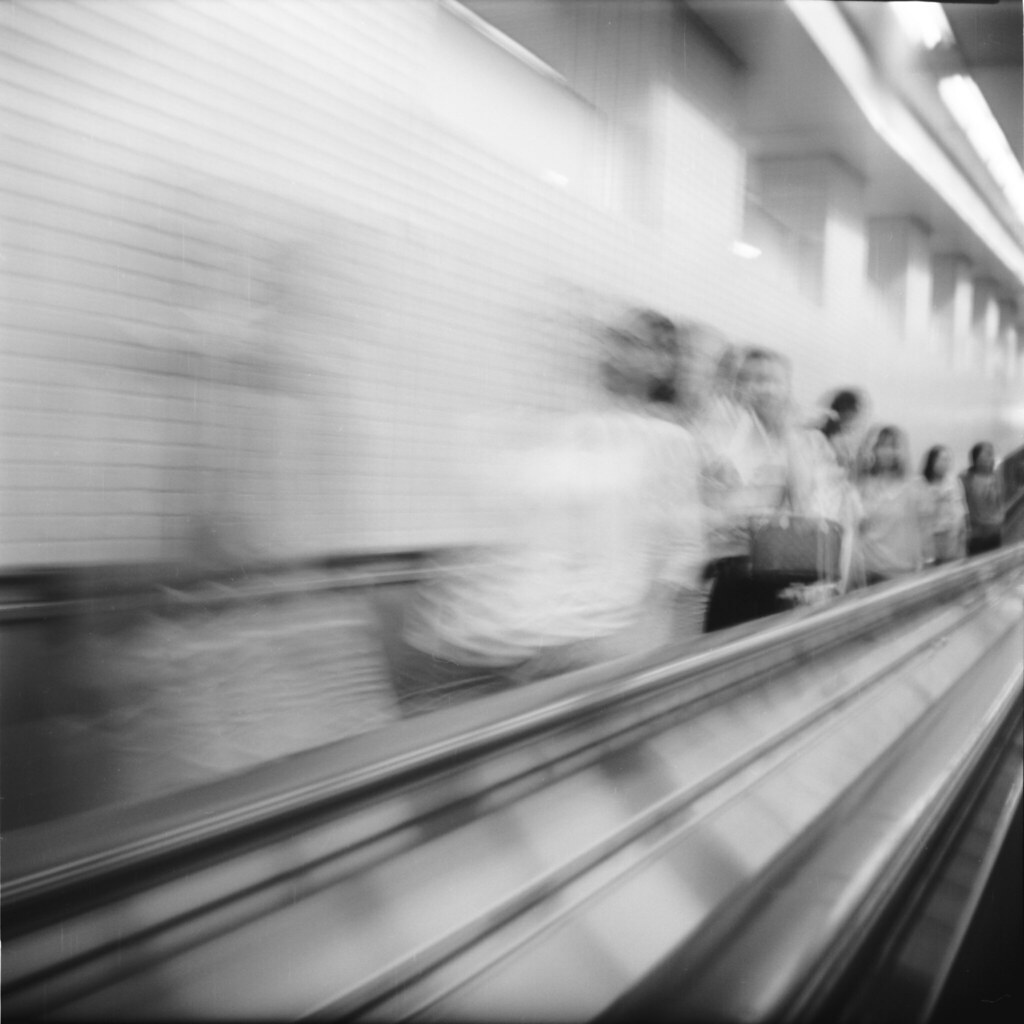
"I don't get the point of this horizontal escalator. I mean, the whole arcade is about a kilometer, and this power walkway runs for all of fifty meters. Sure is fun though. Hey, what if I put the camera on the railing and shoot the people gliding by? Worth a shot."

Around 0.5 seconds.


Handy Box #7
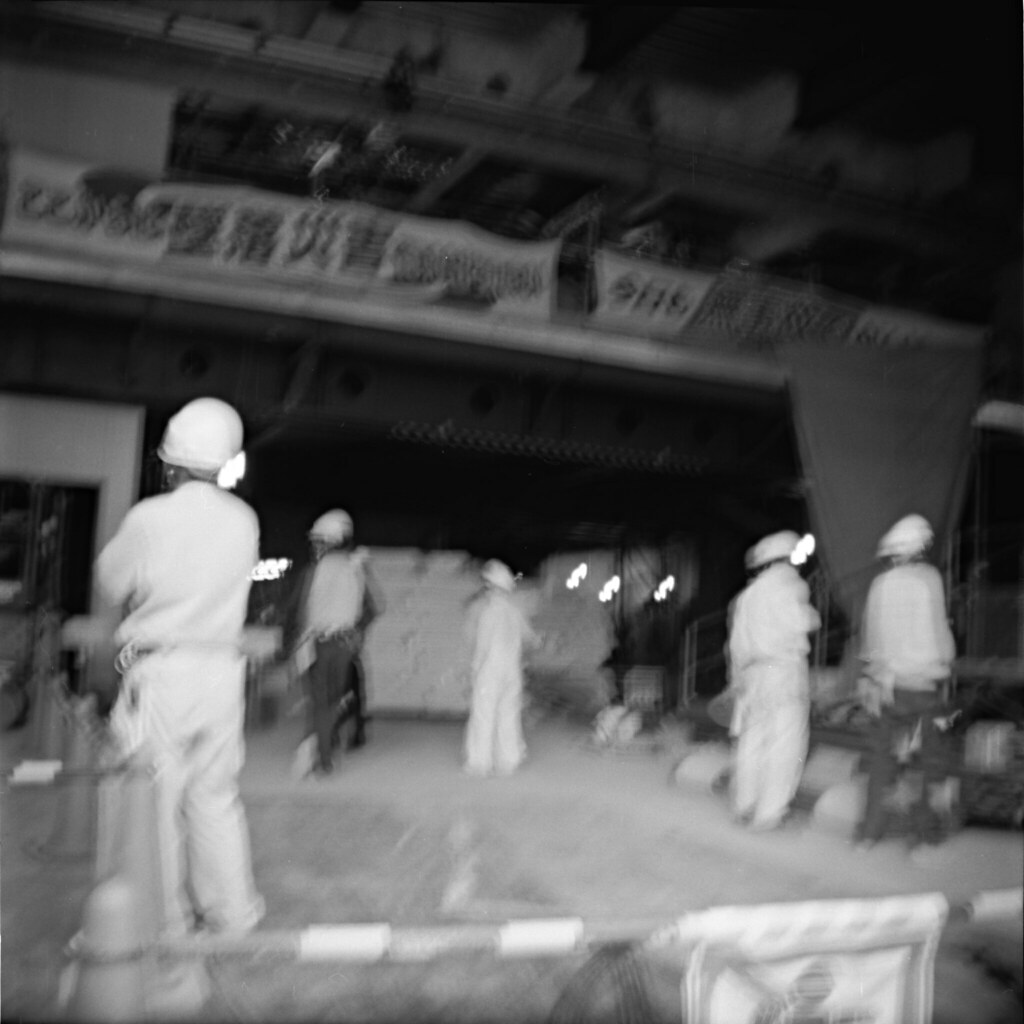
"Construction work. Never fails. Big machinery, exposed frameworks, people in helmets. Pretty dark in there though. Take some extra time perhaps."

2-3 seconds; that overexposed the brightest areas however. And I think the blur is enough to be distracting here.


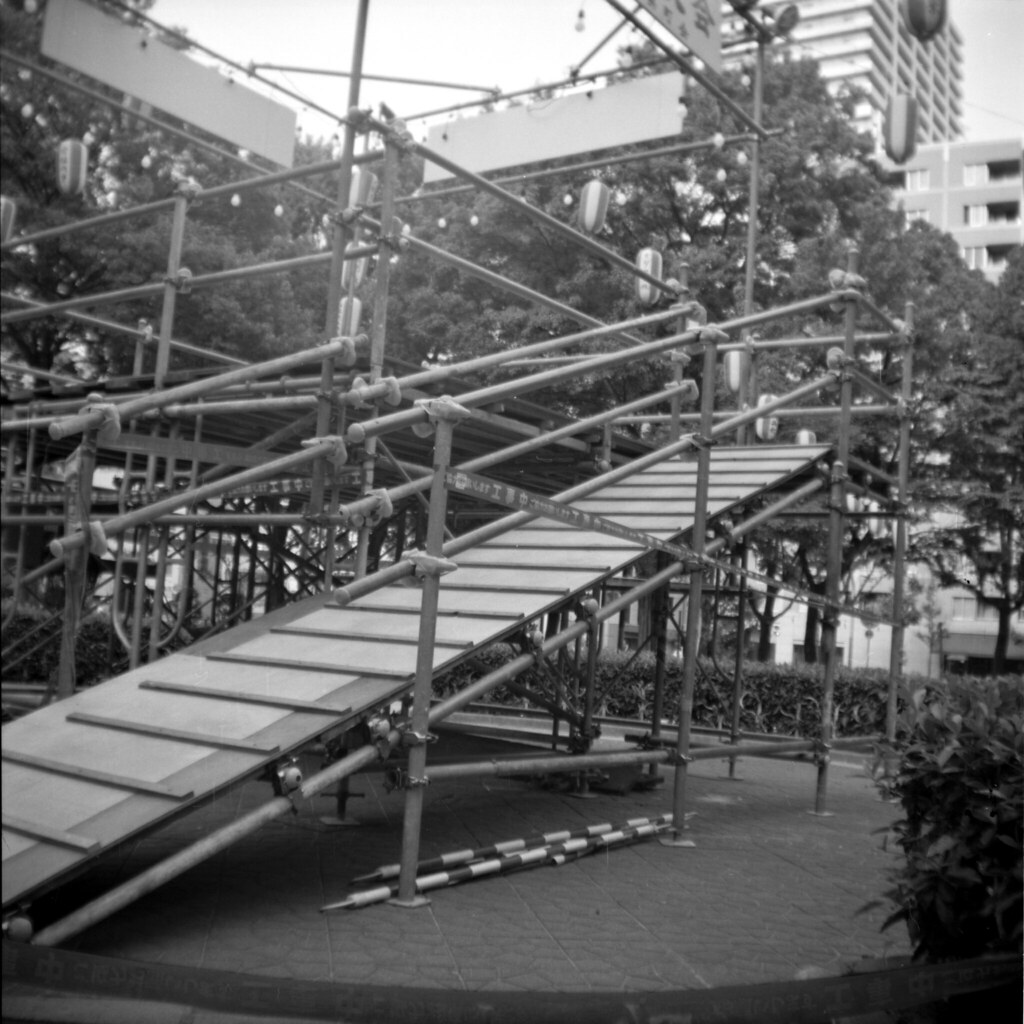
Handy Box #8
"There's an Obon festival in this park tonight I guess, that's why they've put up the scaffolding and lanterns. Let's see how the camera likes backlight."

"instant" shutter. Backlight is OK; fair bit of veiling glare but nothing distracting.


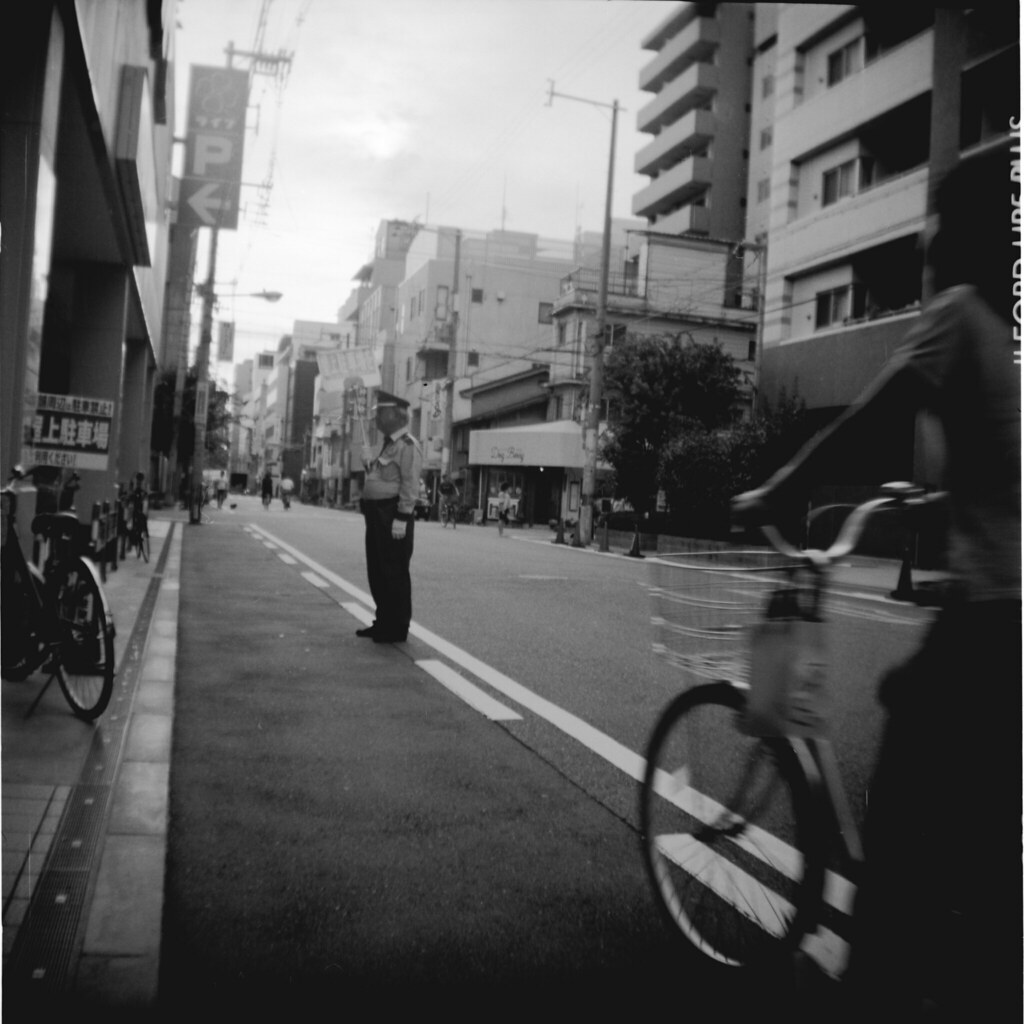
Handy Box #9
"Nice, deep light - the late afternoon sun is kind of shading the street. If I could just get the guard to look this way... Oh, bicycle coming, got to take it right now."

"instant" shutter. Shadow in late afternoon makes it a bit underexposed.


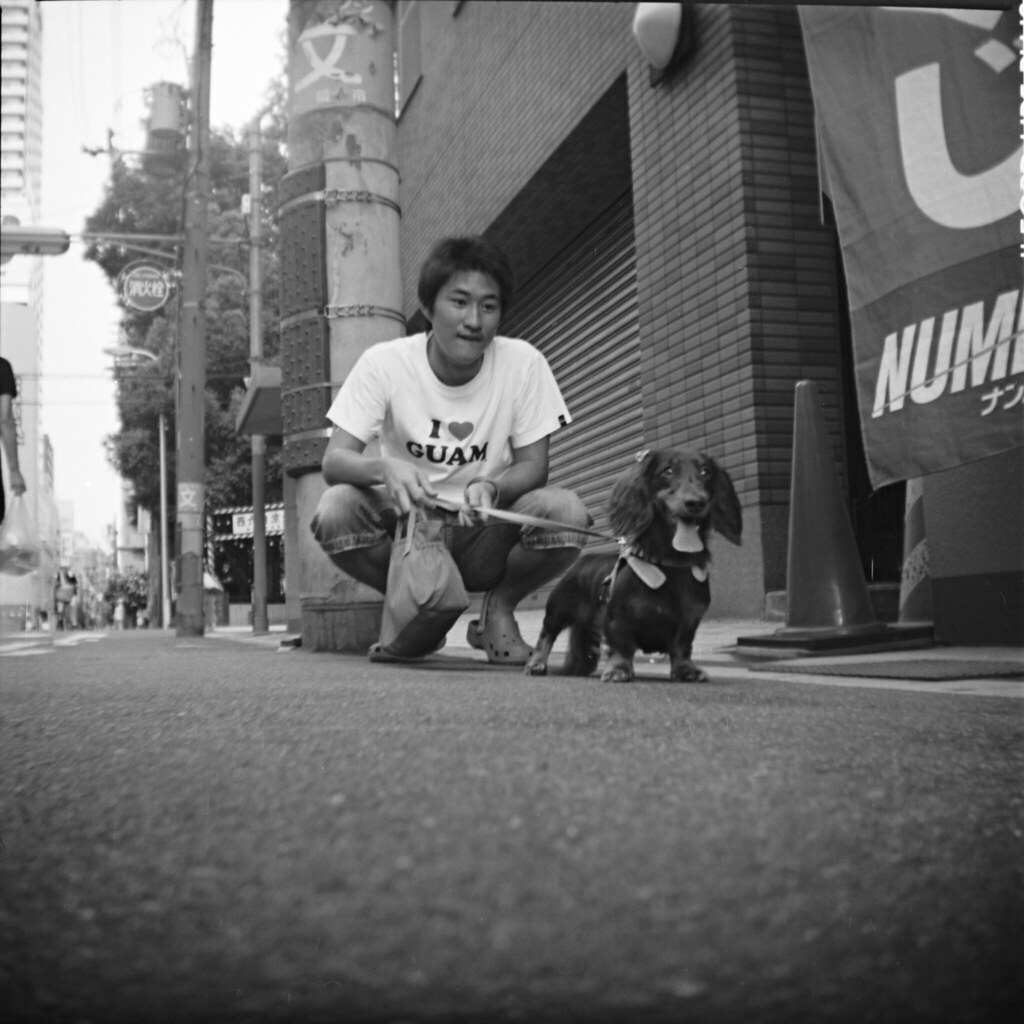
Handy Box #10
"Another dog! And crouching owner. 'Crouching Owner, Hidden Dachshund' could be a good movie title. Got to get low here. Rule of thumb: Low dog, low picture."

"instant" shutter. Close areas, like the street at the bottom, are very unfocused; the focal plane seems to be at around 4-5 meters.


Handy Box #11
"Evening, and we have a good sunset down Nagahori street. I must have half a dozen images of this already, so I want one for comparison."

"instant" shutter. You can see here that the lens has rather a lot of barrel distortion, with buildings at the edge curving inwards.


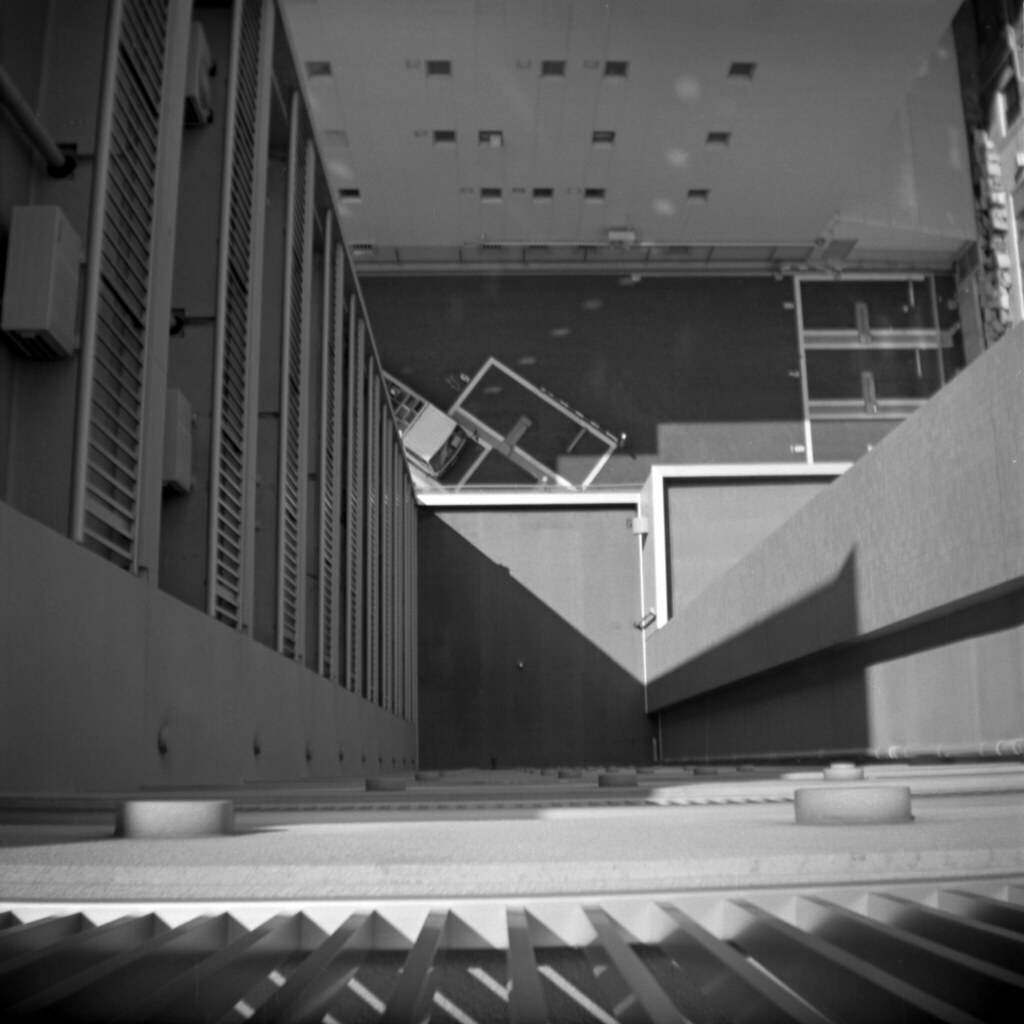
Handy Box #12
"That's some simple, clean geometric light and shadow going on there in the morning light. No way to use the viewfinder so I'll just shoot blind."

"instant" shutter.


EDIT August 2011: Changed links to Per-Anders Westmans current homepage.

---

#1 The name "Göteborgs Kamerafabrik", by the way, means "Gothenburgs Camera Factory" and "Svensk Kameraindustri" means "Swedish Camera Industry", harking back to an era when company names still had a connection to what they were actually doing; do you have any clue what kind of business, say Accentor or Ingenico are in, without clicking through to check?