Showing posts with label camera. Show all posts

Monday, October 10, 2011

Canon Autoboy II

Canon Autoboy 2
Canon Autoboy II. This one has a recording back that optionally imprints the date and time on the picture.

Something interesting happens when word gets around that you still shoot film. Friends and relatives that clean house show up with old film cameras they would otherwise throw away to ask if you'd perhaps be interested in it instead. And of course I am. By now I now find myself with dozens of old, fun toys to play with.

The Canon Autoboy II - also named "(New) Sure Shot" in the US and "AF35M II" in Europe - is an inexpensive point and shoot camera from the early 80s. Like so many products from that time it sports an angular, futuristic design that would have been quite at home in an episode of Space 1999. It has a pleasantly wide 38mm f/2.8 lens. Not a speed demon, but not bad.

Automation was all the rage by this time, and the Autoboy is fully, almost aggressively automatic. Stick the film in and it will load the film on its own, and set the right ISO based on the marks on the film canister. When you turn it on the lens cover opens automatically (and noisily), and it will set both exposure and distance as you take the picture, with no feedback needed (or wanted) from you.

Daimaru
Stairwell. Daimaru department store in Shinsaibashi, Osaka. The building is wonderful, but while they seem to accept shots like this — especially from someone that seems to be a tourist — photography is generally prohibited. I wish you'd be explicitly allowed to; perhaps they could have a photographers evening some night after closing time?

I don't have a manual for the camera (can't find one online), but it seems you can't control it manually at all. So, no pushing or pulling the film; no exposure compensation; no scale focusing. You can apparently prefocus it by pressing the shutter halfway, but that doesn't work very well as you have no indication where you've focused in the first place. This is not an instrument for precise control. Point and shoot and there's your picture, with minimal fuss but plenty of buzz.

Buzz? This is a noisy camera. It's an inexpensive design and probably uses geared motors throughout. The lens cover opens with a loud whack, the lens whirrs and wheezes as it focuses, the film advance almost screeches, and the shutter has a hard plastic-and-metal burst of rattles that's as noticeable as the mirror and shutter as my Pentax 67. This is not a camera for candid photography.

Hipster
Hipster, Osaka style. Horie, Osaka.

With its plastic body and noisy mechanism it sounds and feels cheap. I've seen used units — in worse condition than mine but fully functional — in shops for as little as 5000 yen. That's actually a little unfair, I think. The body seems quite solid, and while the camera is noisy the mechanics seem reliable enough.

What about the results? Good. Really good. The images I took (using Ilford Delta 400) have plenty of contrast and good detail, and overall distortion and corner performance seem fine to me. The autofocus and autoexposure systems do a good job; the lens and autoexposure even manage heavily backlit subjects without getting excessive flare and underexposure.

Frankenrobot
A student works on a Roomba-Kinect frankenrobot. NAIST, Ikoma. Heavy backlighting from the doors in the background, and yet exposure is good enough to make a decent shot. The lens also manages fine without excessive veiling glare. Many cameras would do much worse in a situation like this.

The camera takes normal 1.5v penlight batteries and they seem to last forever, so you'll never be stranded from being out of power. It seems decently solid, better than my first impressions, and the body is sleek with few protrusions. And with the current basement-low prices for a used unit this could be an excellent bag-camera — a camera you load and stick in your bag just in case you ever suddenly need a film camera. It can ride along for months, none the worse for wear. And if something does happen, if it gets drenched in a rainfall or something, well, it's just a few thousand yen for a new one. If you're looking for an inexpensive way to start with film you could do much worse than this.

Escalate Your Fashion
Down escalator in the new JR Umeda station, Osaka. Fireworks festival the same evening so lots of people around wearing traditional summer dress. I'm a bit envious; summer yukata (or samue) are cool and easy to move in when it's hot, but it looks vaguely ridiculous on a westerner.

Monday, May 23, 2011

The Gakkenflex TLR

Ritsuko gave me a Gakkenflex for Christmas last year. It is a kit film camera from Otona no Kagaku; I wrote about their wonderful Stirling engine kit. I've built it and used it for a few rolls now.

TLR? SLR?

The Gakkenflex is a twin-lens reflex camera - a TLR. A TLR, just like the better known SLR (for single-lens reflex) is a solution to the age-old problems of "how do I see what I'll get, and how do focus this thing?" It uses two lenses, one to focus and one to actually take a picture.

TLRSlR

A TLR to the left and an SLR to the right.


The idea with the TLR is that you have two lenses: the upper lens points to a mirror and then on to a focusing screen on top, while the lower lens points directly at the film or digital sensor. The lenses have the same focal length and are mechanically coupled, so that they both show the same scene and are always focused at the same distance.

The result is a compact, light, simple and reliable camera in a convenient rectangular package. With separate lenses there is no shutter lag and no finder black-out when you take the picture. It's one of the great design successes in the camera world. Hundreds of models have been made, by dozens of companies over the years, all with the same basic design.

There's a few drawbacks, though. The two lenses see the world from somewhat different angles, so close up the finder no longer shows you exactly what you'll get. The design makes it difficult to use polarisers and split-density filters, and if you want replaceable optics you need sets of two lenses for every focal length. The solution for that is the now very popular SLR. As you can see on the right above, we replace the two lenses with just one lens, and make the mirror flip up and down. When down it shows the image on the focusing screen, and when up it lets the image through to the film or sensor. We'll see exactly what we're going to get.

The SLR is another trade-off, of course. The finder goes dark while you take the picture, and as the mirror needs to move away there is a noticeable time lag between pressing the shutter and taking the picture. Also, the mechanism is quite noisy and vibration prone, and the faster you make the mirror the more noise and vibration you get. An SLR typically needs to use faster shutter speeds than other camera types or you get blurry images.

One drawback of the TLR is that the finder image is flipped left-to-right - but the image is flipped on an SLR focusing screen too. We get a correct image in most SLR cameras because we add a prism on top of the finder. This prism re-flips the image and projects it straight back so we we can look through straight ahead. Nothing prevents you from adding a prism to a TLR finder. We use a prism for 35mm SLR cameras because the small focusing screen is hard to see and hard to focus. Most TLR cameras are medium format, and to cover the large, bright focusing screen you need a very big, heavy glass prism. The Pentax 67 I've written about has a removable prism that weighs more than half a kilo - half the entire camera weight - so I normally never use it.

Construction

The Gakkenflex is a kit camera - you get the parts and put it together yourself. The kit consists of a thick booklet and a tray with all the camera parts. The booklet is a fun, informative look at the history and mechanics of the TLR, tips for using the Gakkenflex, various ways you can tweak and change the design and so on. The instructions are detailed, with clear step-by-step illustrations.

Gakkenflex Kit

All parts, in the tray.


Sides

We begin by assembling the sides with the film winder. The left side here has the film "counter" - a toothed wheel that will rotate half a turn for each 35mm frame.


Shutter Assembly

The shutter parts to the left, and the finished shutter on the backside of the front plate to the right. This is the most complicated part of the camera.


The camera uses a leaf-shutter; the longish leaf-like blade in the picture above that covers the center hole is the shutter itself.

That leaf is spring loaded - you see the spring top left. There's a one-way catch, like a door latch, on it halfway up, and a curved hammer-like part in the top center, sits right next to it. That hammer is also spring loaded, so if you rotate it counterclockwise, against its spring, it'll swing down, pass by the catch and wind up the spring.

If you then release the hammer it'll rotate clockwise, grab the catch and push the leaf away from the lens opening. As it continues to push, the catch will slide off the edge of the hammer and the leaf spring will return the leaf to cover the opening again.

We tension and release the hammer by the shutter lever on the right. It has a catch too - the outer half-circle - that grabs the hammer. As you push the lever the catch tensions the hammer, until it slides off the catch and releases the shutter as above. The lever is spring-loaded too (that's the large spring in the center on the left), and will return the lever when you release it.

The harder the hammer spring, the faster the leaf will be pushed away. And the harder the leaf spring, the faster it'll return - but then you'll need a still harder hammer spring to work against the leaf spring. The included springs give you a shutter speed of around 1/100 seconds, but you can of course change it by replacing the springs.

Neat, simple design.

Body

We've put the front plate, the sides and the film chamber together. The slanted grooves at the top is where the mirror will go and the round hole is for the upper focusing lens.


Lens Assembly

Here's the lens assemblies. The upper row is the picture taking lens with its aperture disc, and the lower is the focusing lens. The two lens elements are identical; there's no particular reason they must be, though. Many TLR cameras have a simpler and cheaper, but brighter, focusing lens with a larger open aperture. You want as much light as possible for focusing and the image quality doesn't matter so bright and cheap makes sense.


Gakkenflex

Add the mirror and screen, the back plate and the finder shade/covers (here opened up), and we're done. One Gakkenflex, freshly born.

You focus by turning the lenses. The lens barrels are threaded - one clockwise, one counterclockwise - and they are coupled by the gear teeth around the rim. As you screw one lens in and out, the other lens follows right along.

The knob on the upper left in the picture is for winding the film, lower right is for rewinding it. The lever at the front is the shutter.


Done! Now, what have we got? A tiny, so-light-it-probably-floats 35mm camera with fixed - around 1/100-ish - shutter speed and fixed aperture about right for 400 ASA film. I'm not kidding about the size or weight; put it in a coat pocket and you'll forget it's even there. The construction is not very sturdy, but then, it really doesn't have to be.

Yashica Mat and Gakkenflex

The Gakkenflex together with a Yashica Mat - really a lightweight, compact camera, but it looks big and menacing next to the tiny 35mm Gakkenflex.


The finder is portrait oriented and 35mm-sized, which makes framing a challenge and focusing mostly guesswork. Bring a loupe or magnifying glass to make it easier. The taking lens is a single element, so we're sure to get lots of interesting effects near the corners of each picture. The ability to focus is a step up from the Fuji single-use cameras, but while Fuji tries to minimize lens aberrations, the Gakkenflex positively celebrate them.

Book

Book. Painted ad for a long-gone bookstore on Nagahori street, Osaka.

This pretty much sums up the kind of image quality you get: colorful, a little dreamy, with decent detail in the center that fades to dark, vignetted blur towards the edges. And of course both focusing and framing is hit and miss.


Kobe

You can take fairly normal outdoor shots, but you can also easily use the blur to give you a fake toy- or model-like quality to your images. Here's one of the main roads through Kobe.


Slippery Slope

With darker scenes you may have to brighten afterwards, and that brings out the vignetting in the corners. Here a delivery truck is stuck on an icy slope in Ikoma, with the driver putting on snowchains. It's getting hot and humid here in Osaka now, and this picture makes me miss winter.


Umeda

The fixed shutter speed is no problem in low light - just hold the camera steady and take multiple exposures. With care it'll look no different than a single shot. This is Nakanoshima, from Yodoyabashi.


Umeda

If people are moving around, though, it'll be obvious what you did. Umeda subway station.


Going Home

You can play with the effect, of course; here the train is arriving at Kita Ikoma station.


Moving Image

Or really play with it - here's an impressionistic portrait of Ritsuko in a Kobe pub. Not that you'd know by looking at it.


This is a seriously fun camera. The kit is one of Otona No Kagaku's all-time best-sellers, and for good reason. It's made to be easily tweakable by its users, and there's thriving communities dedicated to hacking and playing with it. Change the aperture, make it square-format, swap lenses, make it a pinhole camera, take it underwater, add a finder prism - you can easily spend so much time playing with the design you forget to take pictures.

But the pictures are not bad at all. The cheap lens and vignetting imparts an ethereal, otherworldy quality to the most mundane scenes. The low resolution and heavy off-center blurring means that even low-end lab scans can bring out all that the camera has to offer. And the finder ensures you'll always be surprised - positively, more often than not - by the pictures you get back. Here's the full set of images

No Bikes

No Bikes. Karahori, Osaka.

Sunday, October 31, 2010

Vivitar Mariner

The Feeling Negative site has an ongoing traveling camera project: people send a camera to each other in turn, and every recipient takes a roll of film with it before sending it on. It's a fun idea, if somewhat slow as each stop takes a few weeks at least and the participants are spread out over the world.

The camera stopped by here in Osaka last month. I opened the very light cardboard box to find this:

Vivitar Mariner

The Vivitar Mariner. Fifty grams of plasticky 35mm goodness.

The Travelling Camera is a film project so I thought it fitting to take this shot with film too. I used the Pentax 67 with 90mm lens; it doesn't focus very closely so I've had to crop this quite a lot. I really should get a set of extension tubes. The film is Ektar 100, a recent negative film from Kodak with strong colors and very fine grain; the results are akin to slide film, but with much better dynamic range.


Last year I tried a Fuji single-use camera on a day-trip to Kobe. It was simple and dingy but a lot of fun to use. I thought about having a camera just like it but reusable, so you wouldn't have to send it off for development just to change film. The Vivitar Mariner is exactly that camera. I'm not the only one who thinks it's a good idea, apparently, as prices for a used one - a used low-quality 35mm film camera, note - can reach 100 US dollars or more, though more normal prices seem to be around 15-30 Euro.

Early Bird

When I step out on my way to work the morning rush is already underway, and a fair a of office workers are bustling to reach the office early.

The resolution and contrast isn't exactly jumping off the page here. Compare to the medium-format shot above; cameras and lenses, and formats, really do matter a lot.


The complete Mariner has a water-proof enclosure - our one doesn't have it any more - but apart from that this is remarkably similar to the Fuji camera. There's no settable aperture or shutter speeds, and the cheap plastic lens is set at a fixed focus distance of a couple of meters. The body is a very lightweight plastic construction that doesn't exactly inspire confidence but is up to the task of keeping the film in and the light out.

Deliveries

Delivery trucks are still parked at the depot, waiting for the morning shift to get going.

The aperture and speed of the camera is about perfect for open shade like this when used with 400-speed film.


With a 400-speed film you get plenty of light for daylight shots. I would say it's even a little too bright, and if you want to use this on bright summer days you would probably want to try a 100-speed film instead. Of course, it's made for underwater use where the extra light makes sense. There's a flash built-in that takes a 1.5v pen battery, but I didn't try it so I have no idea what the results are like; my guess is that it's not much use beyond a meter or two.

Canal

Tosabori canal, Minami Senba, Osaka. On my way to work with just a tiny detour.
The lens is really wide, much wider than the viewfinder. On the positive side it's fun with a real wide-angle. Less positive is the distortion; the leftmost pillar here should really be straight, not bulging. Of course, the pillar wasn't even visible in the viewfinder. If you insist on decent image quality (and if you are, why are you using this camera?) you should probably crop to the viewfinder to avoid the worst distortions.


Using it is simple. You wind the film, open the front hatch and press the shutter. The film counter is only approximate, and the whole mechanism feels creaky and wobbly, but it works. The stated focal length is 28mm, but I wonder if that isn't a bit of a white lie. The finder may be 28mm, but the shot you get on film is a lot wider than what the finder was showing you. Really - I wouldn't be surprised if the focal length is closer to 21mm or something like that. A wider lens would make sense for underwater use of course. Forget using the viewfinder for precise composition, and you can stop worrying about not getting everything in your shot; even if you didn't even see it in the finder, chances are you still got it on film.

Sakaisuji Honmachi

Sakaisuji Honmachi station, Osaka.
This kind of light really is at or beyond the outer limit for this camera. It's mostly amazing that I got anything at all; at f/9 and 1/125 shutter speed the light here is about five to six stops too low.


With a lens this wide, and with absolutely no controls to set, you can use this camera completely unattended. Just point it vaguely in the general direction of the stuff you want to shoot, and you'll get it. Give it to a child and they'll be bound to more or less get what they wanted, and if it breaks it's cheap enough that it's no real loss.

Ishikiri Station


The train stops at Ishikiri station on the way to Kita Ikoma. This station always strikes me as a sunny, cheerful place for some reason. Should get off one day and take a look at the area.

You can see all the rest of the pictures from my morning commute in this set

Monday, March 29, 2010

Pinhole Camera II: The Daa-a-a-ark Room

In the last post I showed the simple pinhole camera I've made. Very basic, very easy to use - except that you have to load the photo paper in a darkroom and you have to develop it yourself.

A darkroom isn't complicated. It's a room with absolutely no light coming in from the outside. It's not necessarily dark, though; unlike film, paper is not sensitive to red light, so you don't have to be in darkness. A "safelight" that emits red light, and only red light, will let you see what you're doing - you can actually see the image appear on the paper when you develop, which is really cool.

To develop the paper you need three trays for developer, stop (not really necessary) and fixer. A few darkroom tongs are cheap and a good idea since you don't want to get smelly chemicals on your fingers, or accidentally mix them. If you develop your own film you can use the same stop bath (if you use that) and fixer you already have. And if you're just playing around you don't need to be very careful with temperature or time, so a thermometer or clock isn't all that critical. You can see the paper develop so just stop when the image starts looking really dark and solid.

What about developer? Normally you would use special paper developer for photo paper, rather than film developer. Paper developer is a lot more active, giving you good contrast prints, and is incidentally a lot cheaper too. You can use film developer for paper, but it's much slower and will apparently give you low contrast, washed-out looking prints.

But this only applies for printing from a negative. A film negative is low contrast - the difference between the darkest and lightest areas isn't that large. But here we use paper as the negative. We're exposing the real world on the paper, not a low-contrast negative. And the real world is usually really contrasty, with huge light difference between the darkest and brightest areas. So as it turns out, film developer is a decent match for this use, and results in fairly good paper negatives.

Safelight
Safelight

A safelight is not strictly necessary, but it'd really suck to have to do everything in pitch blackness. Safelights - light fixtures with a dark red glass front - are available but they're fairly expensive. Safelight red bulbs that you can use in normal sockets are not cheap either and don't last forever. People warn against using cheap red "party" lightbulbs. There's no guarantee they really cut out all unwanted colors, and edges and scratches may be uncovered by the red paint.

Lightbulbs are hot, need mains power and waste a lot of energy, and they're gradually disappearing the world over. The new hot item here is LED lighting, with many manufacturers pushing LED bulbs. Long before the advent of the white LED's that's made this lighting revolution possible we've had red LED's used in all kind of electronics. A red LED is cheap, will only emit light in fairly specific frequencies, can run on low power and lasts almost forever. Perfect.

My first idea was to get an LED bicycle light. But since I can never have too much complications in my life I decided to go for a more DIY solution. In an electronics store I found an LED "brakelight" kit for car rear brake lights, with a circuit board and male socket. I got the kit, a dozen red 1W LED's, a matching female socket1 and a light switch. For power I used an 12v transformer I had lying around.

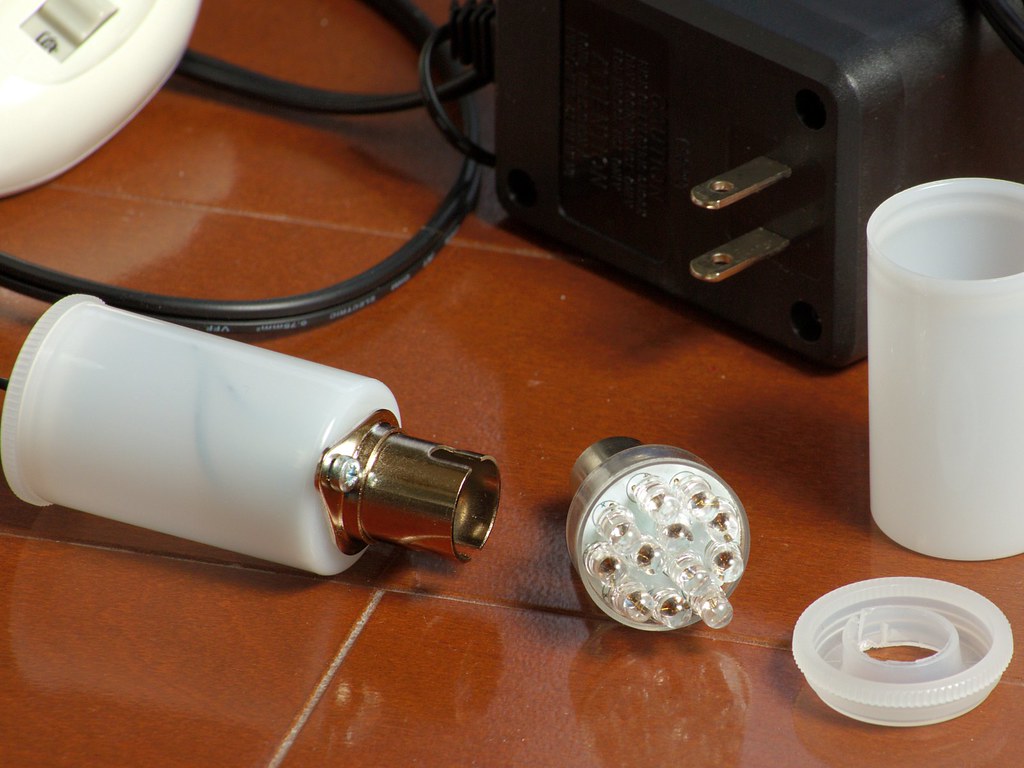
To keep with a filmy theme I attached the socket to a 35mm film canister, with the cable going through the lid. A second white film canister fits nicely over the light itself and serves as a diffuser. I hang it in the bathroom simply by wrapping the cord twice around the curtain rod over the bathtub. The light is plenty strong - so strong that I hang a towel over it to dampen it a little - and seems to be completely safe for the paper as far as I can tell.
 
Safelight

Here's the safelight disassembled. I've soldered the LED's and other components (just a diode and a resistor - it really is very simple), attached it to the socket, attached the male socket to the base canister and done the cabling. Works very nicely.


Making our bathroom really dark turned out to be the most complicated part of this - much more so than making and using the pinhole camera. The room has to be really dark - any stray light from outside will ruin the paper. I tried an elaborate idea with light-proof curtain fabric and a frame made of PVC tubing that utterly failed - on the positive side I now have several meters of tubes and connectors to use for something else. I finally just taped the fabric over our bathroom door (What would I do without gaffer's tape?2). I also close the doors to the washroom outside, making doubly sure I won't have any unwanted light seeping in. Seems to work, if not all that practical.

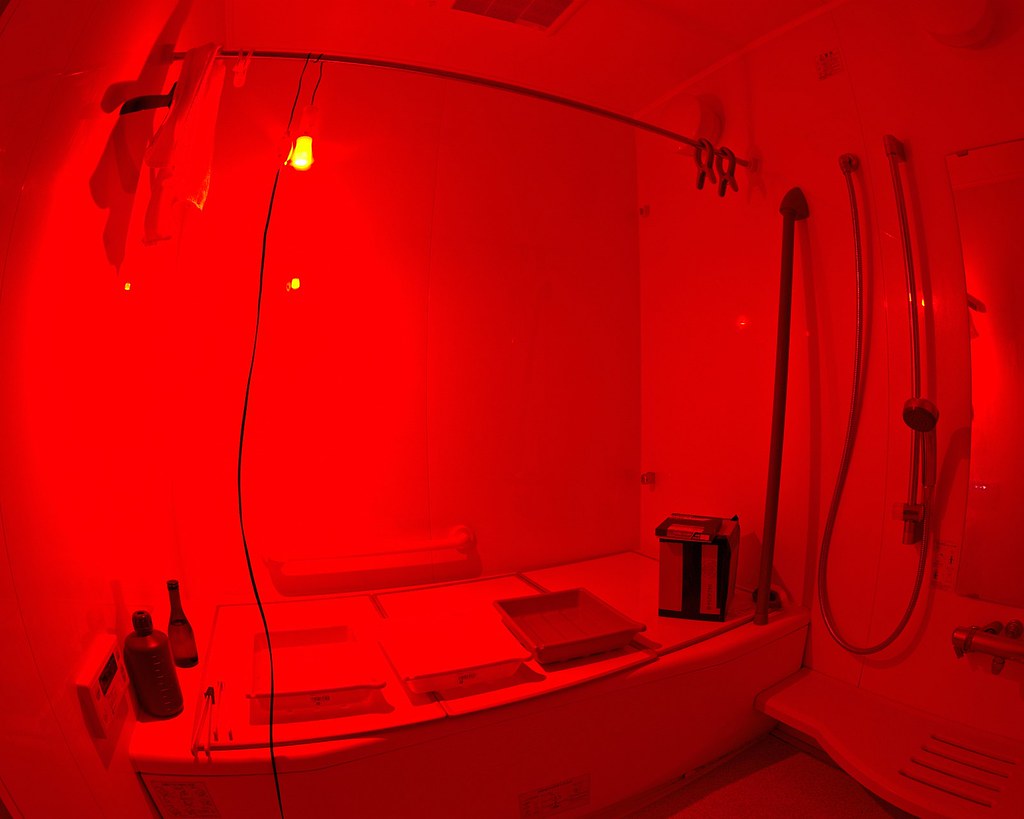
Darkroom Darkroom (BW)

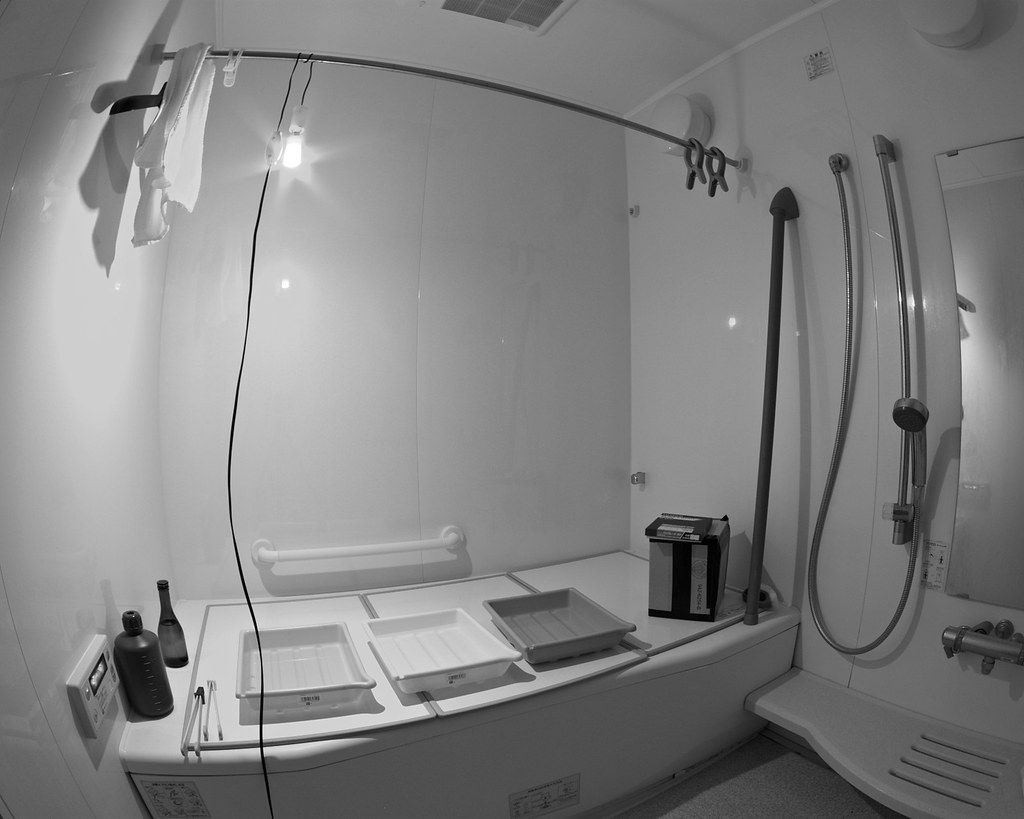
Here's the darkroom, in color and converted to BW (click to enlarge). There's plenty of space, running water and efficient ventilation, and I get a good-sized workbench simply by using the bathtub covers. If I ever get an enlarger I can place it along the wall out of the picture on the right.

This kind of picture, incidentally, is a perfect task for a digital camera. The light is nearly monochromatic, and getting the exposure right without trial and error is almost hopeless. Had I tried to take this on film for whatever reason I'd had to take a whole roll and probably still not get an image I was happy with.


I've taken two pictures with the pinhole camera so far - you don't get much of a frame rate when you have to return and develop each image before loading the next. I used 13x18 cm Fuji multigrade RC paper, the cheapest one in the local shop. The pinhole exposure calculator specified 1.5 minutes for hazy sunshine but that seems a little short, and even two minutes was not really enough. I'll try three minutes next time.

The lack of red sensitivity means the images become just a little odd - blue skies go very bright while reddish objects, like brick buildings, become dark. The long exposure time means that anything moving, like people, disappear completely. And there is of course no way to judge the composition; you find out what you got in the frame only when you develop the negative.

View

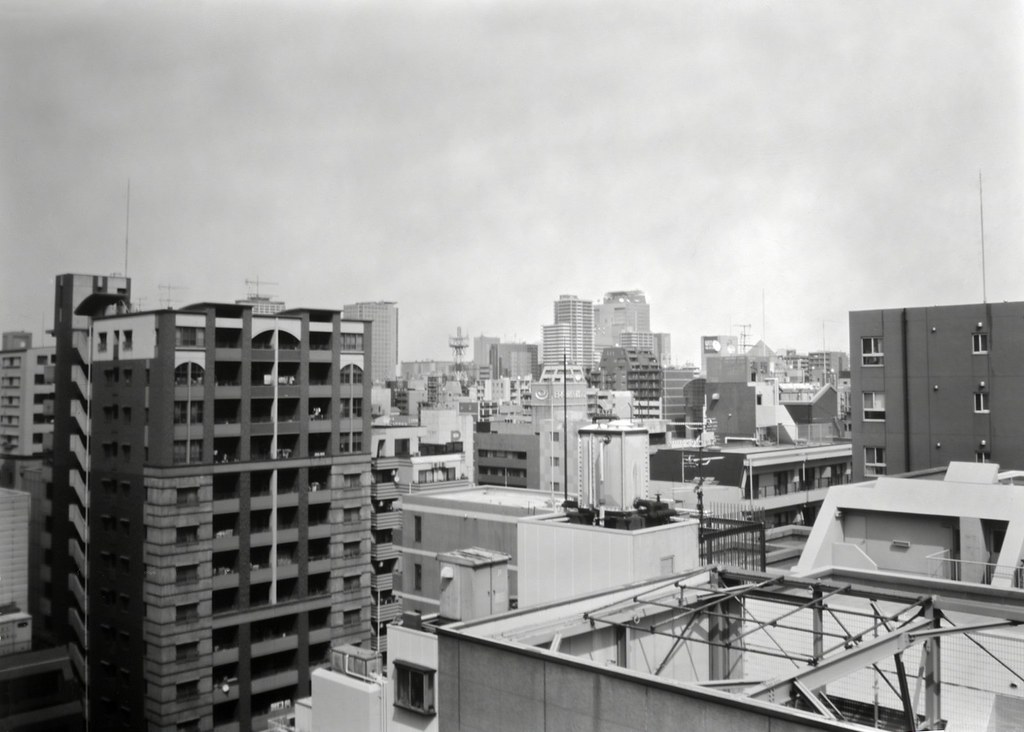
The first shot, my standard view out from our balcony. I actually got a bit of motion blur here since the box shifted a little halfway through the exposure. But the tonality is nice, and evokes an old-time photography (the lack of red sensitivity is probably the reason; really old films were not red-sensitive either). I especially like the mottled sky that really exaggerates the haziness.


Nagahori

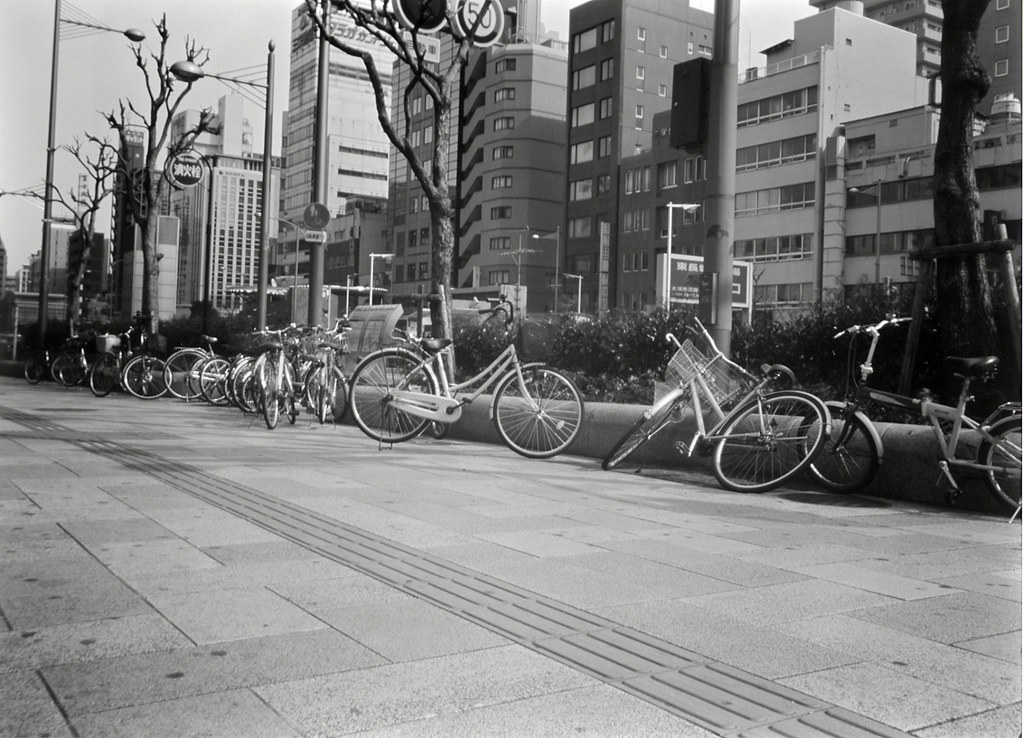
The second shot, with an unfortunate "composition malfunction". I wanted to have the bikes near the bottom with the skyline breaking into the top near the right end. But the wall I used for support apparently sloped a bit without me noticing so instead you get this inspirational study of an Osaka sidewalk. This was stable, and there's more detail than in the first shot; notice that the wheel spokes are clearly visible in the closer bikes, for instance. At the very top you can see how the red traffic signs have turned black. This is a busy sidewalk, by the way, with lots of people passing by, but with two minute exposure there's not even a hint of people in the image.


What's next? I think I'll take a few more shots with this camera but it's not very practical of course. I got lucky recently and found some 4x5 format film holders in decent condition for cheap in a camera store. So I'll build a more solid camera that can fit a film holder; that way I can bring and shoot several exposures before I have to develop them again. And perhaps, instead of a pinhole I'll try using a lens. Even a very simple glass lens is a real improvement on a pinhole, with more detail and much faster exposure. Of course, then we'll have to start worrying about whether and how to focus, and shutter speeds may get too fast to do manually. But those are problems to solve later.

--

#1 That way I'll save literally minutes of time switching the LED lamp when the this one breaks some forty years from now. How's that for optimizing my time?


#2 I'd have to make things properly instead, I guess, instead of cobbling stuff together with tape.

Pinhole Time

Feeling Negative is a fun new site for film photography enthusiasts, and I can warmly recommend it. They have started a series on DIY large format photography, beginning with a simple pinhole camera and using photo paper for a negative. That has inspired me to try making my own.

A pinhole camera is by far the simplest camera possible. You have a light-proof box with a piece of film, a sensor or a retina on one side, and a small hole (a "pinhole") on the other. No lens, no focusing (everything is equally in focus) and no mechanics beyond a way to cover and expose the hole. In evolution it's an intermediate stage between having a light-sensitive patch and an eye with a lens; the Nautilus is a group of animals that just kept the pinhole eye and never so far developed a lens.

The way a pinhole works is very simple: imagine that you're a spot on the film or a pixel on the sensor. Everything is dark, except for the light from the hole. That light comes from whatever is visible through the hole, so with a smaller hole you'll see a smaller part of the world. Make the hole small enough and each part of the film will get the light only from a tiny spot, making a recognizable picture. Of course, the smaller the hole, the less light you get, so exposure time also gets longer and longer.

If you are nearsighted you can see the effect of a pinhole directly. Remove your glasses, and curl your index finger and thumb so you get a tiny hole in the middle. Put your hand right up to your eye so you see through that hole. As you squeeze your finger the hole will get smaller and you'll see that the image gets much sharper but dimmer1.

You'd think you could make the image as sharp as you like simply by making the hole smaller (and accepting the longer exposure times). That's not possible, unfortunately. Because of diffraction the image will start becoming blurrier again as you keep making the hole smaller. There's an optimal size for the hole that depends on the focal length - the distance between the hole and the film - of the camera. How do you find out the best pinhole size? The easiest way is to use an online calculator such as this one.

My pinhole camera is using 13×18cm photo paper as the film. Why that size? It's small enough to be cheap (a box of 50 sheets costs just a few hundred yen) and still large enough to make a good sized, easy to scan negative. After a bit of rummaging I found a suitable cardboard box with a short side of about 17 cm; that makes for a pleasant, somewhat wide angle of view with this paper. The pinhole calculator tells me that I need a pinhole slightly less than 0.5mm diameter, that it corresponds to an f-stop of around f/350, and that exposure time in clear daylight will be about a minute and a half.

There's several ways to make the actual pinhole. Ideally it should be made in a thin, rigid material, be nearly round and not have rough edges. A good choice is an empty aluminum can - cut out a square from a can, flatten it, then make the hole. I made a small dent in the aluminum with a pen, then used a sharp tool (needle-nose tweezers) to slowly drill a hole in the middle of the dent from both sides. 0.5mm is fairly big, so it was easy to check the size with calipers and a loupe.

Pinhole camera (front)

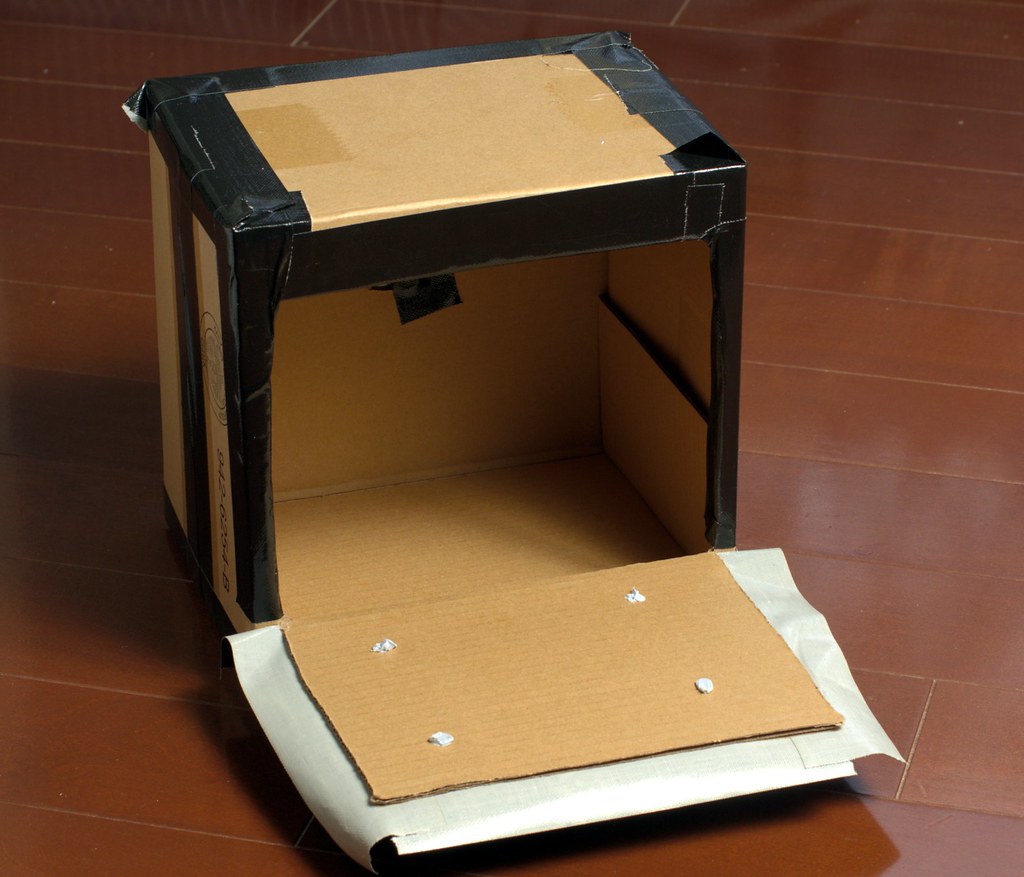
Large-format pinhole camera. Note the high-quality cardboard, metal from a can of real beer (not cheap happōshu) for the pinhole and the exclusive gaffer's tape trimmings to give it that refined air of executive class - only the very best materials is good enough for us here.


The box is simplicity itself. I light-proofed it by liberal use of gaffer's tape along all edges, and the pinhole plate is taped in front of a hole in the center of the box. Another piece of tape with an edge folded in serves as the shutter - pull the tape to open, then attach it to close again. With a shutter speed in minutes, a few seconds doesn't matter. I cut a flap on the back, taped the edges, then added strips of tape along the flap to close it. The tape along the edges makes sure the flap tape doesn't stick to the cardboard. That way I can open it without ruining the box. The "film holder" is four bits of blue-tack to hold the paper in place. The whole construction, pinhole and all, took perhaps half an hour or so.

Pinhole Camera (back)

The camera from he back. Stick the photo paper to the four lumps of blue-tack, close the flap and seal it with the strips of tape. The blue-tack clings to the paper, unfortunately, but it doesn't seem to affect development. Still, a better way to hold the paper is probably a good idea.


To use the camera you put a sheet of photo paper in the back and close both back and pinhole. Place the camera where you want to take a picture - make sure it's stable - open the tape shutter, wait two minutes or so, tape up the pinhole, then return home. Take out the photo paper and develop it much like you would with film (developer, wash, fixer, wash again, then dry).

Now, the paper is light sensitive. That's why you can use it to capture images after all. Film comes in light-tight rolls or in small canisters and you develop them in special lightproof tanks. But the paper is a bunch of sheets in a box. How do you get the paper into the camera, and how do you get it developed? You need a darkroom. This is getting pretty long already, so I'll talk about that - and show the results - in the next post.

--
#1 If you're not nearsighted you'll just have to take my word that it works. Don't complain - you don't know how good you have it.

Friday, March 12, 2010

Rollei 35

I wrote, oh, half a year ago about my experience with a disposable film camera. The Fuji camera was really small, light and fun to use. It had a cheap plastic lens, no way to focus and no way to adjust for the light but the results were still surprisingly good. I got the idea that I should try to find a small, manual film camera like that, only with a bit more flexibility and better build. An always-there camera I could keep in my coat pocket. I found this:

Rollei 35


There's a lot of compact film cameras out there. You may think there's a lot of compact digital cameras to choose from today, but camera companies have been churning out compact cameras for as long as photography has existed; of course, what consitutes "compact" has changed over time. There's entire books cataloguing just compacts from a specific company, or from one era, or compacts with some technical feature in common. Most models aren't all that interesting, just cookie-cutter variations on the dominant designs of their era, and they've long since faded into obscurity. But some cameras do stand out.

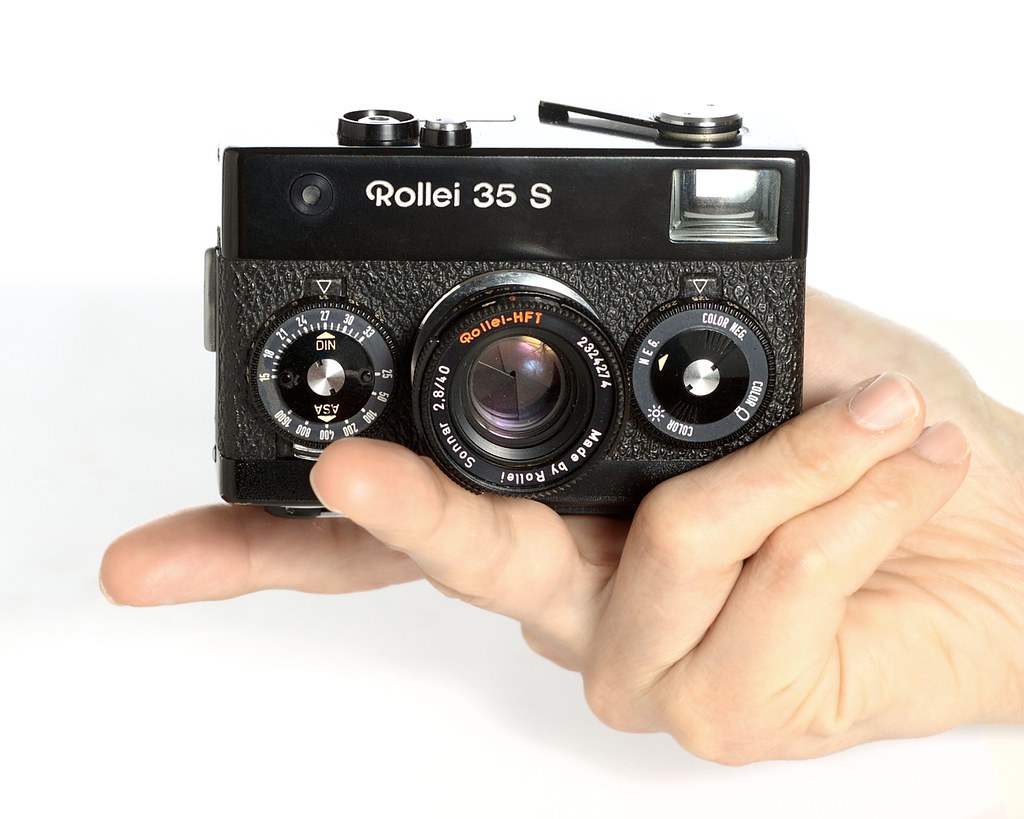
Rollei 35 S

The Rollei 35 S. Pictures don't really convey just how small and compact this camera is.


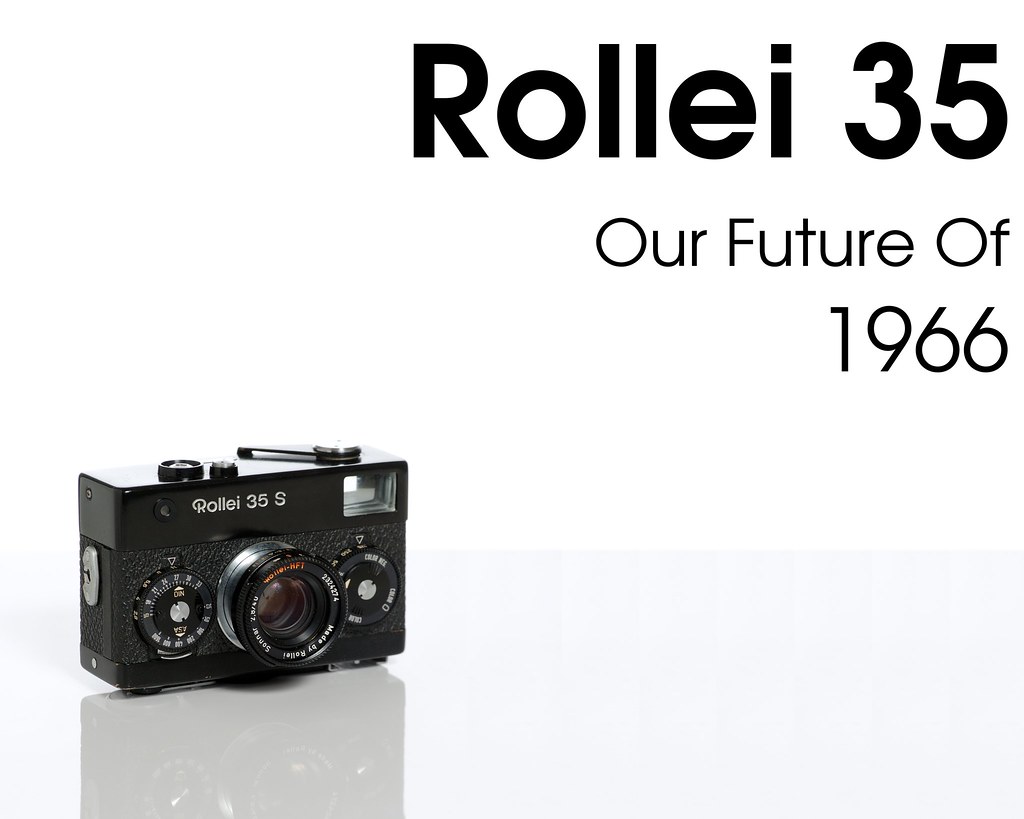
The Rollei 35 appeared in 1966 and was the smallest 35mm camera ever at the time. It's still the smallest ever all-mechanical 35mm camera. As you can see above, it's quite literally built like a metal brick: a rectangular slab with controls that only barely stick out from the flat surfaces. The flat, circular knobs on the front set the aperture and shutter speed. The winding lever, lens lock and shutter button on the top, and hot shoe and rewind lever on the bottom are all almost flush with the surface. The lens retracts into the body when it's not being used. The small size and flat surfaces means you can even carry it comfortably in your front jeans pocket.

Fall

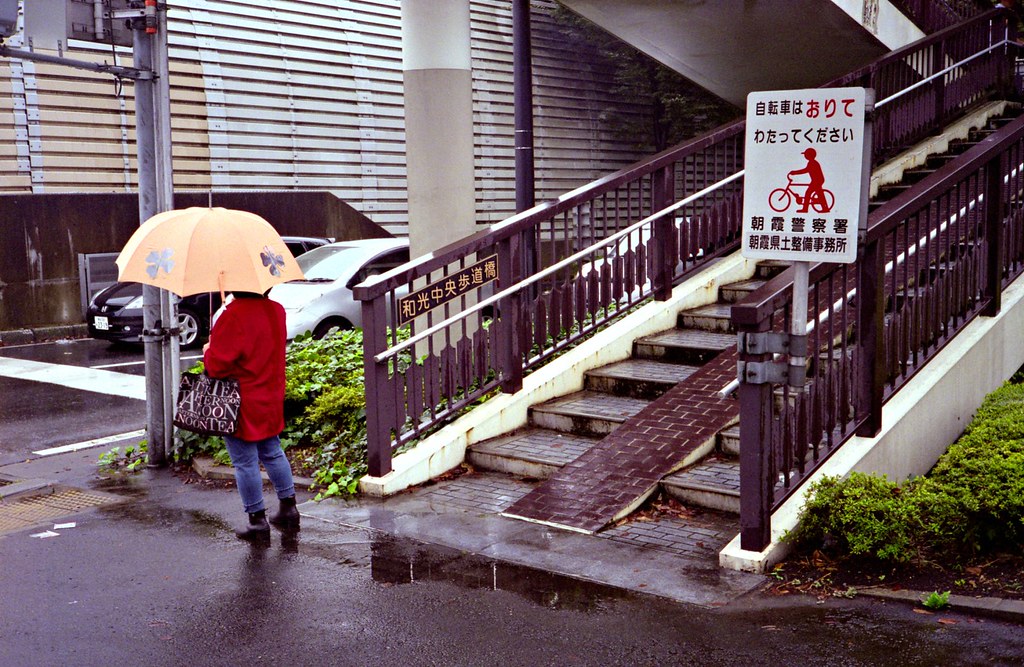
Rainy day in Wako city. This is the kind of shot that's difficult to get with a large camera. You have very little time, and the rain means you don't want to drop your umbrella and start messing about with a big DSLR, and get all wet, and probably miss the opportunity anyway.


Of course, this design has a few drawbacks. While small, the all-metal build is fairly heavy - it really feels like a small metal brick. And the flat rectangular design makes for some interesting ergonomics. The front wheels have small, hard-to-see markings along the edge (the front-facing labels are just there to help you remember the film you use). The film advance lever is on the left, rather than right - fine by me, but then, I'm left-handed. There's no grip or handle or place to keep your hands.

The hot shoe is on the bottom of the camera, right next to the tripod mount and the frame counter. You'll not be using a flash and a tripod at the same time. Or use a tripod and see how many frames you've shot. Or change the film while on a tripod. And a flash will either light your subject from below, for that spooky flashlight-under-your-chin look; or you hold the camera upside down and trigger the shot with your left little finger. But this is not a tripod or flash-kind of camera, so these are amusing oddities rather than real drawbacks.

The mechanics inside are a marvel of ingenuity, but they add to the quirkiness. The shutter mechanism is designed in two separate parts, one in the camera house, and one in the lens itself. The lens can only be folded in with the shutter cocked, and in fact the camera is designed to be stored with a wound-up shutter. My camera has probably been stored like that more or less constantly since it was manufactured in the 1970's, but the shutter still works fine at all speeds. As you need to wind the film to fold in the lens you can't just close it after taking the last frame as the film won't wind any further. You need to rewind the film right after the last shot; another small quirk.

Lined Up

Yebisu parade in Namba, Osaka. Grainy film, slow shutter speed and just wildly guessing the focus distance. Pictures don't need to be technically perfect to be good images.

This is a guess-focusing camera, like the old Voigtländer Bessa I have. No rangefinder of focusing screen in other words, just a scale on the lens telling you the distance. There's a battery driven light meter that is always turned on - you turn it "off" simply by covering the meter cell. It seems to work well, overall, but my camera has a slow current leak so the battery drains after a couple of weeks. No matter, as I always use an external meter anyhow.

A rectangular, odd film camera with fiddly collapsible lens, no focusing and strange control layout. Sounds horrible, I know, but it's a very pleasant camera to use in practice. First, this is not meant to be an all-in-one camera. It's not going to be used in a studio, it's not going to be used for huge, high-quality prints or slow, contemplative photography - there's better cameras for that. This camera is meant to slip into your pocket and simply be there whenever you feel like taking a quick snapshot of something. And in that role, it absolutely excels.

Saturday, Slow Day

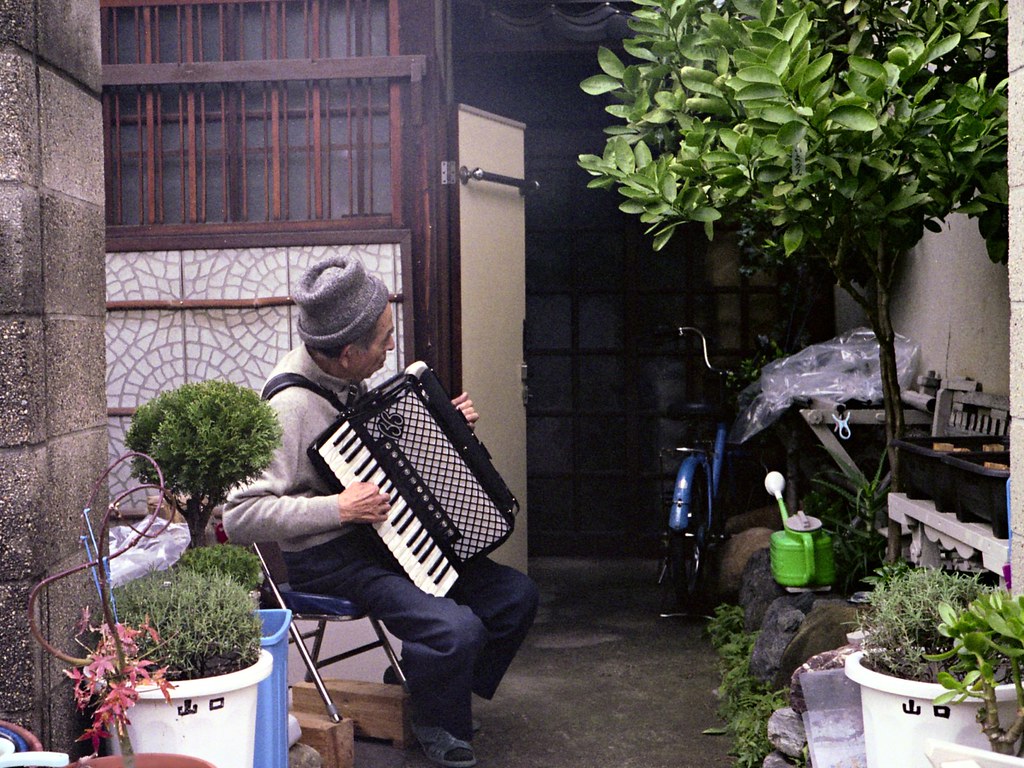
An old man is practicing outside his home in Nishitanabe, Osaka. On my way to my Japanese lesson and I had a bagful of books. Without a pocket camera I'd not have any way of getting this. And the film defects - the grain, the odd color balance - add to the image, I think.

The lens is a high-quality 40mm f/2.8. The focal length is fairly short, and you're not going to make huge prints from the camera anyway, so focusing is usually a non-problem. In daylight with a 400 iso film you can simply set the camera to f/11, set the distance to 4-5 meters or so and forget about it. Everything you need will be in focus. When it's dark you have to open up the lens so you'll need to start thinking about focus, but again, it's not hard. We're not bad at guessing distances, and we can quickly get better if we practice a bit. And getting focus right really only matters close up and with near-open aperture. If you shoot at around 1-1.5 meters at f/2.8 you'll better take two shots just in case. Any other time you'll most likely get it right without even trying.

Honmachi

Black and white is fun too, of course. But this camera came at the time color film was becoming a mass photographic medium, and at a time - the 1970's - when color exploded in media, in design and in fashion. This camera likes color film.


And despite the unforgiving shape and small size it really lies well in your hands. Everything is nearly flush with the body so you can easily cradle the whole camera in the hand without accidentally changing some setting or pressing something. The viewfinder is bright and clear and all the controls feel snappy and distinct. Loading the film is easy when you've done it once, and the small format means you can squeeze a few extra frames from the film; I get 27 or 28 shots on a 24-shot roll (the very first possible shot is just a little cut off).

Last Train Home

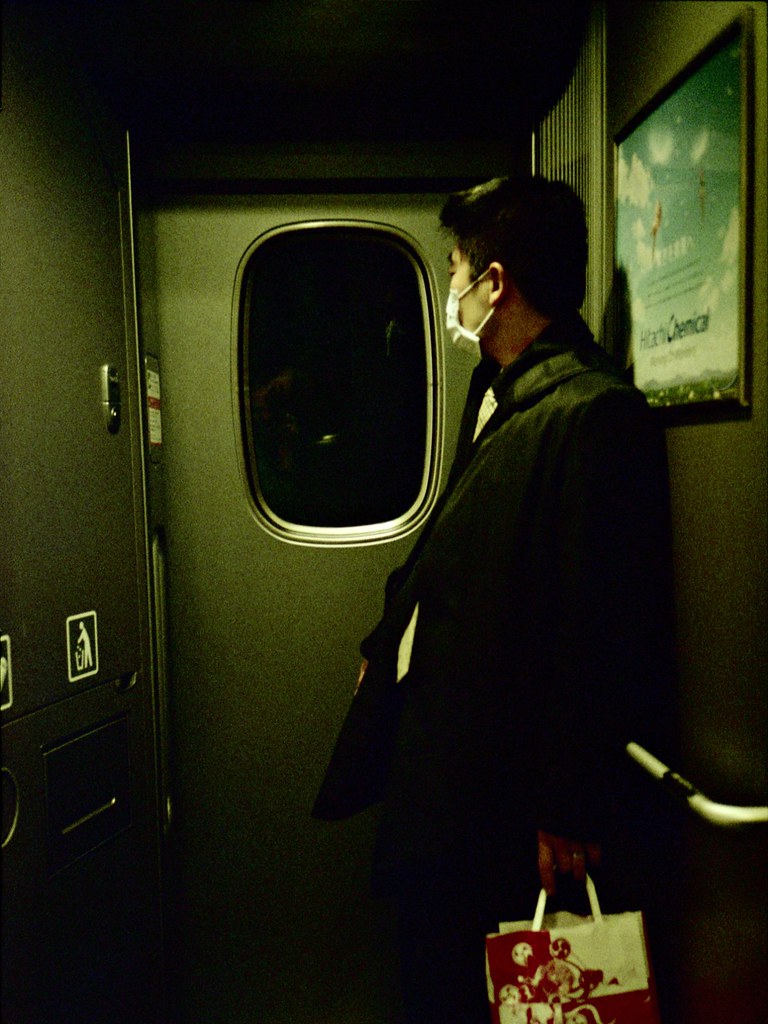
Salaryman on his way home on the Tokyo-Osaka Shinkansen. This is about as bad as conditions will ever get: dim light that demands an open aperture and a slow shutter; flourescent lamps to mess up your color balance; fast-moving train shaking you and your subject; short focal distance and no time to steady yourself to catch that weary, resigned posture before he becomes self-concious about it and you lose the moment.


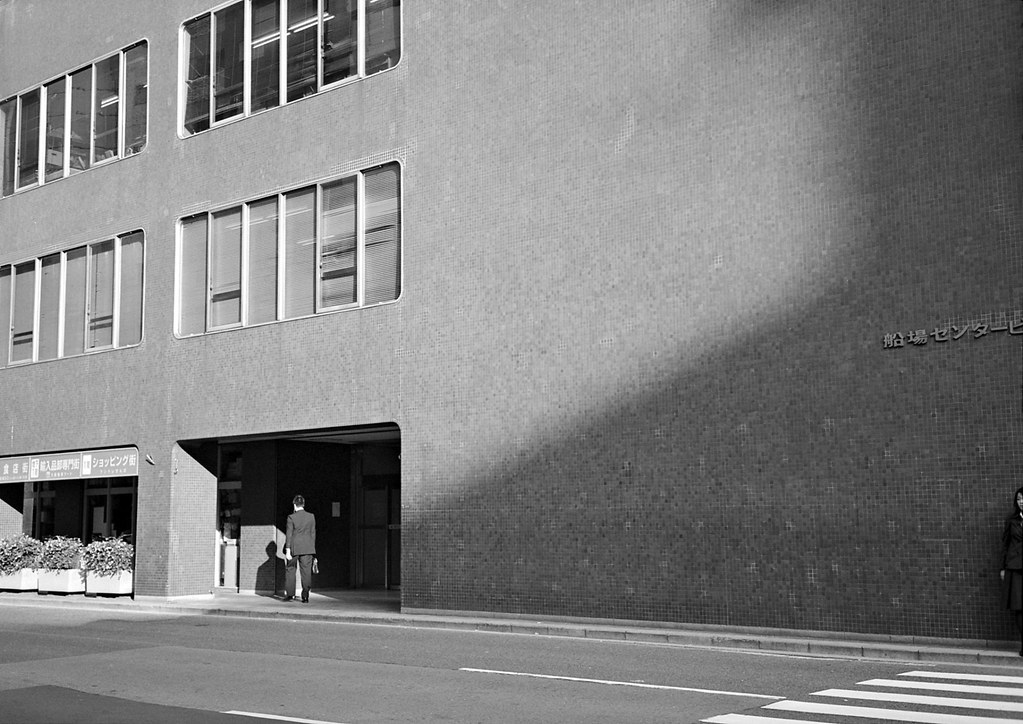
Using the Rollei 35 means guess-focusing, flare-prone (though good quality) lens, fast film, cheap scanner and - quite often - slow shutter speeds. And as the camera encourages a breezy the-devil-may-care attitude to using tripods or stable handholding, the resulting pictures aren't all that high resolution. The shots I normally get are, in practice, oh, 4-6 megapixels or so. Use a high-resolution film, put the camera on a tripod and measure the actual distance and you can probably get upwards of 10mp, and more than that with a high-quality scanner. But why would I? If I want high resolution I already have other cameras for that. And I enjoy the pictures I get all the more for their grain, slightly off color and motion blur.

In fact, apart from the weight this is very nearly exactly what I was looking for when I wrote about the reusable Fuji camera last year: a tiny, fun wide-angle point and shoot, but with better optics and some way to set focus, aperture and shutter speed. I got all that, and a camera that oozes precision engineering out of every pore (being a Rollei, it of course oozes it in a predictable, reliable, perfectly controlled manner).

A Beer If You Please

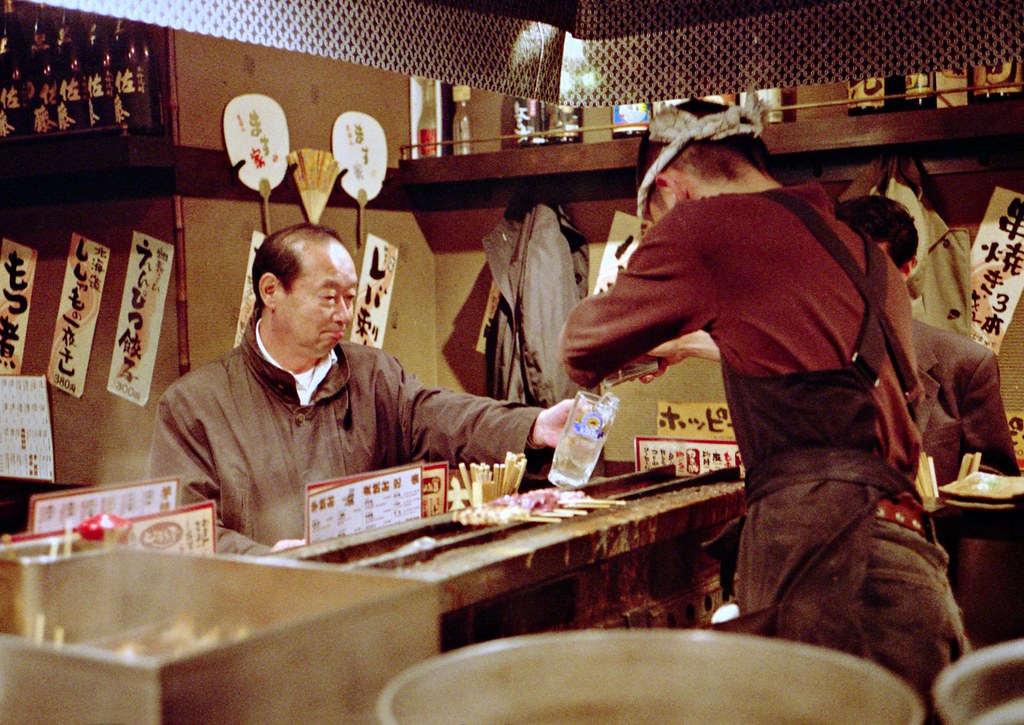
Standing bar in Ikebukuro. For whatever reason, people seem much less self-concious about film cameras than digital ones. A digital camera is a nuisance, or even threatening. A film camera is amusing and a little quaint.


A few tips for use:

  • To wind the film you close the cover, pull out the lens and shoot-wind-shoot-wind... until you get to frame '1'. However, in practice the first "real" frame is two frames before '1', so you may want to make use of that.

  • Remember, the lens needs to be pulled out, then twisted to lock. Nothing happens if you forget this. And you can't unlock and retract the lens until you wind the film. If you shot the last frame you can't wind the film any longer, so you need to wind back the roll before you can close the camera.
  • Make sure you don't hold your finger on the shutter as you wind the film; it can accidentally disengage the winding mechanism, so you end up taking a double exposure. Unfortunately, this doesn't seem to be reliably repeatable (and I'm not sure it's good for the mechanism) so you can't really use it on purpose either.
  • The lens is prone to flare. A hood is a good idea. I got a Rollei collapsible rubber hood with my camera that fits perfectly.

  • The shutter button is not a trigger. It actually holds the shutter open, while the shutter timer is a trigger that closes the shutter again. So if you release the shutter button before the exposure is done you'll close the shutter too early and get an underexposed picture. Keep the finer on the shutter until you're done, in other words.

  • There's no visual indication when you have rewound the roll. Make sure you've really rewound the whle thing before you open the camera. I lost part of my first roll when I opened it halfway.


Would I use this as my main camera? Nope. It's too limited - though what it does do, it does well. Would I recommend it as a beginner's film camera? Umm, no. It's a bit too weird and unforgiving. But I can happily recommend it for those who like using film, who like street photography and who want a tiny camera to take along for those chance opportunities that keep showing up if only you look for them.

Absorbed

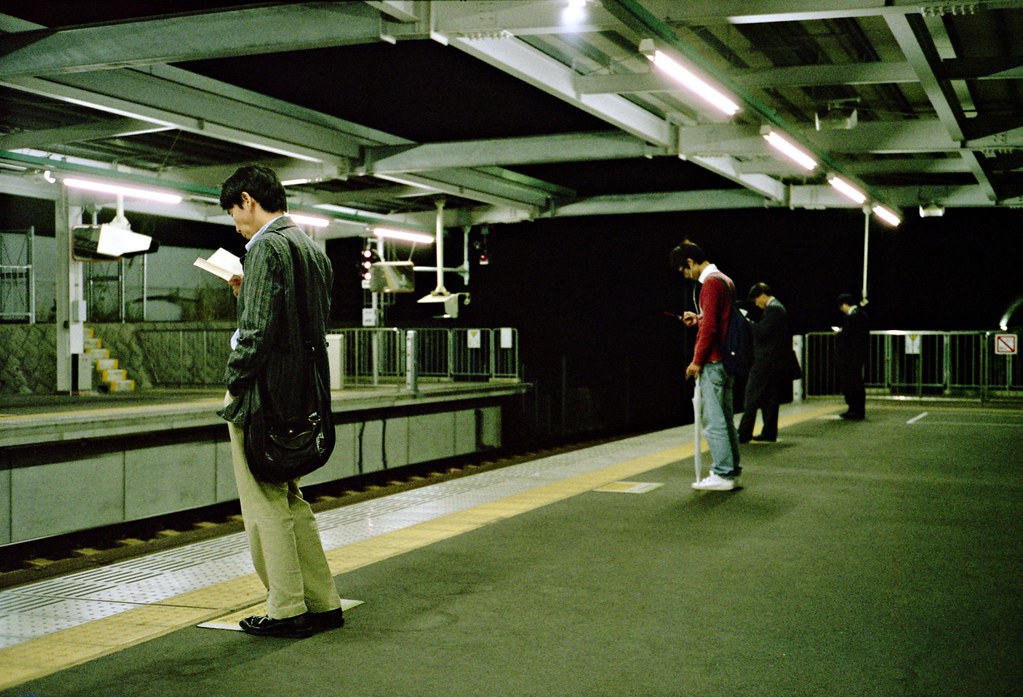
Kita Ikoma station, Nara.

Monday, October 12, 2009

Utsurundesu - Fuji one-use camera

We went to Kobe a few weeks ago (as usual, I know - but it's a nice place). The weather was absolutely perfect; a cool, completely clear day with pure blue sky and just a hint of approaching autumn in the air. After lunch at a south Indian restaurant and inspired by the weather we walked to the mountainside and took the Shin-Kobe cable car up the mountain. For whatever reason, however, I had neither a digital camera nor a color film camera with me. Black and white film is a wonderful medium, but it's admittedly less than ideal for capturing brilliant blue autumn skies.

Kobe, again

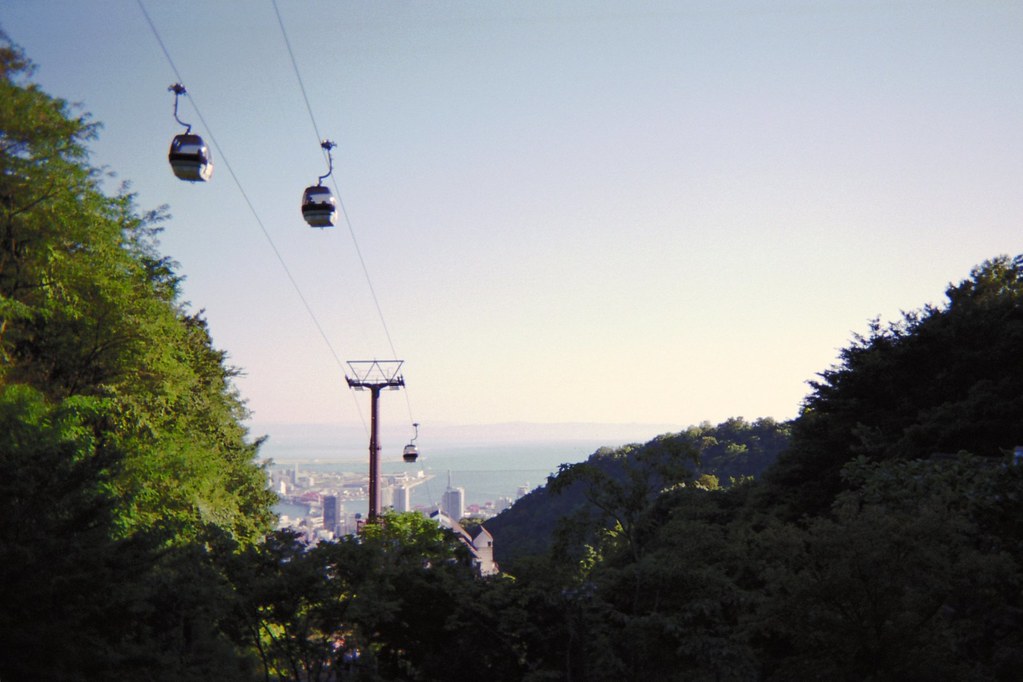
Kobe, from the ropeway. At the top is a restaurant and a few souvenir shaps (of course), and a public herb garden that is quite nice, though a bit bedraggled from too many visitors.


Fortunately help was close at hand. I've often seen these disposable one-use film cameras for sale in convenience stores and shops, and here we had an opportunity to test one. It seemed like fun, it was certainly better than nothing, and if the results were really disastrously bad we'd still be no worse off than without it.

Film With Lens

The Fuji "Utsurundesu" single-use camera. "Film With Lens" is a pretty accurate slogan. There's several variants, with iso 400 film as well as 1600 and with various length of film. There's a waterproof version, and yes, there's a Hello Kitty one too. This one is 400 speed film, with 27 shots and a built-in flash. Cost is just shy of 1000 yen - about twice the price of just buying the film itself.


The camera is a snap-together plastic shell with a fixed lens, fixed shutter and a flash. The 35mm film is already wound out in the camera, and as you shoot you wind the film back into the canister. You don't have to rewind it once you're done, and your shots are safe inside the can if anything would happen. The camera store takes out the film and develops it as usual. They send the shell back to Fuji where they put in a new film, attach a new wrapper and send it out to the shops again. It's really a rental camera rather than a disposable one in other words.

Kobe mountainside Ropeway Station

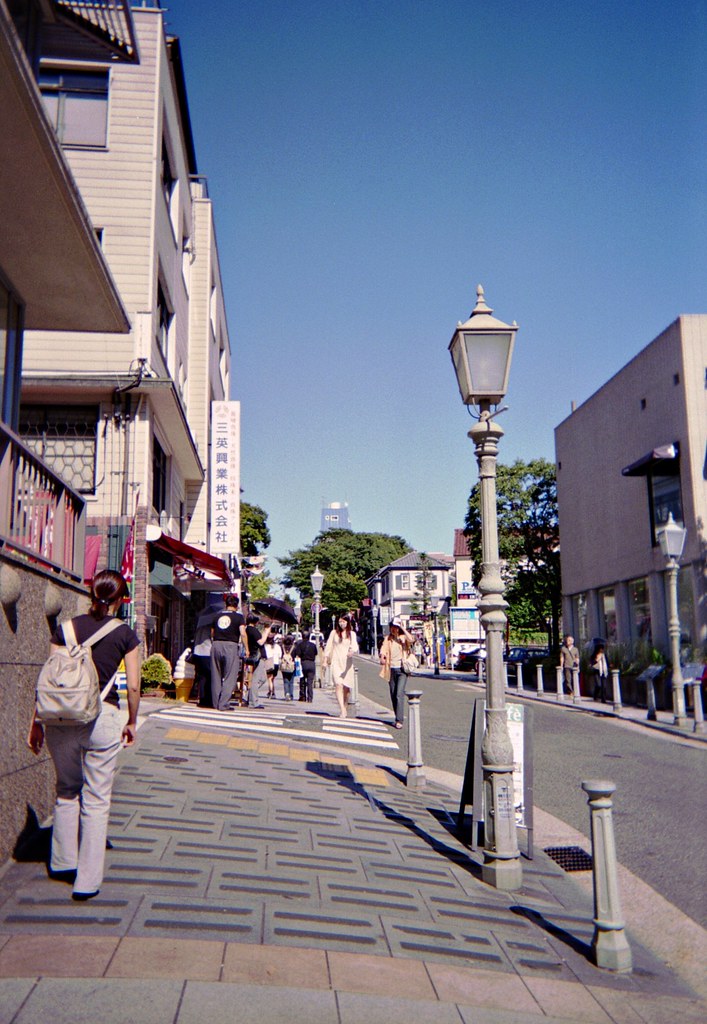
On the left, Kobe's Kitano district, with its old European-style buildings. On the right, the ground station for the Shin-Kobe ropeway. The two pictures are taken with the exact same shutter speed and aperture. The left image is in direct, cloudless midday sunshine, while the right one is indoors, with only a shadow-side window and north-facing opening letting in dim light. Despite the large difference in light, the film manages to record both scenes nicely - though the indoor scene is probably near the practical limit for it, as the grain increases a lot.


This camera is a latter-day descendant of the box camera, like the one I wrote about last summer. It aims to be simple to use, robust and inexpensive, and like a box camera it succeeds admirably. The focus distance, the shutter speed and the aperture are all fixed1. The lens is 32mm - that's pretty wide. No focusing errors, ever; with a wide lens and a small aperture everything is more or less in focus. You really have no exposure problems either. Negative film has lots and lots of exposure latitude, so whether you're in bright sunlight or dim shadows you'll still get a usable image. The small flash is only needed for night-time shots or dim indoor light.

Isuzu Bakery
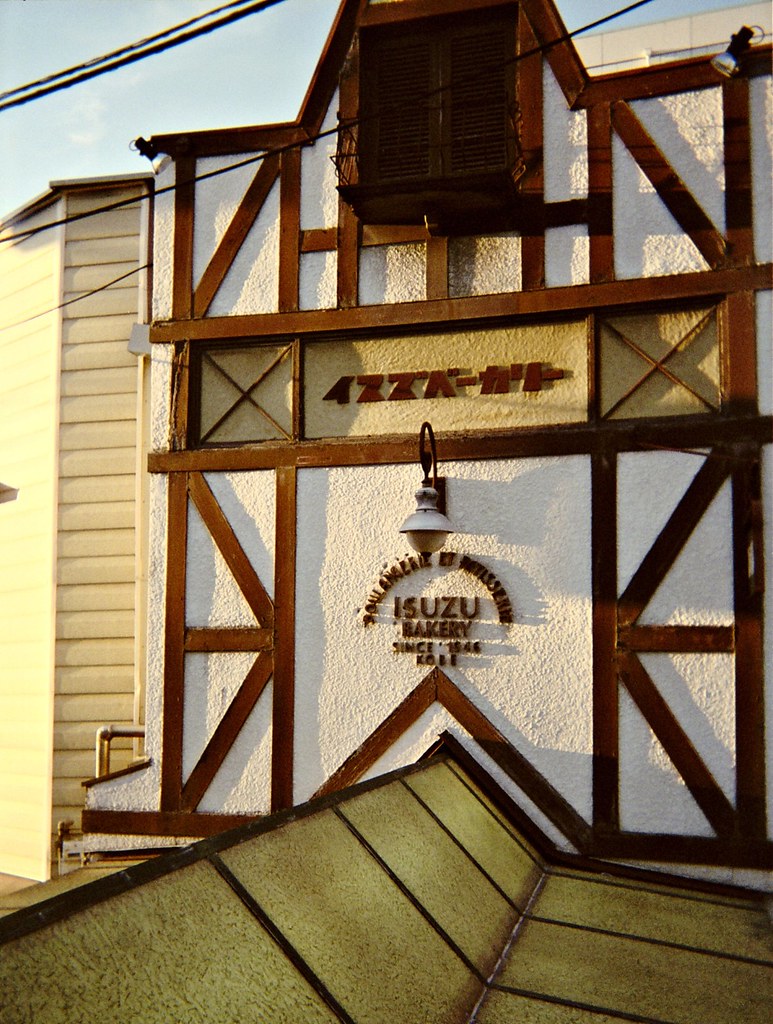
Isuzu Bakery, Kobe

This is the most portable camera I've ever used. It weighs 88 grams - less than even the smallest digital camera. It really is small enough to fit in your shirt pocket (and the light weight means your shirt doesn't sag). The shutter emits a discreet "clk" sound that you wouldn't notice a meter away. Apart from the flash there's no need for a battery or external power so you could stuff one of these into your bag and just forget about it until you need it.

And a fair number of here people do just that: they keep one of these in the car. If they get involved in an accident they may need to document the scene and any damage. And they use these not just because of the reliability and cost; film is seen as more trustworthy than digital cameras since it's very hard to manipulate a negative without leaving traces. Just keep one in the trunk and replace it every few years.

The results? Good. In fact, surprisingly good. The small prints we got (9x11) look just fine if a little contrasty; the shop probably use their "holiday snapshots" setting, with lots of color and contrast, when printing from these cameras. They'd be perfect for passing around to friends and relatives. As you can see in the images here they're clearly good enough for web use too.
 
Eagle-eye

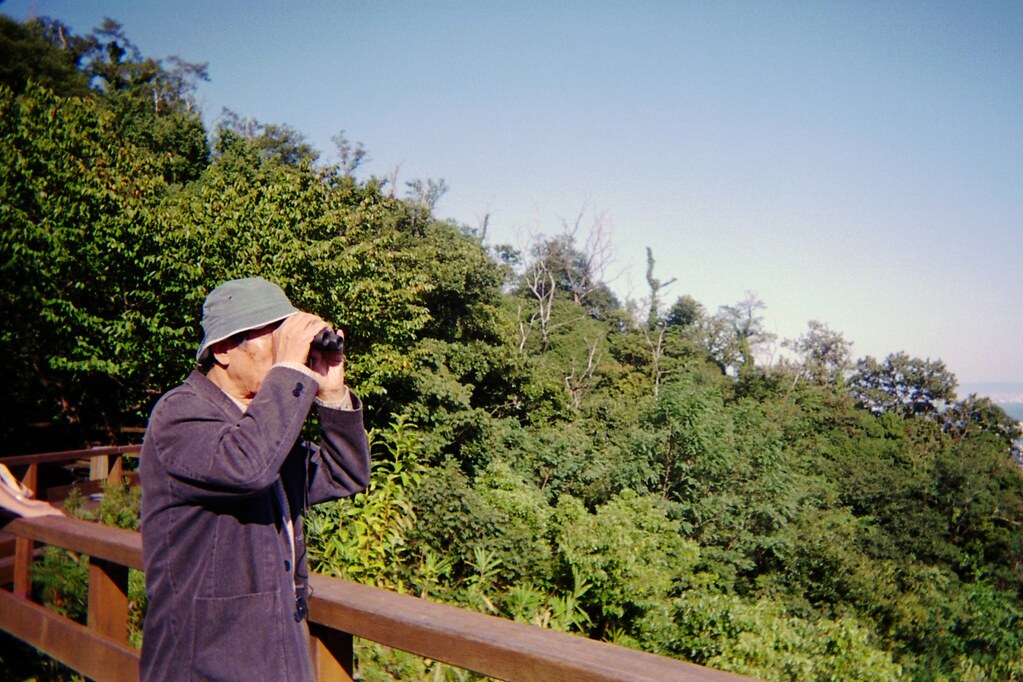
A man observes Kobe from the greenhouse balcony.


Of course, "good enough" is not the same as "perfect". It has a cheap, plastic lens after all, so it flares a lot, there's plenty of light falloff in the corners (arguably not a bad thing for blue-sky shots like these), fairly low contrast and low resolution. This is a great snapshot camera, but it's a complement, not a replacement for a more serious camera if you are interested in photography.

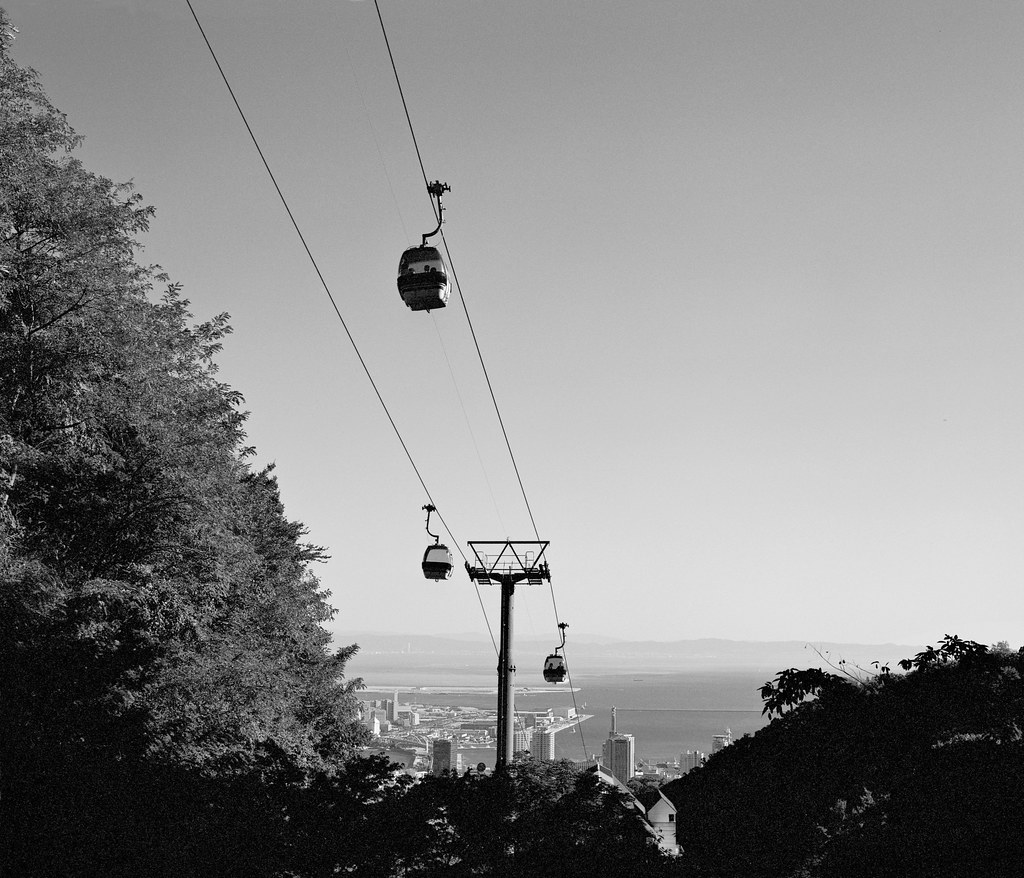
Kobe Ropeway

Kobe ropeway in late afternoon. Fuji Utsurundesu camera.


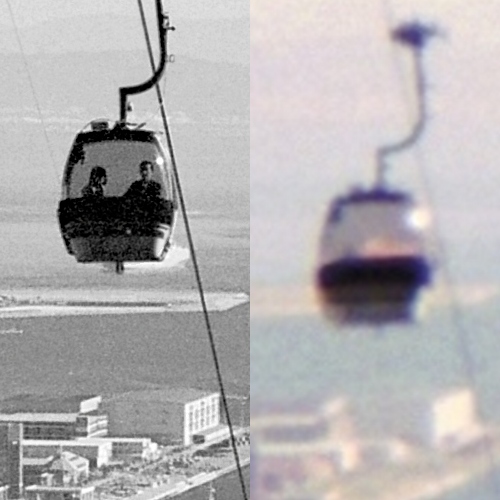
Kobe Ropeway

Kobe ropeway in late afternoon. Pentax 67.


A quick comparison

The medium format camera and the 35mm instant camera pictures, showing the same spot at the same size. My digital SLR camera would end up somewhere in between, though fairly close to the MF shot in resolution. Good to know there's a reason to keep lugging the 6x7-format camera around.


I like this camera - and the idea of this camera - so much, in fact, that I'd like to have one like it for real. I'd basically want a reusable version of this camera with selectable aperture and focus, but still very simple and very compact; something I could throw in my bag and forget about until I need it. It would be a near perfect street camera, backup camera and small camera to take along on business trips. Ritsuko has a Canon Demi half-frame camera; it comes close, though it's completely dependent on its light meter. I'll see what I can find.

Update: My blog entries usually take a fair amount of time to write, and scanning film for the illustrations doesn't exactly speed it up either. Since I first wrote this I got myself a candidate camera that seems to fit my requirements. I'll write about it when I've used it for a while.

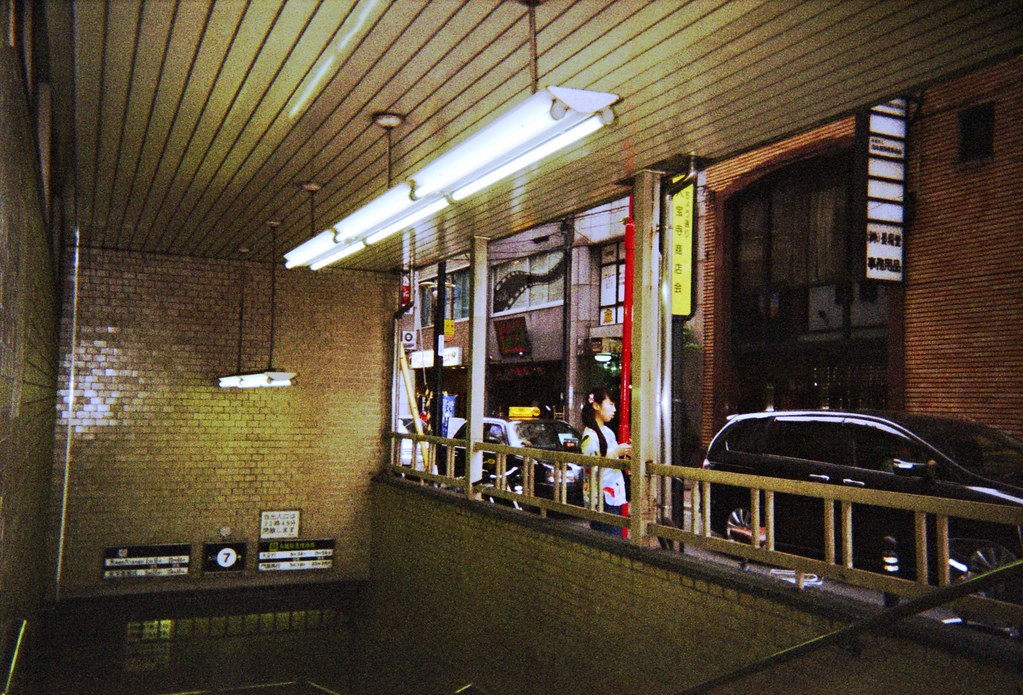
Sakaisuji Underground

Sakaisuji subway line entrance. Late afternoon, bad weather and under cover so it was getting fairly dark already. I used the built-in flash to brighten up the entrance and get the light level closer to the outside street. Grainy, yes, but I feel it enhances this picture.


--

#1 The shutter speed is 1/140 and aperture is f/10 according to Fuji's online documentation. With a 400-speed film it's about right for decently sunny days.