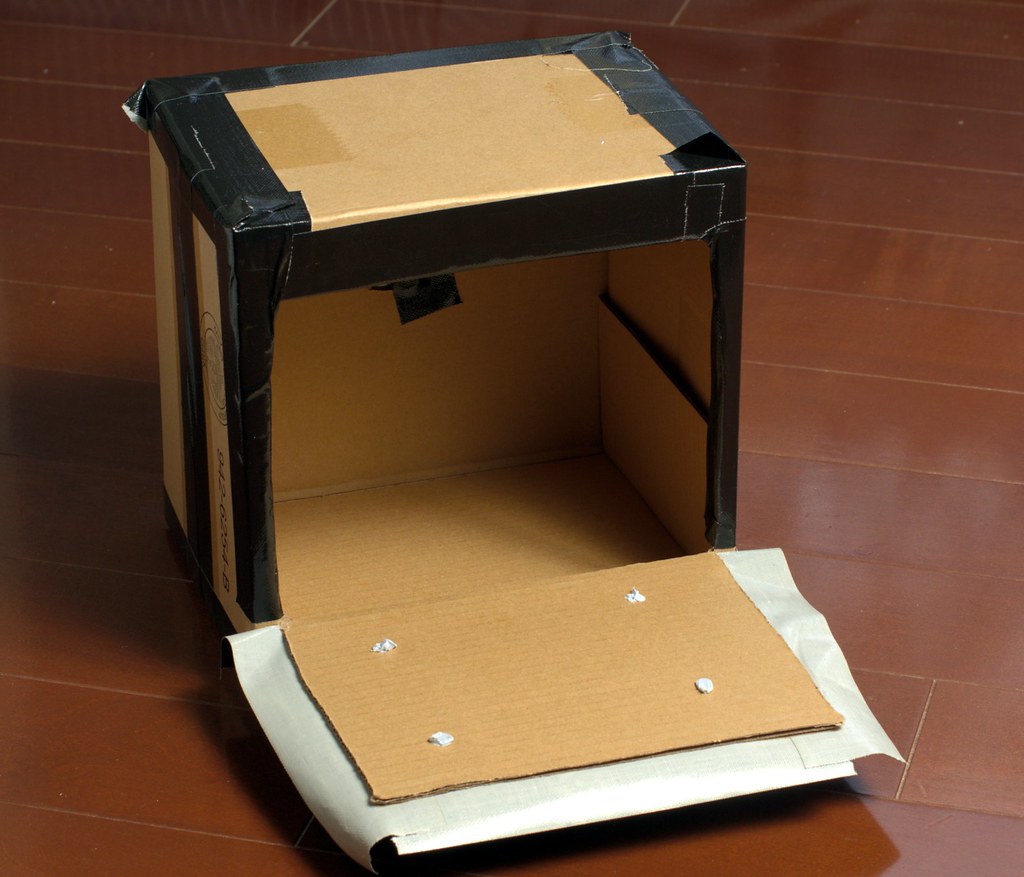
Wednesday, March 31, 2010

Stay away from Sony Ericsson's Online Services

Sony Ericsson does some fairly good telephones. I have one now, and I'm changing it for a new one (an Android-based Xperia) soon. I've never had reason to be displeased with their stuff.

So, as I'm changing phones I noticed that they have an online synchronization service where you can upload all your data, such as contacts, calendar data, bookmarks, personal notes and so on, and have access to it online. That seemed downright spiffy - I could upload my current data, switch phones and download to the new one. Before creating an account, I read through the terms and conditions. Good thing I did.

here they are: Terms and Conditions

Quote:

If you send any communications or materials to the Site by electronic mail or otherwise, all such communications will be treated as non-confidential and non-proprietary. Sony Ericsson is free to use, without any compensation to you, any concepts, ideas, know-how, or techniques contained in any communication you send to the Site for any purpose whatsoever.


In other words: any of your data (say, your notes, or synched application data), uploaded in any way whatsoever - such as by using the synchronization service - is free for their taking. This explicitly included ideas, concepts, know-how and so on. You had better not synch your phone if you have a patentable idea or research data jotted down, as Sony-Ericsson would now own the right to use it, freely and against your will.

And lest you think this is some bit of boilerplate slipped in by accident, they repeat it, with its own subheading, further down in the document:

Ownership of Submitted Content

By posting Submitted Content, you grant Sony Ericsson a worldwide non-exclusive, assignable, fully paid, royalty-free, perpetual and irrevocable license to use, copy, publicly perform, display, distribute and modify the Submitted Content. This includes the right to prepare derivative works thereof, or incorporate the Submitted Content into other works as well as sublicense the same.


Again, if you let your data into their servers, they grab a perpetual license to use it no matter what you may think.

Now, there's no chance that this would actually hold up in any court, of course. But the attitude towards their customers that it displays is disturbing and I'm keeping well away from any of their online services. Right now I'm having second thoughts on getting a new phone from them as well.

Monday, March 29, 2010

Pinhole Camera II: The Daa-a-a-ark Room

In the last post I showed the simple pinhole camera I've made. Very basic, very easy to use - except that you have to load the photo paper in a darkroom and you have to develop it yourself.

A darkroom isn't complicated. It's a room with absolutely no light coming in from the outside. It's not necessarily dark, though; unlike film, paper is not sensitive to red light, so you don't have to be in darkness. A "safelight" that emits red light, and only red light, will let you see what you're doing - you can actually see the image appear on the paper when you develop, which is really cool.

To develop the paper you need three trays for developer, stop (not really necessary) and fixer. A few darkroom tongs are cheap and a good idea since you don't want to get smelly chemicals on your fingers, or accidentally mix them. If you develop your own film you can use the same stop bath (if you use that) and fixer you already have. And if you're just playing around you don't need to be very careful with temperature or time, so a thermometer or clock isn't all that critical. You can see the paper develop so just stop when the image starts looking really dark and solid.

What about developer? Normally you would use special paper developer for photo paper, rather than film developer. Paper developer is a lot more active, giving you good contrast prints, and is incidentally a lot cheaper too. You can use film developer for paper, but it's much slower and will apparently give you low contrast, washed-out looking prints.

But this only applies for printing from a negative. A film negative is low contrast - the difference between the darkest and lightest areas isn't that large. But here we use paper as the negative. We're exposing the real world on the paper, not a low-contrast negative. And the real world is usually really contrasty, with huge light difference between the darkest and brightest areas. So as it turns out, film developer is a decent match for this use, and results in fairly good paper negatives.

Safelight
Safelight

A safelight is not strictly necessary, but it'd really suck to have to do everything in pitch blackness. Safelights - light fixtures with a dark red glass front - are available but they're fairly expensive. Safelight red bulbs that you can use in normal sockets are not cheap either and don't last forever. People warn against using cheap red "party" lightbulbs. There's no guarantee they really cut out all unwanted colors, and edges and scratches may be uncovered by the red paint.

Lightbulbs are hot, need mains power and waste a lot of energy, and they're gradually disappearing the world over. The new hot item here is LED lighting, with many manufacturers pushing LED bulbs. Long before the advent of the white LED's that's made this lighting revolution possible we've had red LED's used in all kind of electronics. A red LED is cheap, will only emit light in fairly specific frequencies, can run on low power and lasts almost forever. Perfect.

My first idea was to get an LED bicycle light. But since I can never have too much complications in my life I decided to go for a more DIY solution. In an electronics store I found an LED "brakelight" kit for car rear brake lights, with a circuit board and male socket. I got the kit, a dozen red 1W LED's, a matching female socket1 and a light switch. For power I used an 12v transformer I had lying around.

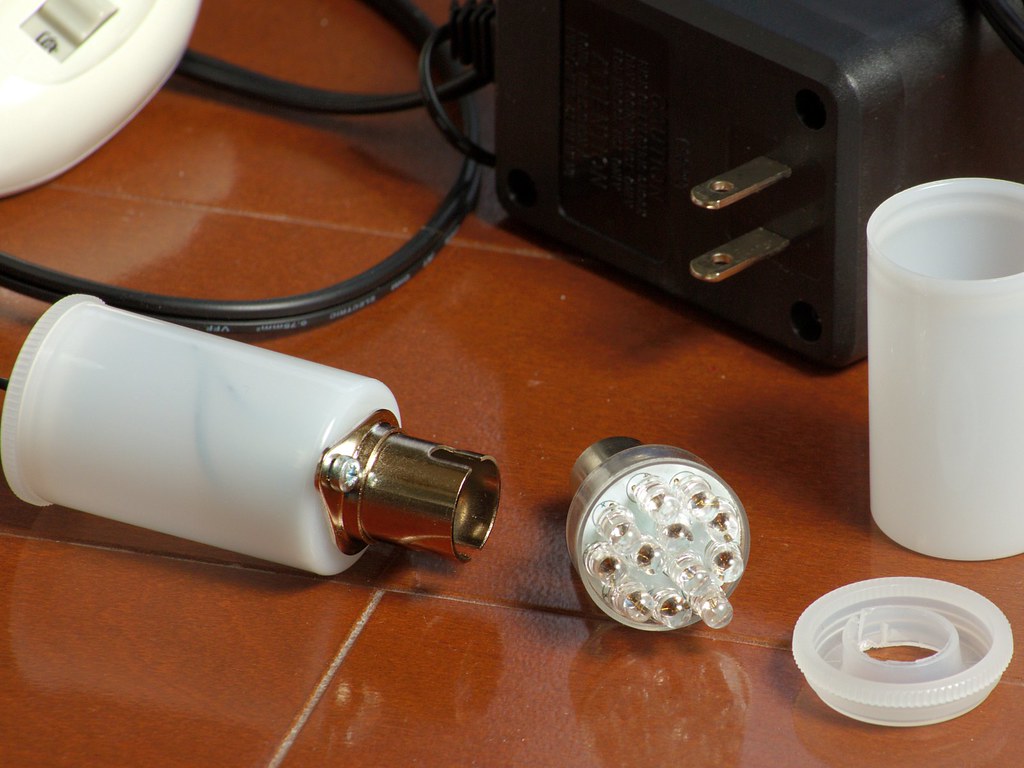
To keep with a filmy theme I attached the socket to a 35mm film canister, with the cable going through the lid. A second white film canister fits nicely over the light itself and serves as a diffuser. I hang it in the bathroom simply by wrapping the cord twice around the curtain rod over the bathtub. The light is plenty strong - so strong that I hang a towel over it to dampen it a little - and seems to be completely safe for the paper as far as I can tell.
 
Safelight

Here's the safelight disassembled. I've soldered the LED's and other components (just a diode and a resistor - it really is very simple), attached it to the socket, attached the male socket to the base canister and done the cabling. Works very nicely.


Making our bathroom really dark turned out to be the most complicated part of this - much more so than making and using the pinhole camera. The room has to be really dark - any stray light from outside will ruin the paper. I tried an elaborate idea with light-proof curtain fabric and a frame made of PVC tubing that utterly failed - on the positive side I now have several meters of tubes and connectors to use for something else. I finally just taped the fabric over our bathroom door (What would I do without gaffer's tape?2). I also close the doors to the washroom outside, making doubly sure I won't have any unwanted light seeping in. Seems to work, if not all that practical.

Darkroom Darkroom (BW)

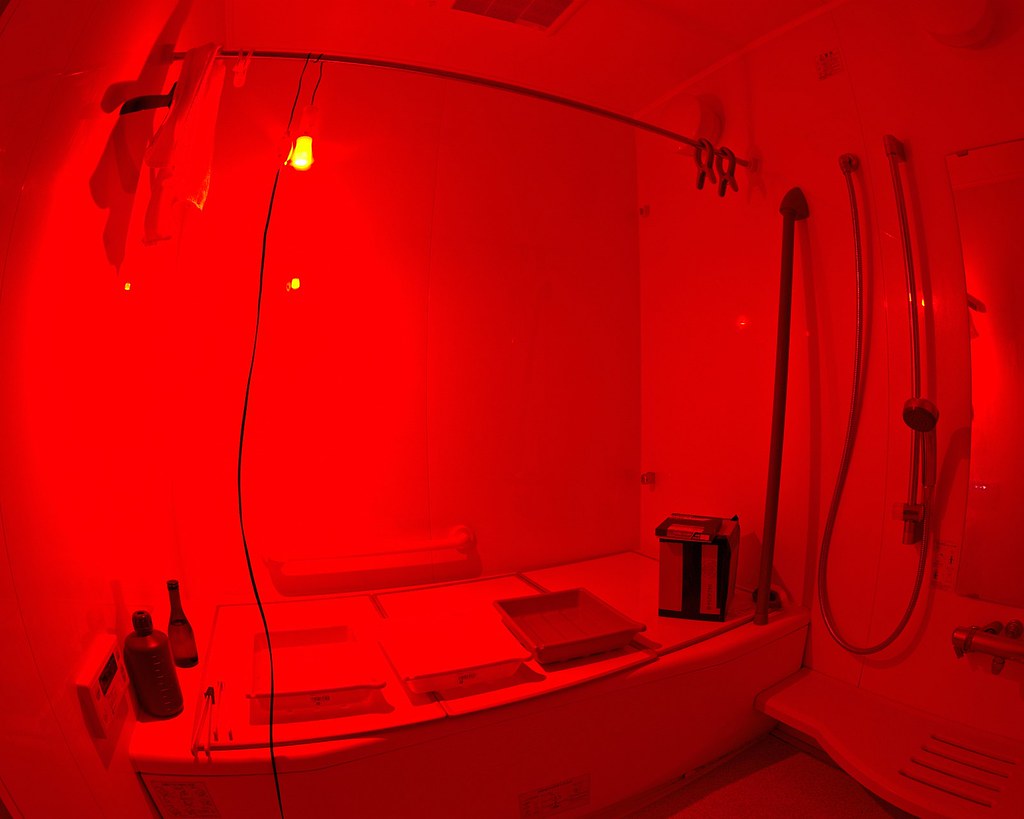
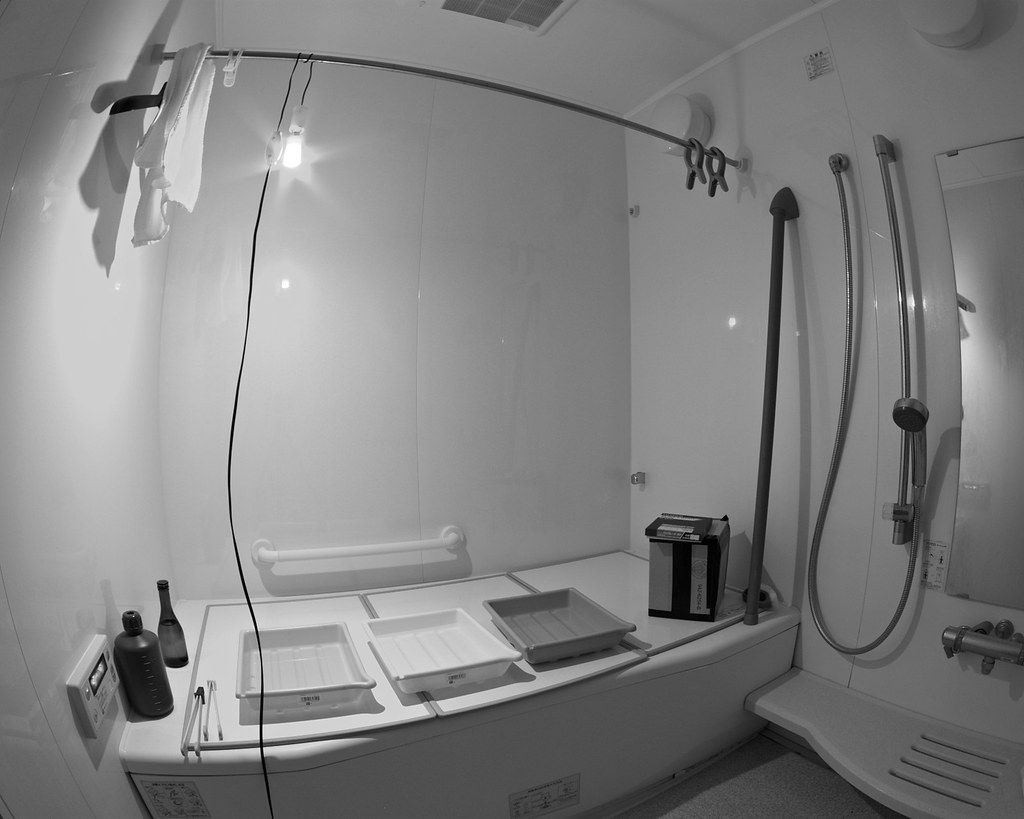
Here's the darkroom, in color and converted to BW (click to enlarge). There's plenty of space, running water and efficient ventilation, and I get a good-sized workbench simply by using the bathtub covers. If I ever get an enlarger I can place it along the wall out of the picture on the right.

This kind of picture, incidentally, is a perfect task for a digital camera. The light is nearly monochromatic, and getting the exposure right without trial and error is almost hopeless. Had I tried to take this on film for whatever reason I'd had to take a whole roll and probably still not get an image I was happy with.


I've taken two pictures with the pinhole camera so far - you don't get much of a frame rate when you have to return and develop each image before loading the next. I used 13x18 cm Fuji multigrade RC paper, the cheapest one in the local shop. The pinhole exposure calculator specified 1.5 minutes for hazy sunshine but that seems a little short, and even two minutes was not really enough. I'll try three minutes next time.

The lack of red sensitivity means the images become just a little odd - blue skies go very bright while reddish objects, like brick buildings, become dark. The long exposure time means that anything moving, like people, disappear completely. And there is of course no way to judge the composition; you find out what you got in the frame only when you develop the negative.

View

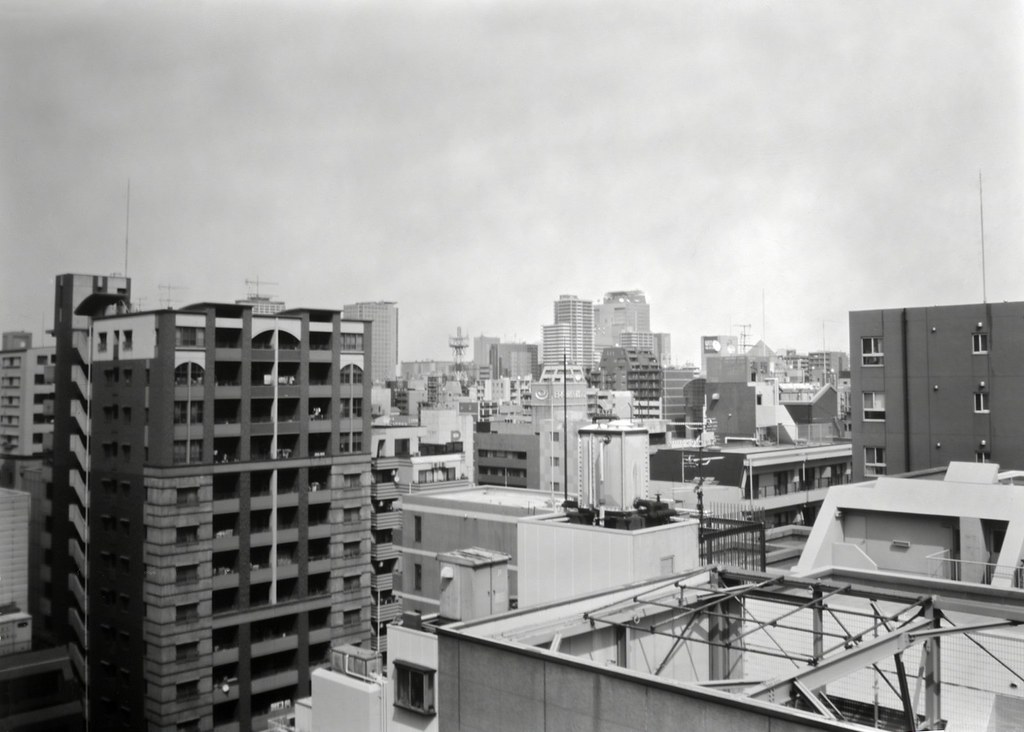
The first shot, my standard view out from our balcony. I actually got a bit of motion blur here since the box shifted a little halfway through the exposure. But the tonality is nice, and evokes an old-time photography (the lack of red sensitivity is probably the reason; really old films were not red-sensitive either). I especially like the mottled sky that really exaggerates the haziness.


Nagahori

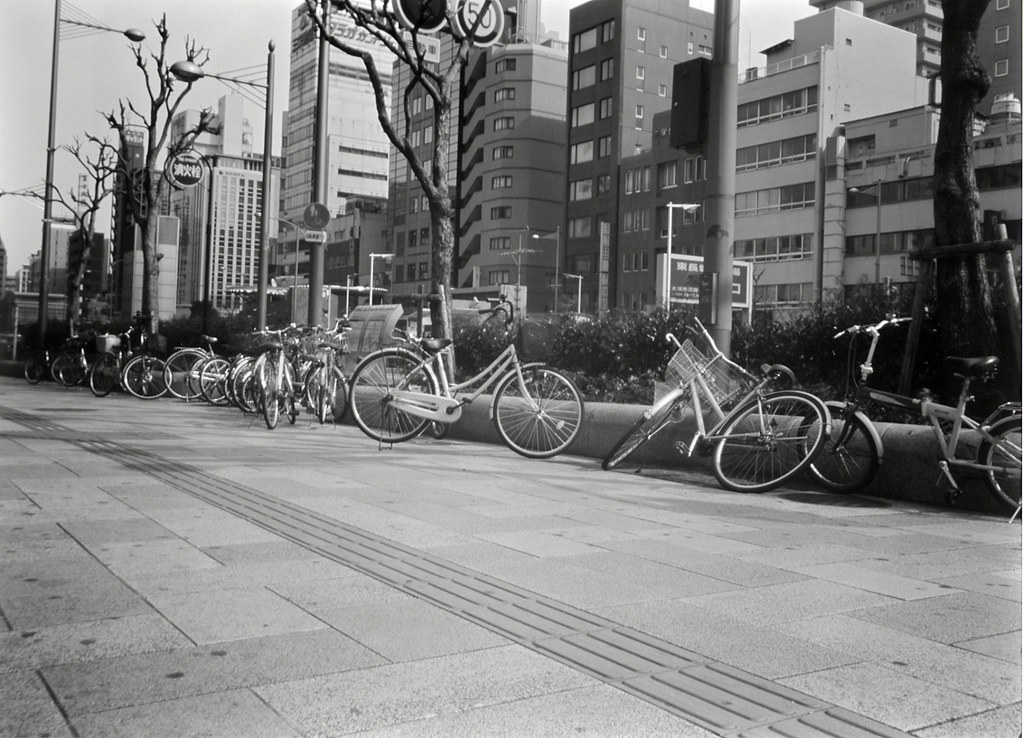
The second shot, with an unfortunate "composition malfunction". I wanted to have the bikes near the bottom with the skyline breaking into the top near the right end. But the wall I used for support apparently sloped a bit without me noticing so instead you get this inspirational study of an Osaka sidewalk. This was stable, and there's more detail than in the first shot; notice that the wheel spokes are clearly visible in the closer bikes, for instance. At the very top you can see how the red traffic signs have turned black. This is a busy sidewalk, by the way, with lots of people passing by, but with two minute exposure there's not even a hint of people in the image.


What's next? I think I'll take a few more shots with this camera but it's not very practical of course. I got lucky recently and found some 4x5 format film holders in decent condition for cheap in a camera store. So I'll build a more solid camera that can fit a film holder; that way I can bring and shoot several exposures before I have to develop them again. And perhaps, instead of a pinhole I'll try using a lens. Even a very simple glass lens is a real improvement on a pinhole, with more detail and much faster exposure. Of course, then we'll have to start worrying about whether and how to focus, and shutter speeds may get too fast to do manually. But those are problems to solve later.

--

#1 That way I'll save literally minutes of time switching the LED lamp when the this one breaks some forty years from now. How's that for optimizing my time?


#2 I'd have to make things properly instead, I guess, instead of cobbling stuff together with tape.

Pinhole Time

Feeling Negative is a fun new site for film photography enthusiasts, and I can warmly recommend it. They have started a series on DIY large format photography, beginning with a simple pinhole camera and using photo paper for a negative. That has inspired me to try making my own.

A pinhole camera is by far the simplest camera possible. You have a light-proof box with a piece of film, a sensor or a retina on one side, and a small hole (a "pinhole") on the other. No lens, no focusing (everything is equally in focus) and no mechanics beyond a way to cover and expose the hole. In evolution it's an intermediate stage between having a light-sensitive patch and an eye with a lens; the Nautilus is a group of animals that just kept the pinhole eye and never so far developed a lens.

The way a pinhole works is very simple: imagine that you're a spot on the film or a pixel on the sensor. Everything is dark, except for the light from the hole. That light comes from whatever is visible through the hole, so with a smaller hole you'll see a smaller part of the world. Make the hole small enough and each part of the film will get the light only from a tiny spot, making a recognizable picture. Of course, the smaller the hole, the less light you get, so exposure time also gets longer and longer.

If you are nearsighted you can see the effect of a pinhole directly. Remove your glasses, and curl your index finger and thumb so you get a tiny hole in the middle. Put your hand right up to your eye so you see through that hole. As you squeeze your finger the hole will get smaller and you'll see that the image gets much sharper but dimmer1.

You'd think you could make the image as sharp as you like simply by making the hole smaller (and accepting the longer exposure times). That's not possible, unfortunately. Because of diffraction the image will start becoming blurrier again as you keep making the hole smaller. There's an optimal size for the hole that depends on the focal length - the distance between the hole and the film - of the camera. How do you find out the best pinhole size? The easiest way is to use an online calculator such as this one.

My pinhole camera is using 13×18cm photo paper as the film. Why that size? It's small enough to be cheap (a box of 50 sheets costs just a few hundred yen) and still large enough to make a good sized, easy to scan negative. After a bit of rummaging I found a suitable cardboard box with a short side of about 17 cm; that makes for a pleasant, somewhat wide angle of view with this paper. The pinhole calculator tells me that I need a pinhole slightly less than 0.5mm diameter, that it corresponds to an f-stop of around f/350, and that exposure time in clear daylight will be about a minute and a half.

There's several ways to make the actual pinhole. Ideally it should be made in a thin, rigid material, be nearly round and not have rough edges. A good choice is an empty aluminum can - cut out a square from a can, flatten it, then make the hole. I made a small dent in the aluminum with a pen, then used a sharp tool (needle-nose tweezers) to slowly drill a hole in the middle of the dent from both sides. 0.5mm is fairly big, so it was easy to check the size with calipers and a loupe.

Pinhole camera (front)

Large-format pinhole camera. Note the high-quality cardboard, metal from a can of real beer (not cheap happōshu) for the pinhole and the exclusive gaffer's tape trimmings to give it that refined air of executive class - only the very best materials is good enough for us here.


The box is simplicity itself. I light-proofed it by liberal use of gaffer's tape along all edges, and the pinhole plate is taped in front of a hole in the center of the box. Another piece of tape with an edge folded in serves as the shutter - pull the tape to open, then attach it to close again. With a shutter speed in minutes, a few seconds doesn't matter. I cut a flap on the back, taped the edges, then added strips of tape along the flap to close it. The tape along the edges makes sure the flap tape doesn't stick to the cardboard. That way I can open it without ruining the box. The "film holder" is four bits of blue-tack to hold the paper in place. The whole construction, pinhole and all, took perhaps half an hour or so.

Pinhole Camera (back)

The camera from he back. Stick the photo paper to the four lumps of blue-tack, close the flap and seal it with the strips of tape. The blue-tack clings to the paper, unfortunately, but it doesn't seem to affect development. Still, a better way to hold the paper is probably a good idea.


To use the camera you put a sheet of photo paper in the back and close both back and pinhole. Place the camera where you want to take a picture - make sure it's stable - open the tape shutter, wait two minutes or so, tape up the pinhole, then return home. Take out the photo paper and develop it much like you would with film (developer, wash, fixer, wash again, then dry).

Now, the paper is light sensitive. That's why you can use it to capture images after all. Film comes in light-tight rolls or in small canisters and you develop them in special lightproof tanks. But the paper is a bunch of sheets in a box. How do you get the paper into the camera, and how do you get it developed? You need a darkroom. This is getting pretty long already, so I'll talk about that - and show the results - in the next post.

--
#1 If you're not nearsighted you'll just have to take my word that it works. Don't complain - you don't know how good you have it.

Saturday, March 27, 2010

Turing Machine

You probably heard about it if you're the kind of person who appreciates this, but a man named Mike Davey has built an actual Turing Machine, moving tape and all. This is amazingly cool, at least as good as the lava lamp centrifuge I posted a few weeks ago.

A Turing Machine is a theoretical model of computation, an idealized, maximally simplified computer. The Turing machine can theoretically do anything any computer can do. Specifically, you can show that there is a Turing machine that can take a description of any other Turing machine - or any computer - and emulate its operation. So any results you prove about the Turing machine is also true about any real-world computing device. Anything the Turing machine can do, a normal computer can do too. ANything shown to be impossible for a Turing machine (not just slow, but impossible), is also impossible with a real computer, no matter how big and powerful.

For instance, through the Turing machine we know that it is impossible to create a program that will take any program as input and find out whether that program will ever finish or if it will just loop forever (the Halting problem). Why is that important? It's the same thing as saying you can't make an automated test to verify that any real-world program is bug-free or that it does what it's supposed to do. Any testing or verification has to be specific to a program. That has some pretty important real-world consequences for the quality of important software systems and the cost of developing them.

A more fundamental consequence is that it sets important limits on what functions a Turing machine can actually compute. There are a classes of functions that you can express, but that you can't resolve - you can't get an answer - using a Turing machine. And as a Turing machine is exactly as powerful as any real-world computer (speed is immaterial), it means the same restrictions apply to them as well. Before you start gloating too much about the superiority of humans to computers, remember that it's quite probable that we are the same kind of computing devices and are just as unable to resolve this class of functions.

The Turing machine is an abstract tool for people working on theory of computation and algorithms. Building a real-world machine that looks and operates like Alan Turings imaginary machine is perhaps not the most useful thing in the world, but it's hugely, amazingly cool.

Friday, March 26, 2010

No More Elephants

Book Done

I recently finished "Elephant Time, Mouse Time" that I started last year. Took a little longer to read than I thought. Unlike fiction, you want to read popular nonfiction fairly closely so you don't miss anything, and there's plenty of specialty words even in a very accessible book like this. Not sure when I'll have use of words like "echinoderm" (it's 棘皮動物 for those who want to know) but I'm sure it'll come in handy.

So what's next? For now, nothing. Instead I'm trying to read the newspaper. I select one article from the previous evening paper and read it during my commute in the morning. One article may not sound like much - and the first read-through is fairly quick - but with the heavy kanji use and subject-specific vocabulary the second reading is usually slow going. And if I ever finish a piece before I arrive I have a whole paper worth of other articles to choose from.

So far it does seem to improve my vocabulary more than reading a book. Not surprising, as a book is all about one thing throughout while articles are about wildly different subjects. On the downside, a newspaper is a bit large and bulky to wield in a cramped commuter train. We'll see how it goes.

Wednesday, March 24, 2010

Graduation

Our master and doctoral students here at NAIST are graduating today1. They're leaving the warm, comforting womb of graduate school to brave the harsh seas of commerce and industry - or, in some cases, the cutthroat gladiatorial games that is a research career. I'm sure they'll do fine.

Big congratulations to everyone!

--

#1 People all enter grad school at the same time and graduate at the same time here in Japan. Which is certainly different from the "You're done when you're done"-system in Sweden.

The bad part of the Japanese system is that you have to wait for the yearly deadline before you can leave. The good part is of course that you have a definite deadline to induce panic focus your mind - that alone would have shaved six months off my time. And when everyone graduates at the same time it's an excellent opportunity for a party.

Tuesday, March 23, 2010

API invokes Godwin's Law

The EU foreign correspondents in Brussels has come up with an interesting notion: Open government and free information access leads to despotism. Yes, we're in "1984" land, apparently, where war is peace, freedom is slavery and openness is repression. You think I'm joking? Here's a quote from the article:

"This is a totalitarian dream," [Mr. Consoli of the API] told EUobserver. "Every dictator who has ever lived has dreamed of communicating directly with the public without questions from a troublesome press."


They seem to believe their own readers are so utterly stupid, so dull, so dumb, so completely bereft of anything resembling analytical thought that they can not see a press release for what it is, and can not be trusted to form an actual informed opinion on their own. Some in the EU press corps wanted to restrict access to press releases only to accredited journalists, forcing all information flow to go through them only; instead they are calling for a mandatory embargo, giving them information ahead of everyone else.

What a heaping pile of dung.

The real reason for this over the top reaction has nothing to do with freedom of information, but with the shrinking number of EU correspondents. They want a monopoly on EU information in order to safeguard their own jobs. Why are their numbers decreasing? After all, if the press corps are doing a lot of valuable legwork and analysis, why would their editors ax their jobs? Partly it's the recession of course. But part of the answer may come from a Australian study showing more than half of all news reports are based on PR - on press releases, prepared media packets and so on.

Of course, taking a press release as a starting point for investigating a piece is fine. But basing your work entirely on competing press material from different interests is not. And that, unfortunately, happens far too often. So perhaps one reason the EU press corps is shrinking is that too many of those people never did enough of that independent reporting and legwork they keep talking about, and instead just repackaged the press material in their own words. When a cash-strapped editor realizes he can get the same material right over the web he'd have a hard time to motivate keeping an expensive foreign correspondent around.

Do I believe journalists in general are lazy or unskilled? No, of course not. Nor do I believe that journalism isn't important, or that it can be completely replaced by hobbyists writing blogs. But while journalists in the abstract do work that is both important and professional, the work done by specific journalists is all too frequently neither. I like newspapers - we take two at home - and I really want to continue liking them. But they're really making it difficult, with distasteful self-serving propaganda like this.

The way for quality journalism to survive is to produce journalism of good enough quality that people want access to it. But this attempt to scare people with a coming dictatorship unless you get privileged access or first dibs on evaluating information is not quality journalism or professional conduct. In fact, this transparent attempt at intimidation smells of exactly the same kind of partisan gutter journalism that is putting me off the paid-for media to begin with.