

Wednesday, October 8, 2014
Lunar Eclipse
Lunar eclipse in Japan tonight. As I walked home along Nagahori street in the cool autumn air, people were standing around, talking, and taking pictures. Some office workers sat on a railing outside Yamaya, our local liquor shop, drinking a beer and watching the eclipse.

Tuesday, October 7, 2014
Automatically Resize Vim Splits
If you think "Vim splits" may have something to do with a cleaning product then this post might not be for you. Geekery ahead.

I am a long-time user of the Vim text editor. It's made for use from the keyboard (though you can use a mouse if you want), and works great running on a remote computer. When I program I often use split windows, where I have multiple files open and visible at the same time in different window panes:
 |
A Vim editor with three splits, each editing a different file. |
Split windows are very useful. But when you have many splits or when you're on a small laptop screen, each split becomes too small to edit things properly. You can of course resize them in various ways:
ctrl-w _ and ctrl-w | will maximize vertically and horizontally; ctrl-w + and -, and < and > will increase and decrease the split size; and ctrl-w = will equalize them all. But that's a hassle; also, when you maximize a split you no longer see the contents of the other ones. Ideally you'd increase the size just enough to edit properly, and do it automatically.So I have a small function written in Vimscript that I stick in my
vimrc file:
" Resize the current split to at least (90,25) but no more than (140,60)
" or 2/3 of the available space otherwise.

function Splitresize()
    let hmax = max([winwidth(0), float2nr(&columns*0.66), 90])
    let vmax = max([winheight(0), float2nr(&lines*0.66), 25])
    exe "vertical resize" . (min([hmax, 140]))
    exe "resize" . (min([vmax, 60]))
endfunction
When you call this (on the command line as
:call Splitresize()), it will resize the current split to 2/3 of the entire editor width and height; but always at least 90 columns by 25 rows, and no more than 140 colmuns by 60 rows. That guarantees that the split is always large enough even on small screens, and never becomes ridiculously huge on large screens. |
I moved from split 2 on the left to split 3 on the lower right, and it has resized itself to a comfortable size. |
My preferred way to make this automatic is to add these mappings:
" move between splits without the ctrl-w prefix

nnoremap <silent><C-J> <C-W><C-J>:call Splitresize()<CR>
nnoremap <silent><C-K> <C-W><C-K>:call Splitresize()<CR>
nnoremap <silent><C-L> <C-W><C-L>:call Splitresize()<CR>
nnoremap <silent><C-H> <C-W><C-H>:call Splitresize()<CR>
You can move between splits with
ctrl-w h, j, k and l. It's a bother to press ctrl-w all the time, though, so many people add mappings so ctrl-h, j, k and l move between splits directly. These mappings add :call Splitresize() to the end, so your splits will resize automatically when you move to them. And you can still use the ctrl-w hjkl mappings or select a split with the mouse when you don't want the split to resize. If you use Vim then give this a try. And if you have any feedback or ideas to improve this then please get in touch.
Friday, October 3, 2014
An Ode to the Review Paper

Each paper yields just one or two scraps of relevant information; information that is often incomplete or contradicts that of other papers. Half the time you can't even judge if the data will be relevant to your work. There's nothing surprising about this, of course. The low-hanging fruit ("neurons use electro-chemical signals!", "the eye is a lens!") have long since been picked, and it takes a lot of time, ingenuity and effort to tease out even a few new scraps of knowledge in detail. Most papers present only a few small new findings because that's all a year or more of work will yield.
But it means any search for background information is a long, slow struggle. And it never ends; there's always more to find if you look. More than a few graduate students get caught in this trap: they think they need all the background before they do their own work, then get stuck in an endless loop of literature searches with no results of their own to show as their grad school clock runs down.
Enter the review paper. That's a paper where a researcher collates, summarizes and interprets all the recent literature on a topic. It can run to dozens of pages and contain hundreds of references. It summarizes the current state of knowledge, and is a great one-stop source for all the major papers. A good review paper also highlights areas of disagreement and areas we don't know enough about.
Some people criticise review papers. They tend to get a lot of citations, often more than the original papers, even though the author often hasn't done much or any of the work it presents. But I say review paper authors are if anything receiving too little credit, not too much.
It truly is a monumental struggle to go through and synthesize all that material. A well-written review paper is a tremendous service to the field, a time saver for hundreds of other people, and a great way to make clear what we do and do not actually know. The more we have of them the better.
Wednesday, September 17, 2014
Film news at Photokina
The German Photokina camera exhibition is in full swing, and there's a couple of interesting film developments:
- Epson has finally released the successors to their V700 film scanners, creatively named the V800. They promise better optics, 6400dpi resolution(1), LED back-light and better film holders. The changes are welcome, and while it's certainly not worth replacing my V700, I'm very happy there's a successor waiting for me if it would break.
- Some three years after Leica said they'd not release any new film cameras, they've ...released a new film camera: Leica M-A
The M-A is the brutally minimalist version of their MP film camera. With no electronics of any kind, there's not even a battery holder. You'll need an external light meter or rely on Sunny-16 for this one. Intriguing idea, and probably a lot of fun to use, though if I could afford a new film Leica I'd likely pick the M7 or MP instead.
#1 Note that the current V700 promises 4800 dpi but doesn't achieve more than about 2200-2400dpi in practice. We'll see if this is a real improvement or just a marketing figure.
Wednesday, September 10, 2014
Phone Payments
Apple, like Google and others before them, are launching a phone payment system. We have a system for phone payments here in Japan already. It's based on "Felica", the standard card system in Japan. It's a precursor to the NFC-based payment cards used all over the world and to the phone payment systems introduced by Google and now Apple. Most domestic phones have it built in, and it's quite popular.
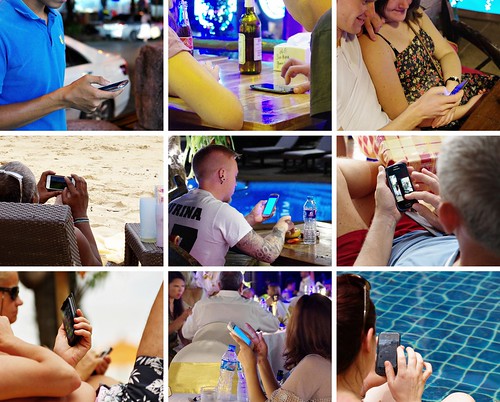
And I don't understand why that is. Why do you want to have your commuter pass (that's the most common use) or small-payment card as part of your phone? Instead of a separate plastic card in your wallet or a card holder? Yes, your phone is always with you, but then, so is your wallet. And a card won't break or lose power. I see these scenarios in my mind:
You're on your way to work. The subway turnstiles are crowded as usual. You juggle your bag and coat to take our your pass. Just as you swipe it you get bumped from behind and you lose your grip; it drops hard to the floor, and gets stepped on for good measure. You pick up your...
...phone, and realize it's dead. It refuses to turn on and the screen has a large, glittering spiderweb of cracks around the corner where it fell to the stone tile floor. The insides make a sad little maraca-like sound as you futilely try to shake it awake. Not going to pay anything with this for a while. Or make calls, check email or throw birds at pigs.
...wallet, and realize it's not just dusty, it even has a footprint on it. You vaguely wipe it off as you hustle to the train and realize it may be time to actually wash it one of these months.
Also, for all that I love my phone, for all that I love the power, knowledge and convenience of our digital world, I am also acutely aware of just how rickety and error-prone our software ecosystems are. Our general-purpose computers, tablets and phones are beset by software problems big and small. They're not the most reliable of machines:
You stand in line to buy a lunch bento at the convenience store when you realize your phone got a software update. Unfortunately, it seems there's a problem; your...
...mobile payment app keeps crashing. You repeatedly try to restart it, and even reboot your phone, but it doesn't help. As the line behind you grows longer and more annoyed you dig frantically through your pockets for small change to pay for your food.
...favourite game keeps crashing. As you pay for your lunch and walk back to work you darkly ponder the prospect of a whole lunch break without flinging a single irate avian.
So no, I don't want Mobile Felica, Google Wallet, Apple Pay or any other way to pay with my phone. I don't want to use my phone as a house key either, or as a workplace security pass. I prefer a life where I don't entrust all the most important and sensitive functions to the single least secure and reliable thing I own.
Tuesday, September 2, 2014
Diving And Drowning
We've back from the Netherlands and Amsterdam — and I haven't posted about Okinawa yet, to say nothing about the summer festival at the local temple, my birthday and other things… I'm drowning in unedited pictures and unfinished posts and I don't see a way to really catch up. I'm hereby declaring Blog Bankruptcy.
What will that mean? I will no longer even try to write long, single posts about things like travel. At this pace I'd be posting about our summer holiday in December and New Year in July. And I won't try to keep things in chronological order. Instead I'll post bits and fragments when they're ready, in whatever order they come.
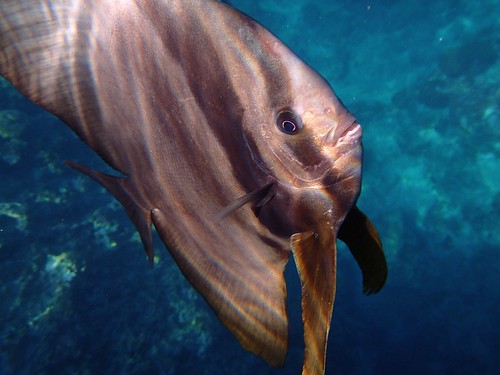
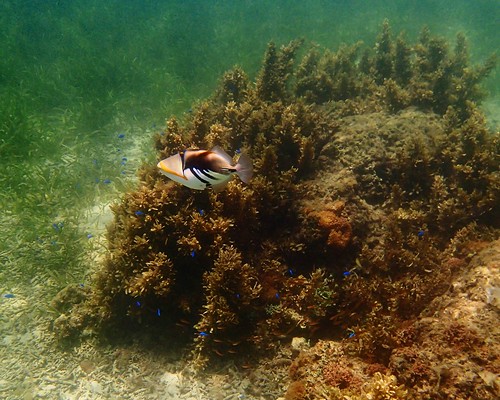
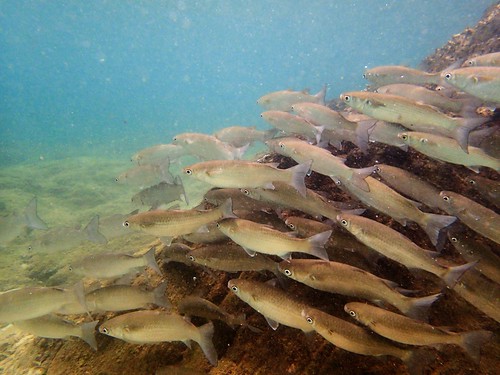
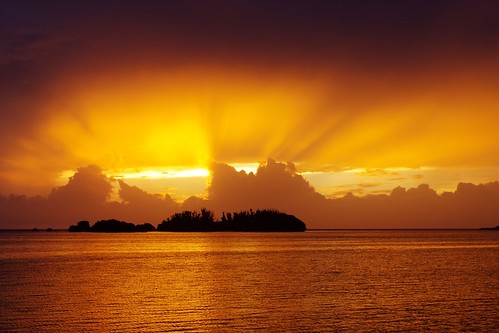
And with the drowning bit out of the way, here a few pictures from underwater Okinawa. As you may remember I went to Okinawa this summer to tutor at OCNC, a computational science summer school. I won't say too much about the school; it was fun and very educational for me as well as (hopefully) for the students, but it was work, not play, and the details aren't really interesting to others.
But we did have some free time during the course, and Ritsuko came to Okinawa towards the end so we could spend a weekend together. And we spent much of that time snorkeling.
Cape Maeda is a famous and popular diving spot. It's easy to get to, easy to get in the water, and fairly shallow so it's good for snorkelers as well as beginning divers. The only drawback is its popularity; during weekends you hardly see the fish or coral for all the divers, snorkeling tours, boats, and swimmers.
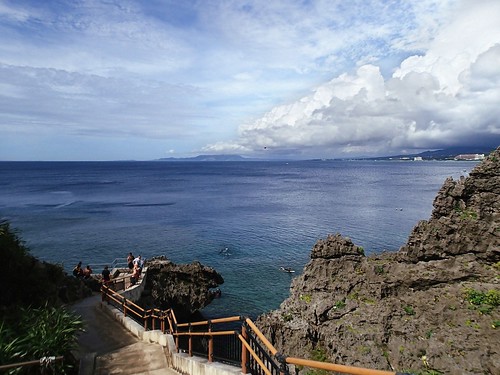

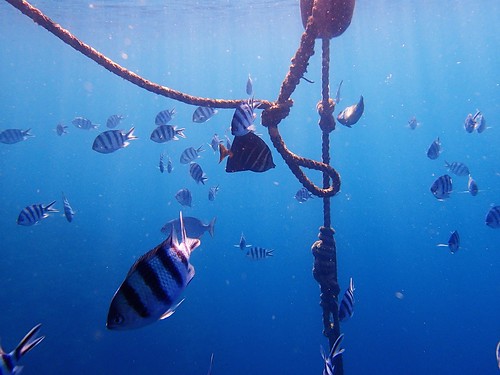

Manzamo is another spot. north of Maeda. Unlike Maeda, though, it's not that easy to get to. The divers' entry point is a fairly rugged cliff at the end of some slippery rock formations. Nothing for beginners. There's a small sandy beach to one side, but you can only enter during high tide and to get there you have to use a narrow path through the rocks and dense brush; that makes me nervous what with the Habu snakes and all.
But the effort is worth it — wonderful, wide fields of coral sloping down to the sea shelf where it suddenly drops to several tens of meters of more. Divers can even see sea turtles here. And there's rarely any other snorkelers around so you can explore in peace and quiet. I didn't have much luck with photography this time, with the memory card full of near-misses. But it was a memorable experience, with lionfish, a stone fish and many other sights.
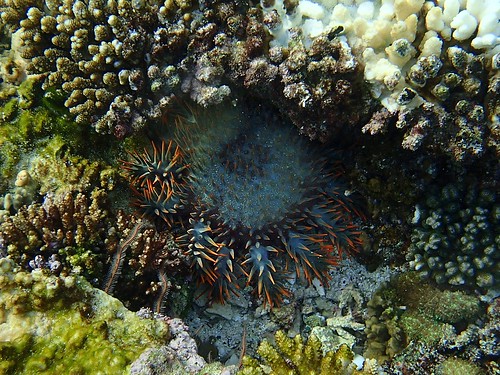

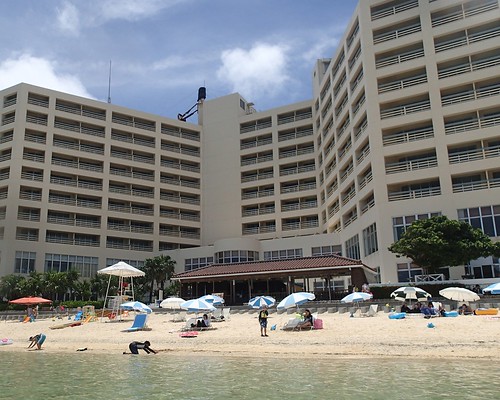
After the end of the three-week course I met up with Ritsuko at the nearby Rizzan Resort, a family-oriented resort hotel just down the coast from OIST.

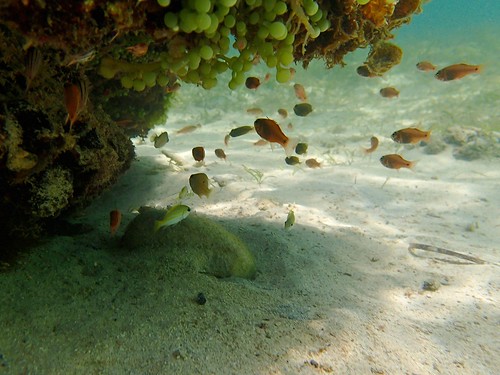
To our surprise, even the beach just outside our hotel had a fair amount of marine life. We took a quick snorkeling tour as well. It was fun, but unfortunately we had to wear vests so no diving down for pictures.



Saturday, August 23, 2014
Poster Pro-tip
We're packing for a trip to the INCF conference in Leiden in the Netherlands. I'm presenting a poster, and I thought I'd give people a quick tip or two, in case you didn't already know about this.
There's many great sites out there to help you make a good poster(1) and teach you how to present it. I haven't seen a lot of practical tips on actually bringing the poster to the venue.
1) Use a real poster carrier. Preferably buy your own. Really, they're lighter and thinner than a cardboard tube, there's no end caps to lose, and the strap makes them much easier to carry. And with your own tube you can mark it so it's easy to find in a sea of similar ones. To my surprise, they're also really cheap. I got a new one for this trip at Daiso for just 200 yen. I don't think a cardboard tube that size is any cheaper.
2) Don't just shove the poster into the carrier. It can scuff the edges and it makes the poster hard to get out again. Roll it up, wrap a sheet of copy paper around the middle and secure it with tape. It'll lie loose in the carrier and drop right out into your hand when you open the tube.
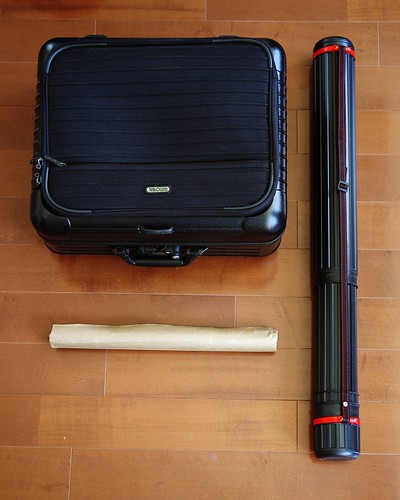 My poster is ready to go, snug in its own carrier. I printed a second copy cut it in two and rolled it up into packing paper to go in my carry-on. If I forget the real poster in some airport bathroom I'll still be able to do the presentation.
3) Make a backup. Always. You don't want to be the poor sod that's rushing about in a panic trying to find a place to print out an A0 poster the morning of the conference. The world is a big, scary place for a poor, helpless poster, and anything can happen on the way. You may lose your luggage (not all airlines allow you to bring it into the cabin), and you can so easily forget the poster in the airplane, in a cab, or in a bathroom. Never mind that it can get stolen, run over or destroyed in any number of ways.
The best way I know to backup is to print a second copy. Design your poster so you can cut it either lengthwise down the middle or sidewise into three pieces. Roll these pieces together into a short tube that will fit into your carry-on. Sure, a visible seam is a little annoying, but it's much, much better than having no poster if something bad happens to your uncut copy.
4) Don't bother bringing tacks, tape or anything like that. I've never been to a conference where such things weren't abundant. A couple of thin ink pens in different colors is a good idea, though; you may find a mistake or something on your poster and they'll let you do last-minute corrections or clarifications.
All done, ready to go. See you in a week!
There's many great sites out there to help you make a good poster(1) and teach you how to present it. I haven't seen a lot of practical tips on actually bringing the poster to the venue.
1) Use a real poster carrier. Preferably buy your own. Really, they're lighter and thinner than a cardboard tube, there's no end caps to lose, and the strap makes them much easier to carry. And with your own tube you can mark it so it's easy to find in a sea of similar ones. To my surprise, they're also really cheap. I got a new one for this trip at Daiso for just 200 yen. I don't think a cardboard tube that size is any cheaper.
2) Don't just shove the poster into the carrier. It can scuff the edges and it makes the poster hard to get out again. Roll it up, wrap a sheet of copy paper around the middle and secure it with tape. It'll lie loose in the carrier and drop right out into your hand when you open the tube.
3) Make a backup. Always. You don't want to be the poor sod that's rushing about in a panic trying to find a place to print out an A0 poster the morning of the conference. The world is a big, scary place for a poor, helpless poster, and anything can happen on the way. You may lose your luggage (not all airlines allow you to bring it into the cabin), and you can so easily forget the poster in the airplane, in a cab, or in a bathroom. Never mind that it can get stolen, run over or destroyed in any number of ways.
The best way I know to backup is to print a second copy. Design your poster so you can cut it either lengthwise down the middle or sidewise into three pieces. Roll these pieces together into a short tube that will fit into your carry-on. Sure, a visible seam is a little annoying, but it's much, much better than having no poster if something bad happens to your uncut copy.
 |
Here's the poster I'm presenting. Notice how I can easily cut it down the middle without
destroying anything. With a bit of tweaking I could have cut it lengthwise instead.
|
4) Don't bother bringing tacks, tape or anything like that. I've never been to a conference where such things weren't abundant. A couple of thin ink pens in different colors is a good idea, though; you may find a mistake or something on your poster and they'll let you do last-minute corrections or clarifications.
All done, ready to go. See you in a week!
#1 I actually favour dense posters with plenty of information. I want to be able to read and understand the work without having to ask the presenter anything. They may be absent of busy talking to somebody else, after all.
Subscribe to:
Posts (Atom)